Chocolate Chip Shortbread.

Recipe for buttery and crumbly chocolate chip shortbread

Chocolate Chip Shortbread.

I made a batch of these delicious, crumbly chocolate chip shortbread biscuits on the weekend and wanted to share them with you. I love baking and it's something I'm trying to make more time for. After all, there's nothing quite as satisfying as sitting down with a cup of tea and dunking a biscuit you made yourself, is there?

The secret to this recipe is the cornflour. It helps give it that crumbly, melt-in-the-mouth texture and I have to say I'm a fan. I've tried a few different recipes and I think this is the best and dare I say maybe even foolproof. They're light and buttery and impossible to resist - an instant crowd pleaser. Try them for yourself and let me know what you think.

chocolate chip shortbread dough

This dough can be stored in the fridge for a couple of days or frozen for up to three months. Wrap it tightly in cling film or wax paper and make sure to twist the ends closed. If you freeze the dough already sliced you can even bake it straight from frozen.

Recipe for buttery and crumbly chocolate chip shortbread

Ingredients for Chocolate Chip Shortbread (makes 12 - 15 biscuits).

250g softened unsalted butter,

50g caster sugar (extra for sprinkling),

250g plain (all-purpose) flour,

125g cornflour,

50g chocolate chips.

Cream the softened butter and sugar together in a bowl until it is pale and fluffy.

Sift the flour and cornflour into the bowl and mix together with the creamed butter and sugar until you have a smooth dough that is no longer crumbly.

Add the chocolate chips and knead until evenly distributed.

Form the dough into a log shape and wrap tightly in cling film smoothing as you go. Chill the dough in the fridge for at least an hour.

While the dough is chilling you can preheat the oven to 170°c / 325°F / Gas mark 3.

Remove the dough log from the cling film and slice it into rounds about 1/2 inch thick. Place on a lined baking sheet and bake in the oven for around 30 minutes or until pale and golden.

Remember if you cut your rounds thinner than 1/2 inch you'll need to adjust the baking time accordingly.

Allow the shortbread biscuits to cool for 5 minutes before transferring them to a wire rack. While the shortbread is still warm sprinkle liberally with sugar and leave to finish cooling.

Recipe adapted from Cookie Magic.

I added chocolate chips to my shortbread but you could add some nuts or dried fruit or if you're feeling particularly adventurous you could try a handful of chopped rosemary or lavender.

Recipe for buttery and crumbly chocolate chip shortbread

Want more recipes using chocolate? Check out some of our favourites below:

Comment

Emma

Hi, I'm Emma.

I'm a crafter, blogger and paper enthusiast living in the North West of England.

Gathering Beauty is the place where I share craft tutorials and diy inspiration. I started this blog back in 2013 as a way of sharing all the things I love and make. I share paper crafts, clay crafts, origami, printables and desktop wallpapers as well as the odd crochet and weaving project. I hope you find something here that inspires you.

3 DIY'S I'D LOVE TO MAKE.

3 Diy's I'd Love To Make

DIY Mid Century Wall Clock

If you’re looking for a statement piece for your home decor, this DIY Mid Century Wall clock is it!

DIY Floating Shelf

You can’t even imagine how easy it is to make this fun DIY Floating Shelf. Check it out! This simple project looks amazing!

DIY Leather Envelope Clutch

I made a few different sized leather envelope clutches using the envelope method. The larger size fits an iPhone 6. The smaller size is a perfect business card holder or jewellery case.

Comment

Emma

Hi, I'm Emma.

I'm a crafter, blogger and paper enthusiast living in the North West of England.

Gathering Beauty is the place where I share craft tutorials and diy inspiration. I started this blog back in 2013 as a way of sharing all the things I love and make. I share paper crafts, clay crafts, origami, printables and desktop wallpapers as well as the odd crochet and weaving project. I hope you find something here that inspires you.

A QUICK NOTE ON WHY I'M TRUNCATING MY RSS FEED.

A Quick Note Or Why I'm Truncating My Rss Feed

If you subscribe to this blog through rss or email starting this week you're going to see some changes. I know this is how a lot of you prefer to read this blog so I wanted to give you a heads up and explain why from now on certain posts will be truncated meaning you will only see the first photo and paragraph of each post with a link to the full post on the blog.

As you know whenever I share a tutorial I include links to craft supplies I've loved and used so you can easily recreate the project using the same materials and products. To do this I use Amazon affiliate links, this means that if you click and purchase on a product I receive a small commission. I recently discovered it is against Amazon's Terms of Service to include these links in email or rss feed. As these affiliate links are what help support this blog and enable me to make more craft projects to share with you, all future posts containing Amazon affiliate links will only be available in full on the blog.

Truncating my blog feed wasn't something I wanted to do as I know a lot of people, including myself can find it really annoying to have to click over to a site after already taking the time to subscribe. Hopefully only truncating the posts containing the Amazon affiliate is a good compromise.

Thank you so much for reading. I really do appreciate each and every one of you who has taken the time to read, share, subscribe and support this blog. It means a lot.

P.S. If you're in the same boat want to know more information about Amazon's Terms of Services and how to comply with them I recommend reading this post.

Comment

Emma

Hi, I'm Emma.

I'm a crafter, blogger and paper enthusiast living in the North West of England.

Gathering Beauty is the place where I share craft tutorials and diy inspiration. I started this blog back in 2013 as a way of sharing all the things I love and make. I share paper crafts, clay crafts, origami, printables and desktop wallpapers as well as the odd crochet and weaving project. I hope you find something here that inspires you.

QUICK AND EASY MICROWAVE BLUEBERRY MUFFIN MUG CAKES.

Quick And Easy Microwave Blueberry Muffin Mug Cakes

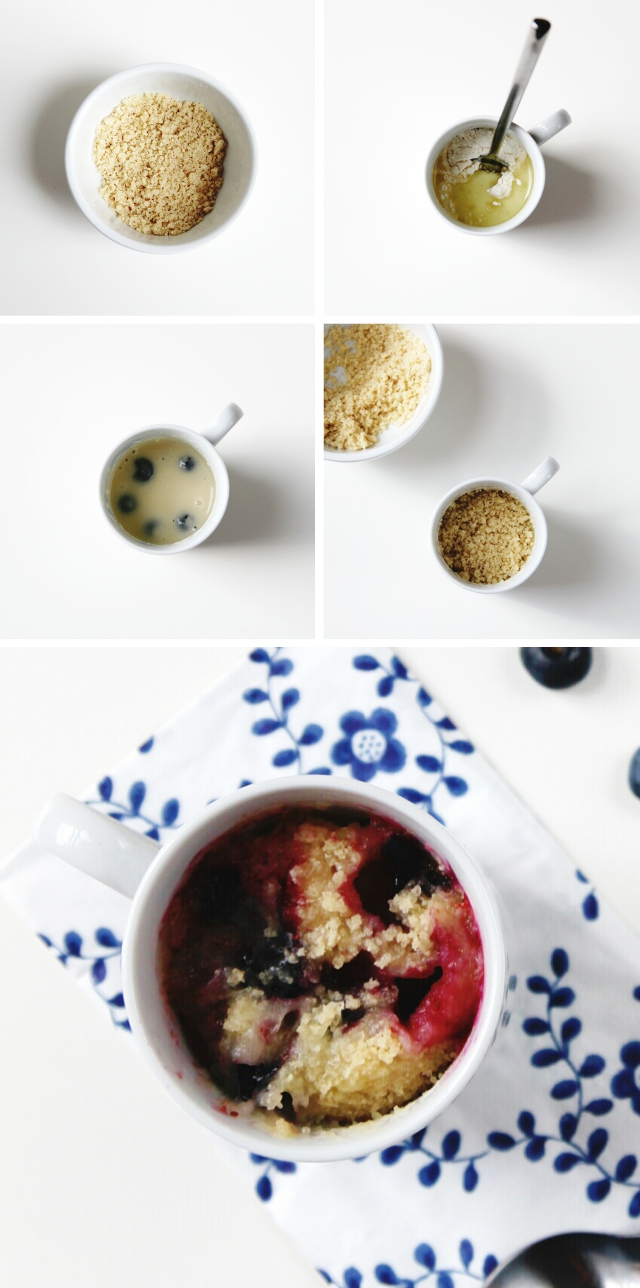
Here's another quick and easy weekend breakfast treat for you. 90 second microwave blueberry muffin cake with a crunchy, sweet streusel topping.

I've tried quite a few of these microwave muffin recipes and this is the best one I've found by far. I think it's the streusel topping that really makes it, of course it doesn't hurt that there's only minimal washing up. An instant favourite.

Ingredients for Quick and Easy Microwave Blueberry Muffin Mug Cakes (makes a single serving):

4 tablespoons plain flour,

2 tablespoons granulated sugar,

1/4 teaspoon baking powder,

3 tablespoons milk,

1 tablespoons vegetable oil,

10 - 15 blueberries.

Streusel topping (enough for 2/3 mug cakes according to taste).

1 tablespoon cold butter,

2 tablespoons plain flour,

1 1/2 tablespoons light brown sugar.

recipe found here, adapted from Mug Cakes, Mimi Sinclair.*

*This is an affiliate link. If you purchase through it I receive a small commission.

How to make Quick And Easy Microwave Blueberry Muffin Mug Cakes

1. To make the streusel topping rub the cold butter, flour and brown sugar together to form breadcrumbs.

2. Use a fork to mix the flour, granulated sugar, baking powder, milk and vegetable oil together in a mug until smooth.

3. Add the blueberries and stir gently. The blueberries should float to the top.

4. Sprinkle on the streusel topping according to taste.

5. Microwave for 1-2 minutes depending on microwave.

6. Enjoy immediately.

A few tips and tricks.

Make sure the butter, flour and sugar are fully combined in the streusel topping and a fine breadcrumb texture. Any lumps of butter will melt and pool leaving your crunchy top soggy.

To measure the butter I found it easier to cut the butter up into little pieces and then fill the tablespoon with the pieces.

I wouldn't recommend adding more than 15 blueberries to each mug muffin. I found 10-15 to be a good muffin to blueberry ratio, any more and the muffin becomes less muffin and more hot, gooey blueberry mess. Not good.

Be careful not to over microwave your muffin as it can become chewy and rubbery. My microwave is 850w and 1 minute 30 was exactly right but you may need to adjust and experiment depending on your own microwave.

I hope you like it as much as I do.

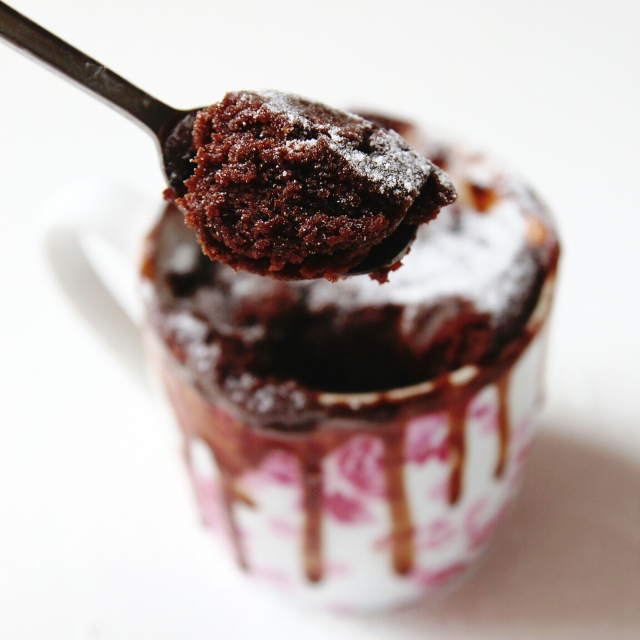
You can find my chocolate nutella microwave mug cake here and my other sweet and savoury treats here.

Chocolate Nutella Microwave Mug Cake
Summary Block
This block has no content yet. Items you add to the page connected to this block will display here.
Comment

Emma

Hi, I'm Emma.

I'm a crafter, blogger and paper enthusiast living in the North West of England.

Gathering Beauty is the place where I share craft tutorials and diy inspiration. I started this blog back in 2013 as a way of sharing all the things I love and make. I share paper crafts, clay crafts, origami, printables and desktop wallpapers as well as the odd crochet and weaving project. I hope you find something here that inspires you.