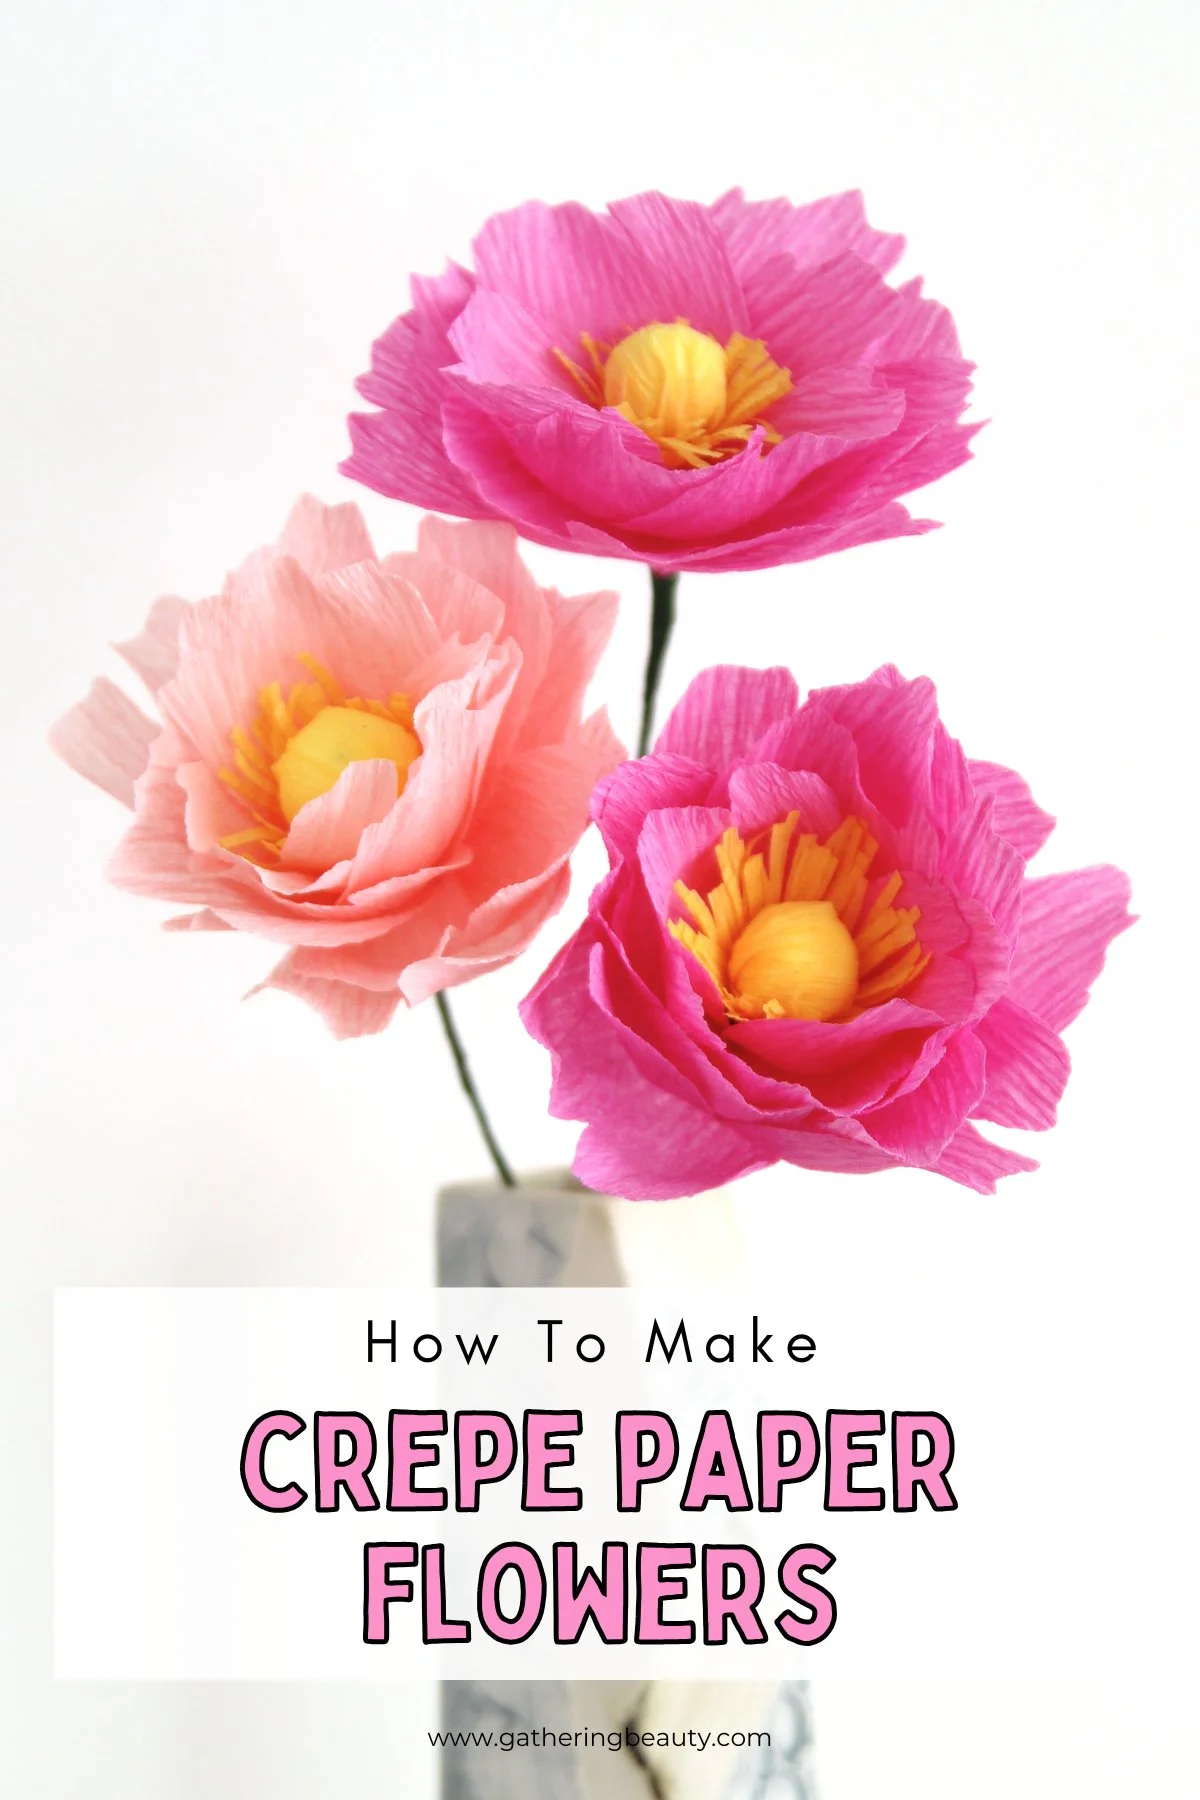
DIY Crepe Paper Peonies
/Learn how to make stunning DIY crepe paper peonies with this easy step-by-step tutorial! These beautiful paper flowers look incredibly realistic and last forever, no watering needed. Perfect for home décor, gift toppers, or a gorgeous paper flower bouquet.

This page contains affiliate links. This means that if you make a purchase after clicking a link, I earn a small commission, but it doesn’t cost you a penny extra.
DIY Paper Flower Peonies.
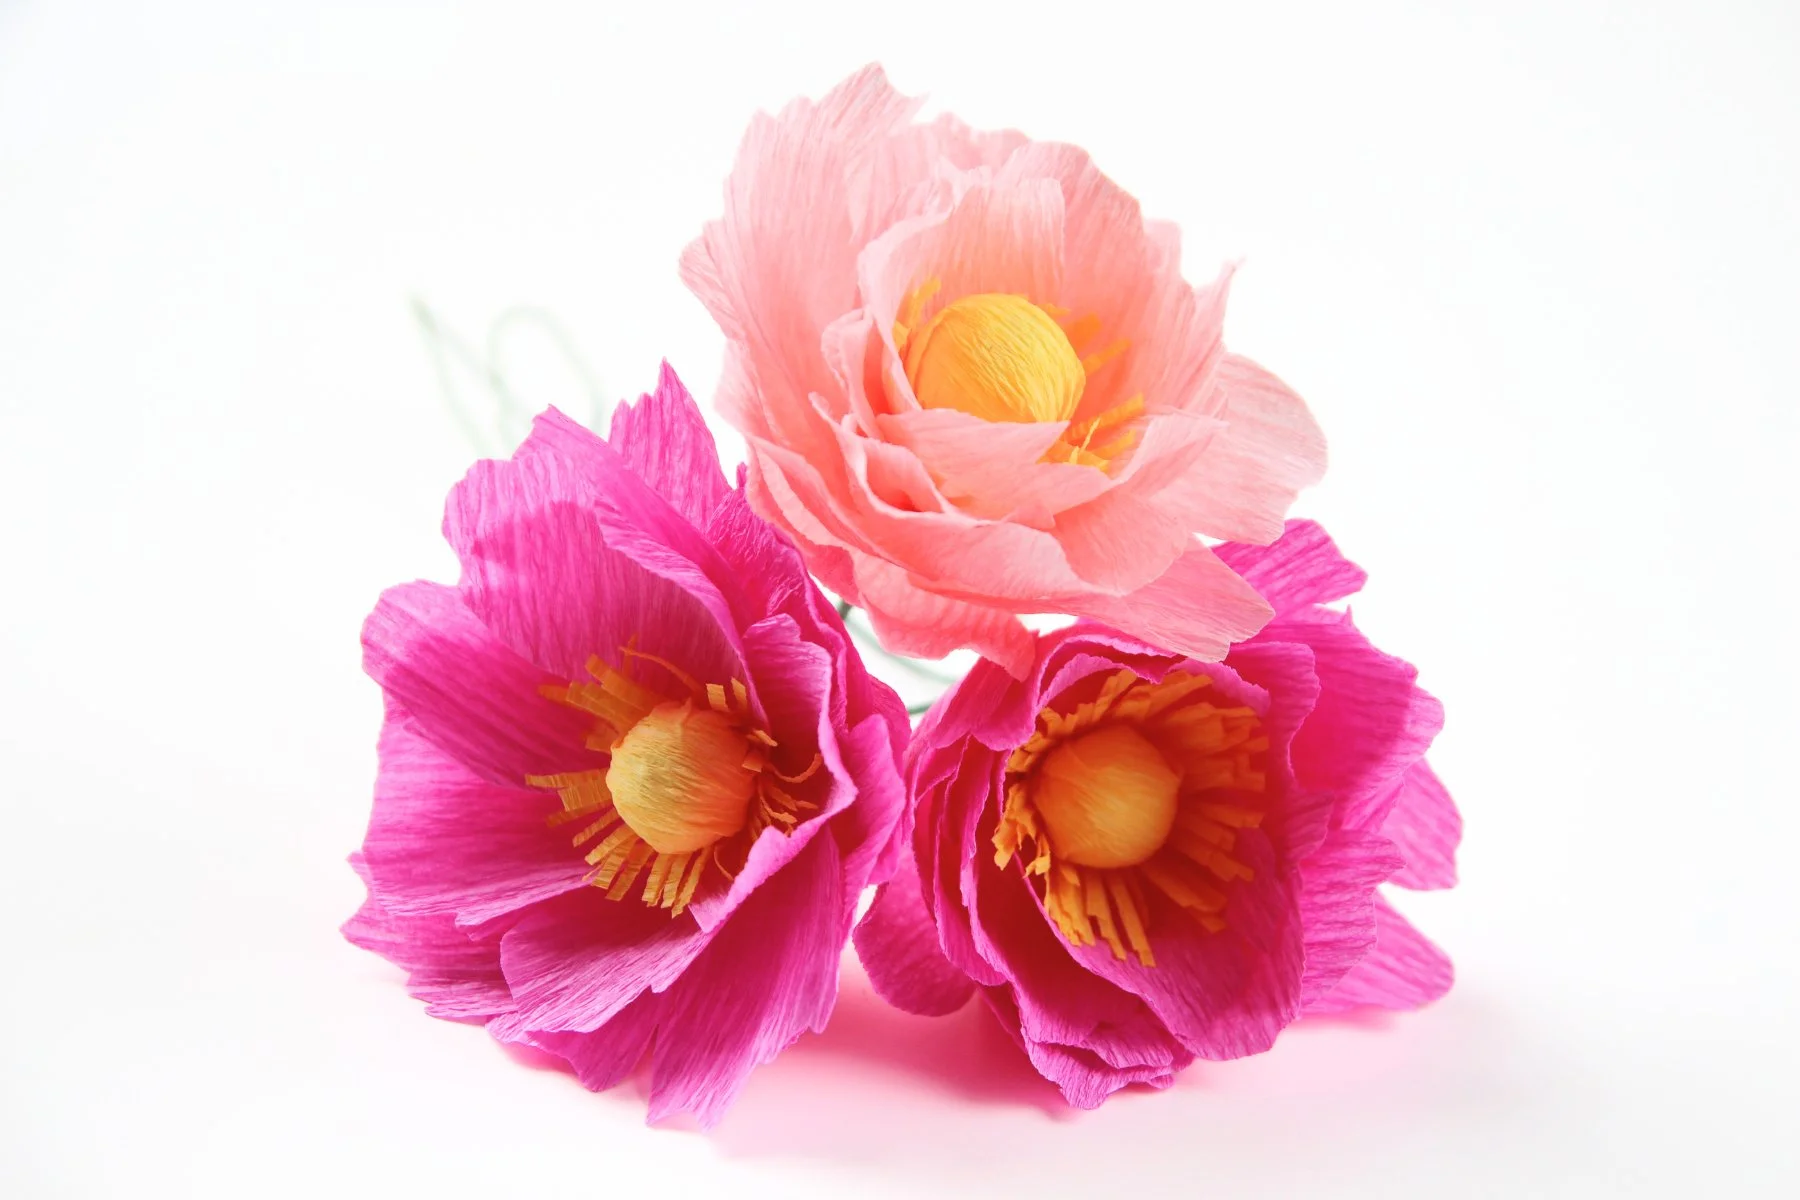
If you’ve ever wished you could keep a bouquet of peonies forever, this DIY project is for you. Not only do paper peonies last forever, but they’re also much easier to make than they look.
Once you learn how to shape the petals and build the flower layer by layer, the process is incredibly easy and relaxing. Before you know it, you’ll want to make an entire bouquet.
Crepe paper is ideal for flower making because of its texture and stretch. The grain in the paper allows you to curl and shape the petals so they mimic the shape of real flowers.
These flowers look beautiful displayed in a vase, attached to gift boxes, used in wreaths, or even turned into a bridal bouquet. And unlike fresh flowers, they’ll stay in bloom year after year!

Supplies:
Template (you can download it at the bottom of the post)
Scissors
Pencil
Glue Gun or some double-sided tape.

How To Make Crepe Paper Peonies.
1. Print and cut out the template and trace around it to make 6 of the small petals and 7 of the large ones.
2. Cut out all your petal pieces.
Make sure the grain of the crepe paper is running vertically as this will help when it comes to shaping the petals.
3. Next, cut a square of yellow crepe paper measuring 3x3 inches and a long strip measuring 7x2 inches.
4. Add some glue to the end of the floral wire and insert it into the bottom of the foam ball.

5. Wrap the square of yellow crepe paper around the ball.
Use floral tape to secure the excess paper at the base.

6. To make the stamen, take the strip of yellow crepe paper and make lots of cuts halfway down to make a fringe.
7. Apply some glue or double-sided tape to the bottom of the strip and wrap it around the wire.
8. Use some more floral tape to secure the excess paper.
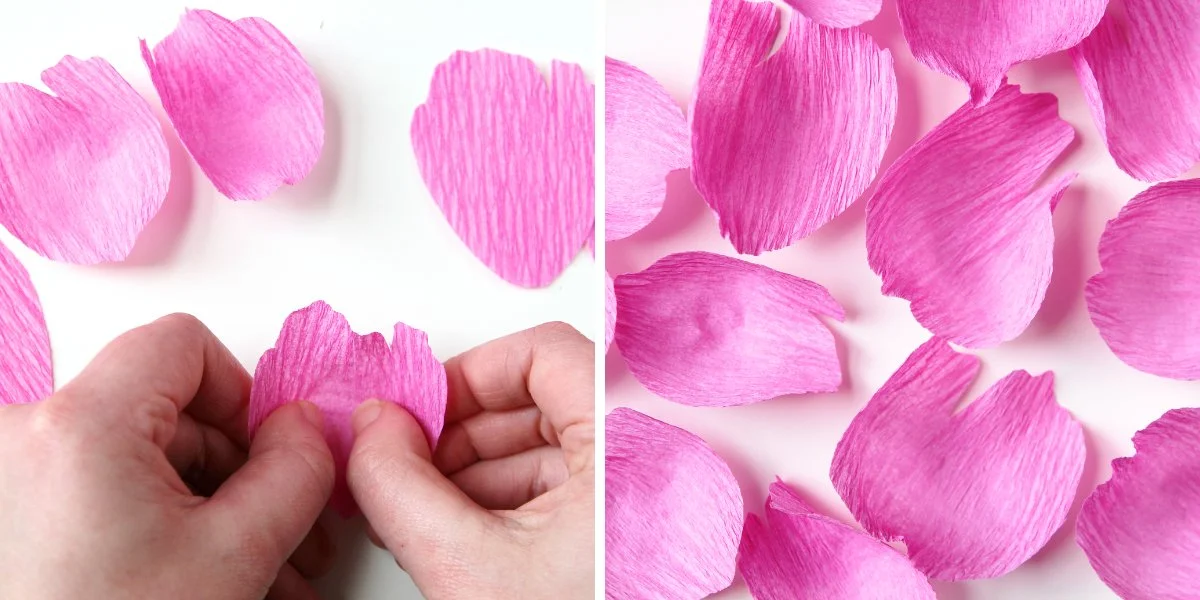
9. Take your petals and, using your thumbs, push away from the centre to shape each one.

10. Apply a little glue to the bottom of each smaller petal and stick them to the stem.
Make sure to overlap each petal as you go.

11. Next, glue on the larger petals and shape the flower.
12. To finish, wrap floral tape around the base of the flower and continue all the way down the wire stem.
This not only hides any exposed paper or glue but also gives the stem a neat, professional finish.
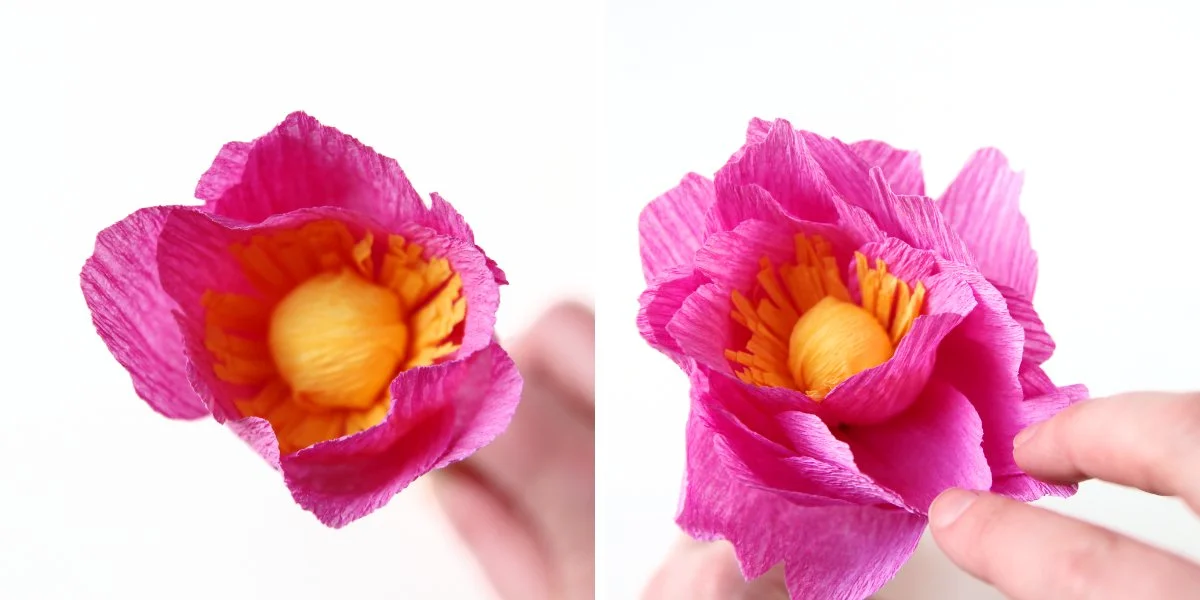
13. Gently open the petals out and shape.
14. Display your crepe paper peonies in a vase or use them as eye-catching gift toppers.