
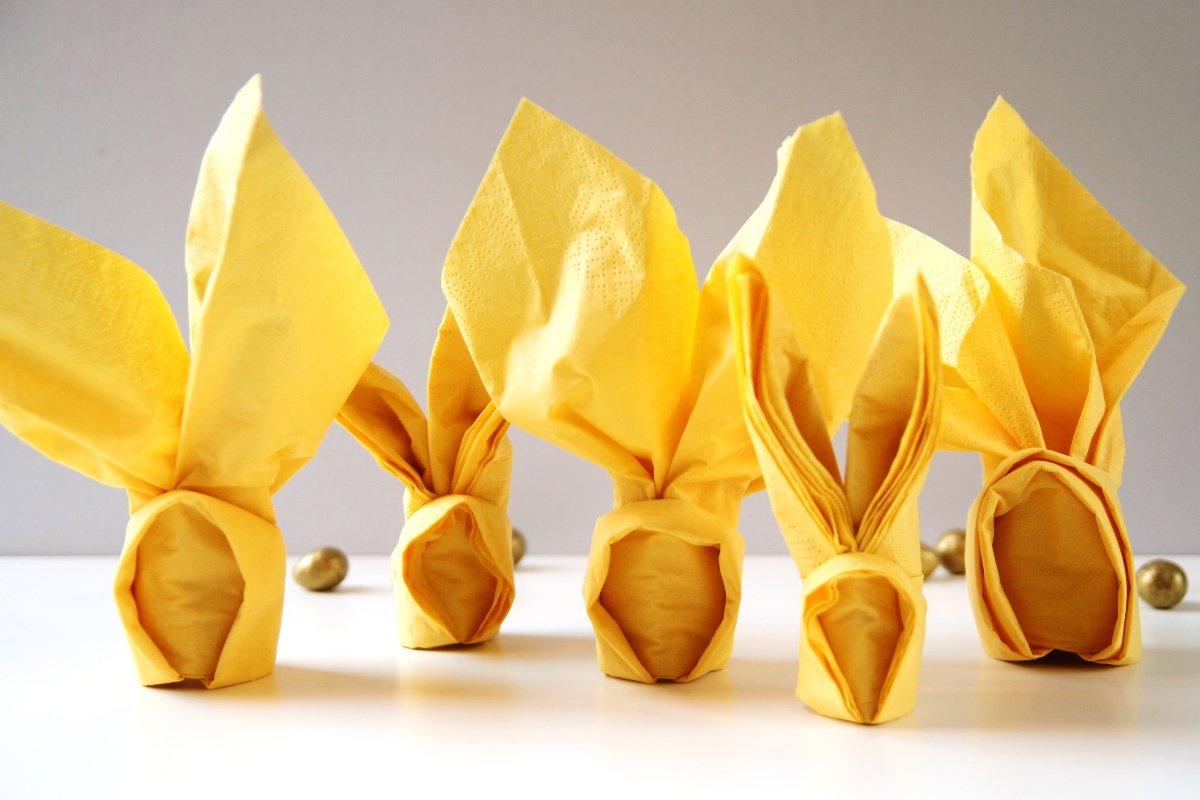
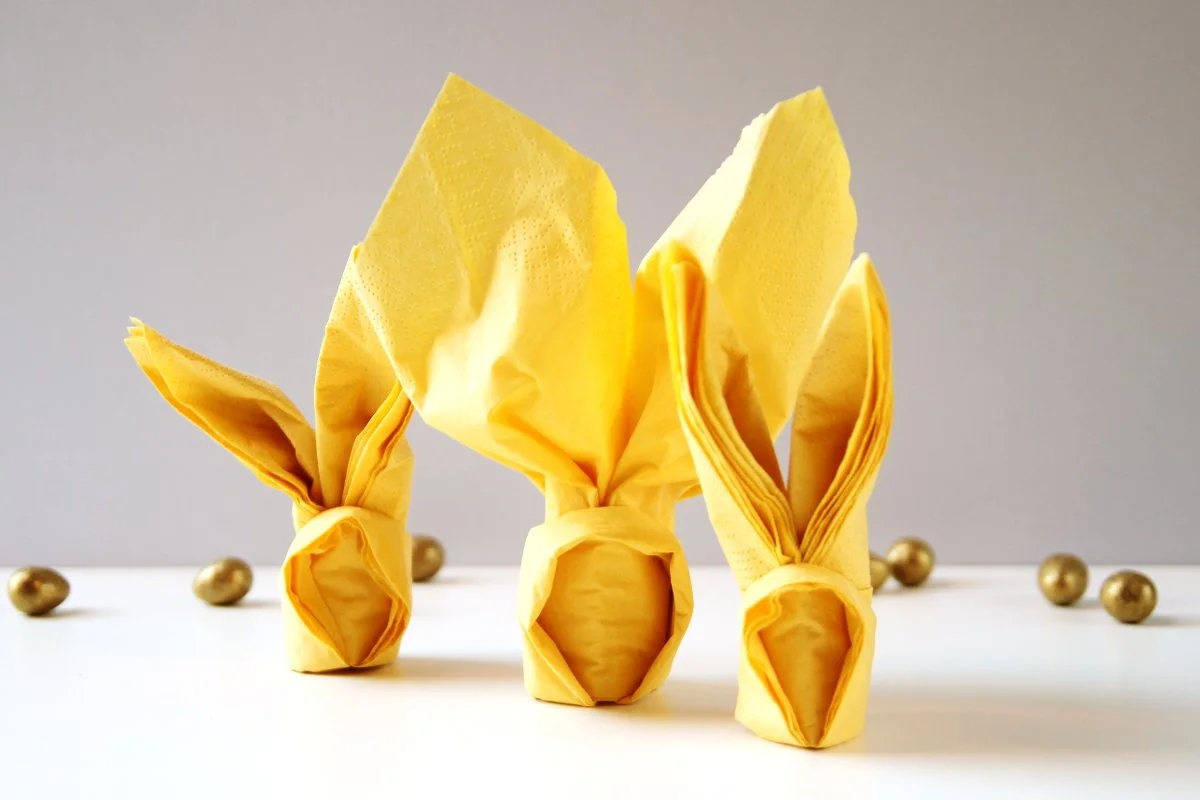
Easter Bunny Napkins
/Make your Easter table extra special this year with these cute Easter bunny napkins. These easy to fold Easter napkins are fantastic for Spring, kids’ parties or anytime you want to add a bright and colourful touch to a party table.
Hosting an Easter brunch? Display them on the table alongside some scattered mini eggs as a centrepiece.
Want a fun Easter decoration for a family meal? Make them using a favourite colour napkin for a personalised place setting. Either way, they’re sure to be a big hit with both adults and kids alike.
To get started check out the tutorial below and follow along with the step-by-step instructions.

This page contains affiliate links. This means that if you make a purchase after clicking a link I earn a small commission but it doesn’t cost you a penny extra!
This post was originally published in 2017 as a video tutorial only but has since been updated.
Easter Bunny Napkins.
Easter is sneaking up fast and I’ve got the cutest Easter craft for you today. These adorable little napkin bunny rabbits are the perfect project to get the kids involved with and make some lovely table decorations.
Do you decorate the house on Easter? I know some people like to display decorated eggs or maybe fill a couple of vases with some happy daffodils but as much as I love those things I don't think anything beats these adorable Easter bunny napkins.
They can be used as either a place card for your Easter party or a handmade personalised gift. How cute would one of these be tucked into an Easter basket?
All you need is a paper napkin and a few folds and you've got yourself a must-have Easter decoration. Check out the video below.
Bunny Rabbit Folded Napkins.
I first saw these bunny ear napkins popping up on Pinterest last year and I couldn't resist giving them a go. I’ve tested out a few different ways and found these two the easiest way to fold them.
You can make them using paper or cloth napkins. However, I did find it easier to make them using paper napkins. The thicker the napkin the harder it is to tuck the bunny closed.
If you have trouble holding your napkin in place wrap it with white twine. Tie in a bow and trim to create whiskers A lovely finishing touch would be a white mini pom-pom stuck on as a nose or maybe a cute fluffy tail. Don’t forget to only use a sticky glue dot or some white tack so you don’t ruin the cloth napkin.


How to Fold a Bunny Napkin - Big Bunny Ears.
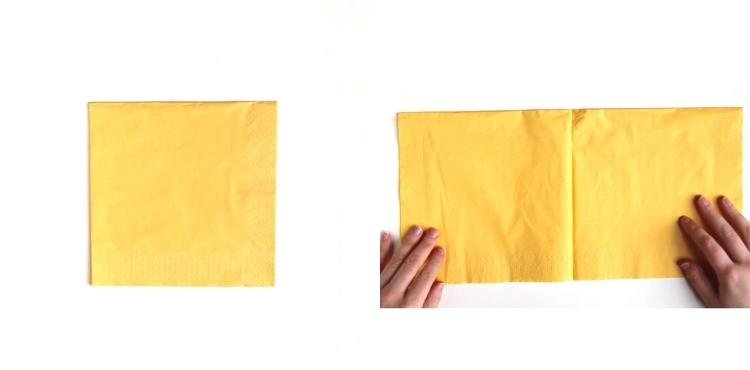
1. Open out the napkin and lay it flat with the corner pointing towards you.
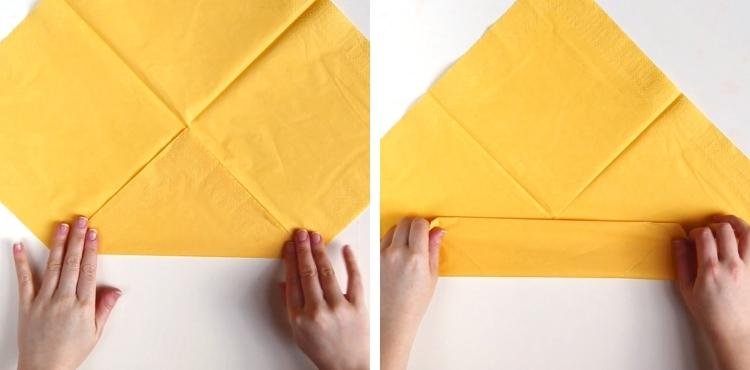
2. Fold the bottom corner in to meet the centre point.
3. Take the bottom edge and fold it into the centre.
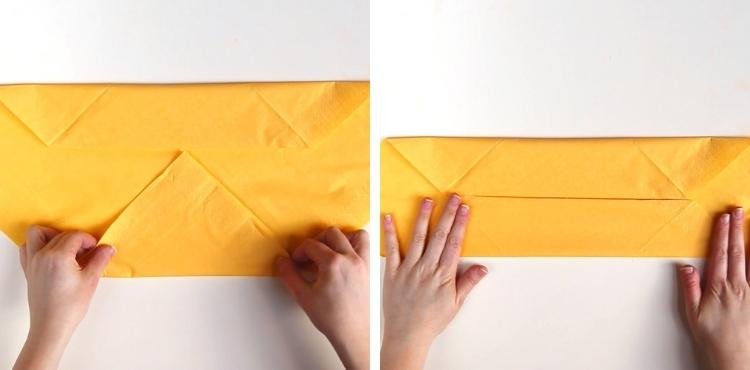
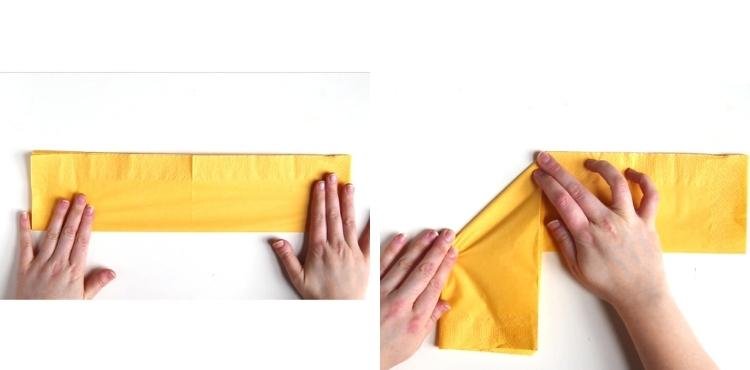
4. Rotate the napkin 180 degrees.
5. Fold the bottom corner into the centre.
6. Fold the bottom edge into the centre.
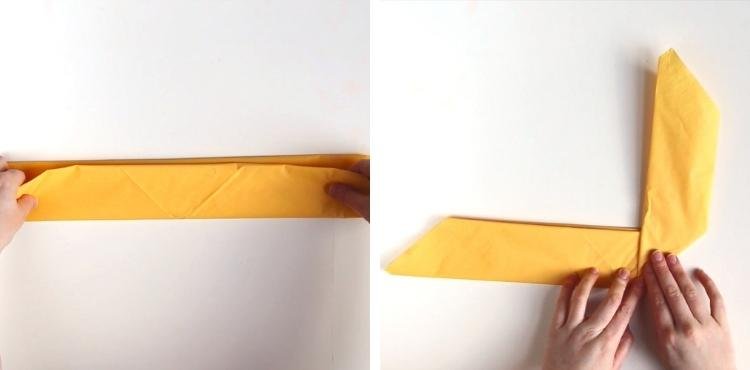
7. Fold the napkin in half with the open end at the top.
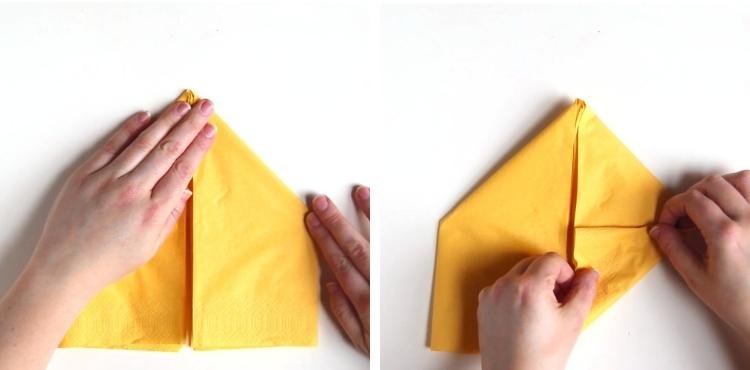
8. Take the napkin and fold the right side up to the centre to make an ‘L’ shape.
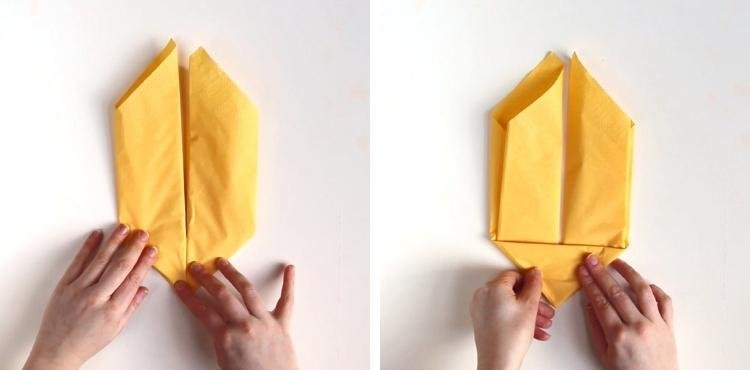
9. Repeat on the left-hand side and fold the bottom side up to the centre to make a diamond shape.
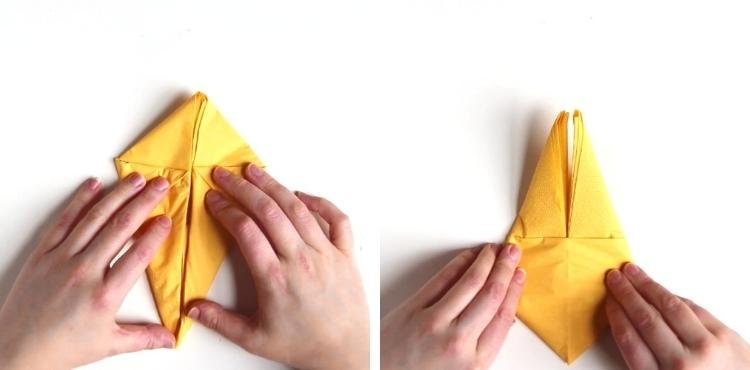
10. Flip the folded napkin over.

11. Take the bottom point and fold it up to make a triangle.
12. Begin to roll and fold the napkin in half.
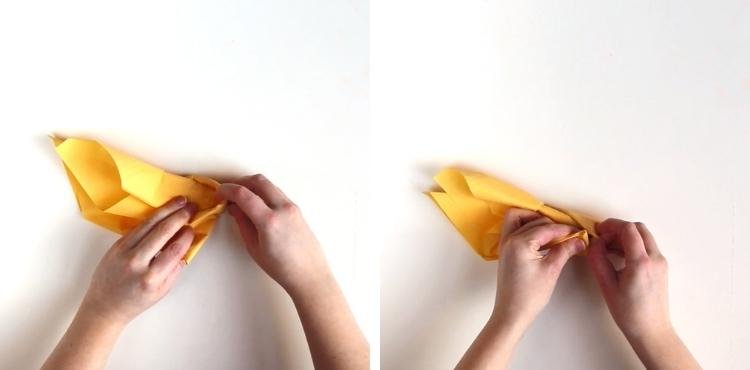
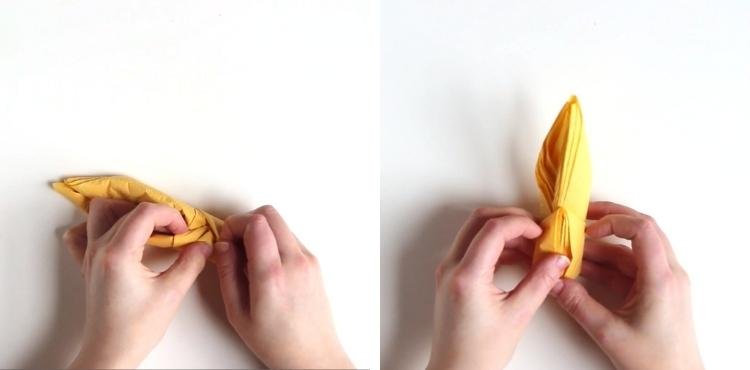
13. As you roll it you should be able to see a pocket.
14. Tuck the opposite end into the pocket.
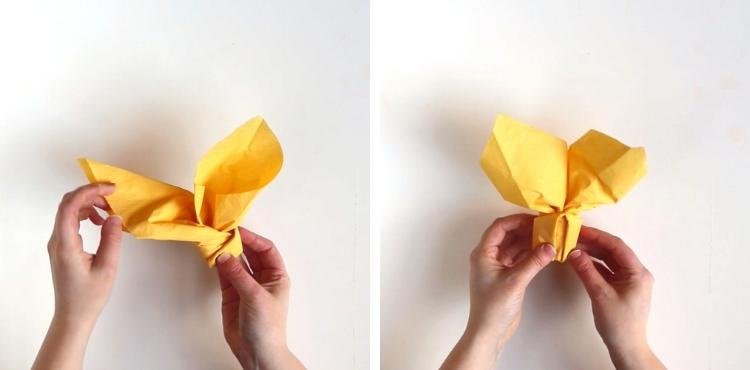
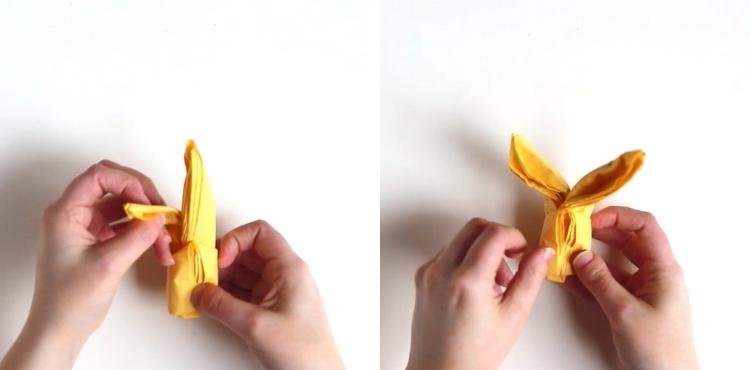
15. Shape the ears on your napkin bunny.
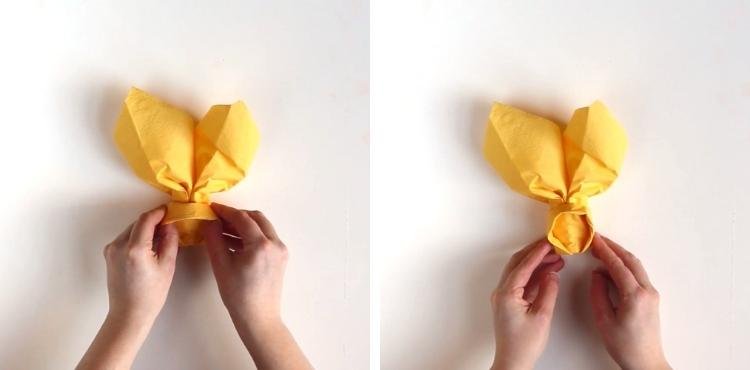
16. To finish open out and shape the bottom.

Once you’ve mastered making the first bunny it’s time to move on to the second one. It’s made in a similar way except instead of opening the napkin all the way out you keep it folded in half. You’ll find the instructions below.
How to Fold an Easter Bunny Napkin - Small Bunny.
1. Open out your paper napkin once so it’s still folded in half.
2. Fold it on half again to make a long thin rectangle.
3. Fold the top edge down at a 45 degree angle to meet at the centre.
4. Repeat on the other side to make a house shape. Rectangle on the bottom, triangle on the top.
5. Take the bottom right corner and fold it into the centre.

6. Repeat and fold the left corner into the centre to make a diamond shape.
7. Take the left side and fold it into the middle.
8. Repeat and fold the right side into the middle to make a kite shape.
9. Flip it over so the ears are at the top.

10. Fold the bottom up to make a triangle.
11. Fold in half and roll it into a tube shape like with the first bunny. You’ll see a pocket on the right.
12. Tuck the left corner into the pocket.
13. Turn your bunny around.
14. Fold down and shape the ears.
15. Open up and shape the back of the bunny to make the bottom.
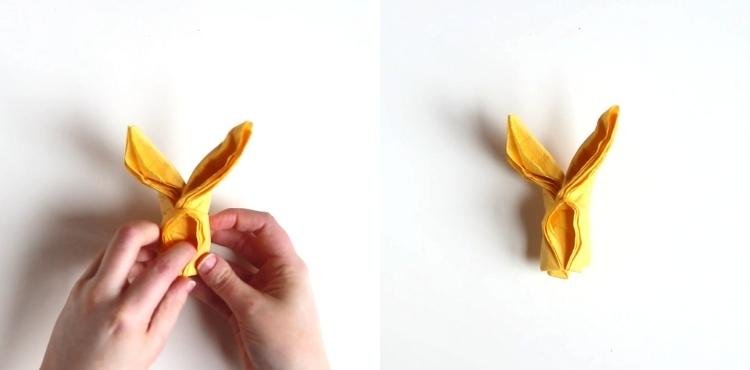
What do you think? Pretty cute, right?
If you get stuck and need a bit more help make to check out the video below.


