DIY Envelope Mini Album
/Learn how to make a beautiful DIY Accordion Envelope Mini Album using ordinary envelopes and scrapbook paper. This easy paper craft is perfect for storing photos, keepsakes, postcards, and journaling cards, making it a thoughtful handmade gift or memory book for holidays, birthdays, weddings, and special occasions.

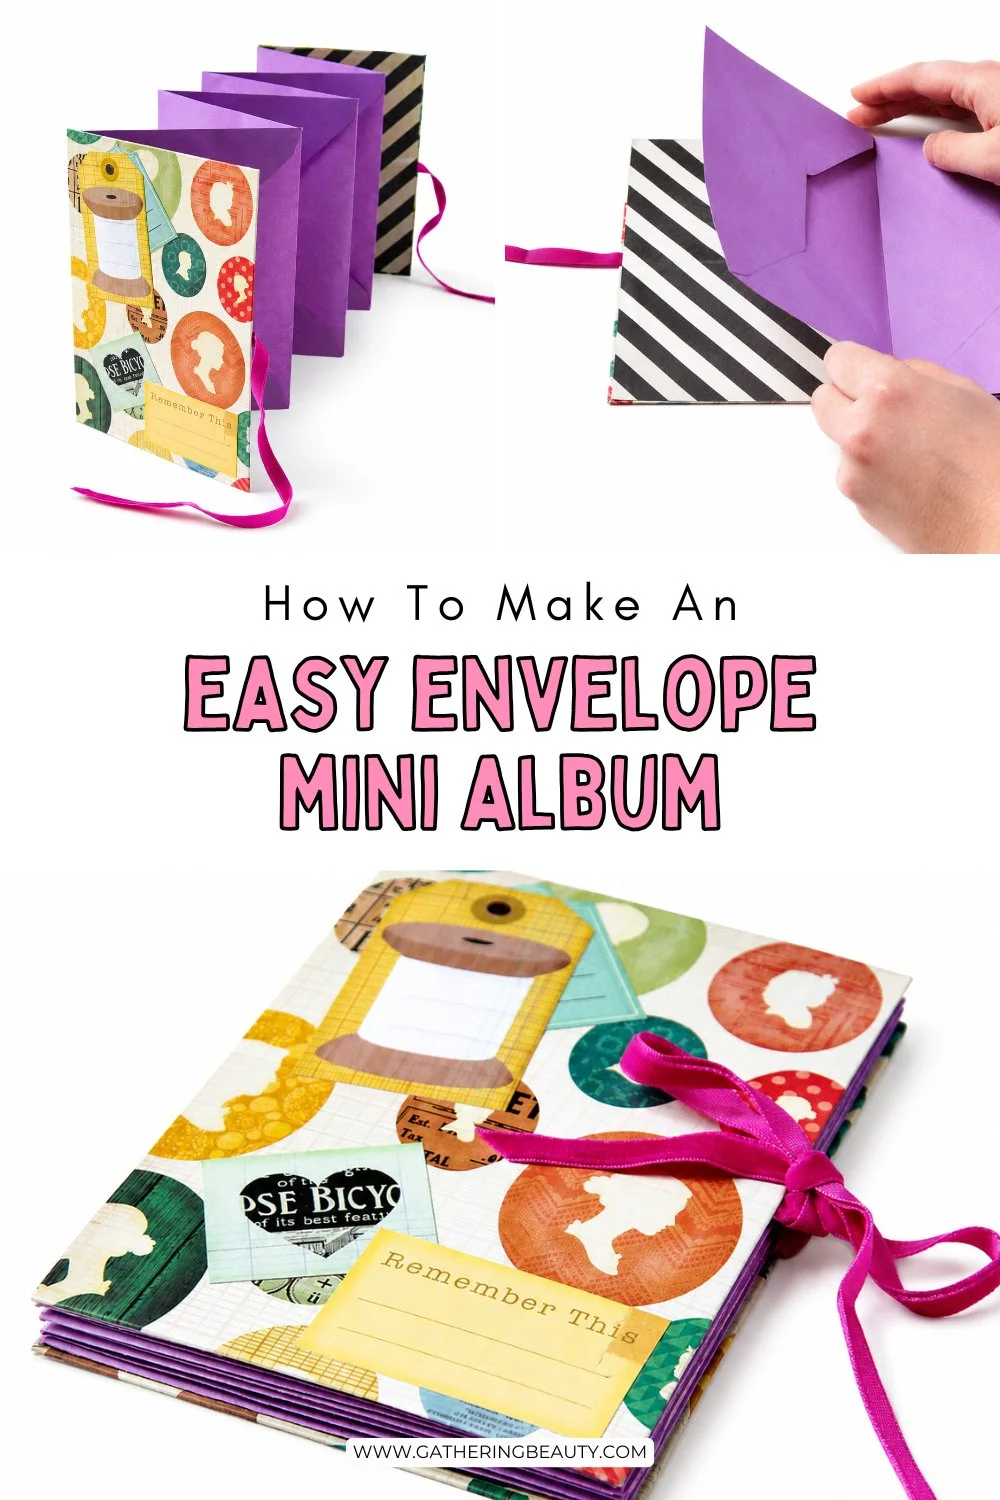
Easy Envelope Mini Album.
Looking for a creative way to store your favourite photos, postcards, ticket stubs, and little keepsakes? This DIY folding envelope mini album is one of my favourite paper craft projects because it's simple to make and endlessly customisable.

Made from ordinary envelopes, scrapbook paper, and a few basic craft supplies, this clever accordion-style album expands as you fill it, giving you plenty of space for memories without becoming bulky.
Whether you're documenting a holiday, creating a handmade gift, or making a memory book for a special occasion, this envelope mini album is a fun project you'll want to make again and again.

Supplies:
Envelopes
Scrapbook Paper
Card stock or chipboard
Double-sided sticky tape
Ribbon
Glue
Scissors.

How To Make An Accordion Envelope Mini Album.
1. Decide on how many envelopes/pages you want.
2. Open up your envelopes and lay them flat.
Using either glue or double-sided sticky tape, you're going to stick the inside of the envelope flap to the back of the next envelope.

3. Keep going until you've stuck down all your envelopes.
4. Fold like an accordion and put to the side for later.

5. To make the hardcover for your mini album, you need to cut a piece of card stock or chipboard slightly larger than your envelope.
I made mine a couple of millimetres bigger on each side. You need to make your cover slightly larger so it can protect your pages/envelopes from being damaged.
6. Stick your hardcover pieces down onto your chosen scrapbook paper, leaving a 1cm border.
7. Cut triangles into the corners.
Leave a small gap at the corner tips (about 1 mm). This gap will fold around the edge of the chipboard.

8. Fold and glue down each flap and leave to dry.
9. To make the closure, cut and glue down a piece of ribbon to the back of each of your cover pieces.
10. To finish the back cover, glue down the final envelope flap along with your piece of ribbon.

11. Cover with another piece of scrapbook paper.

12. Repeat for the front cover, except this time you'll need to glue the whole envelope down.

13. Once dry, decorate the cover and fill the pockets with your photos.