DIY PAPER BAG STARS
/Looking for a last-minute party decoration? Try these simple but effective 3D stars made from paper lunch bags. You can hang them from string or stick to the wall for an awesome photo backdrop.
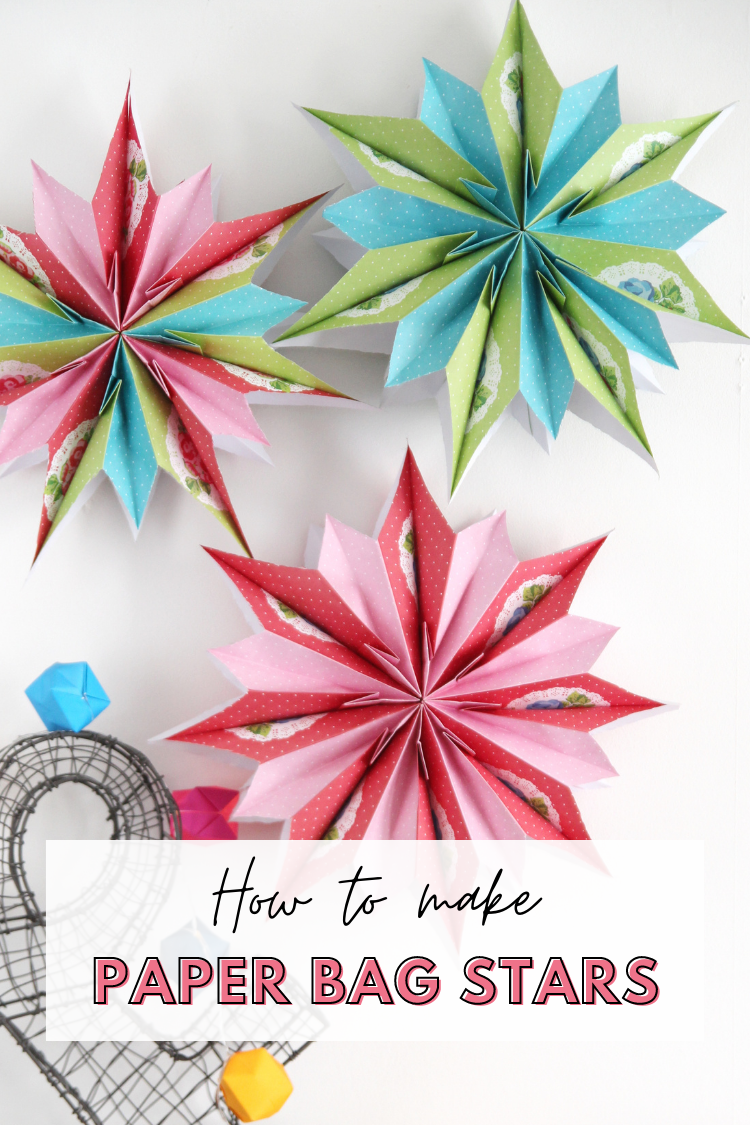
Paper Bag Star Decorations.
Believe it or not but these giant DIY paper stars are made out of paper lunch bags. They’re a quick, cheap and easy way to make pretty decorations for your next party. Each one takes minutes to put together and makes a fantastic statement.
I’m always on the lookout for impressive party decorations you can make as quickly and cheaply as possible. If you’ve ever tried to make a whole bunch of decorations for a wedding or birthday, you know it can get pretty expensive pretty fast.
I made each of these stars for less than £1 each and if you use plain paper lunch bags you can make them for even less. You can draw or paint some colourful patterns on them and make them truly unique.
Check out the video tutorial below to help you create your own paper bag star decorations.

SUPPLIES:
Paper Lunch Bags, the kind that folds out flat at the bottom
A Glue Stick
Scissors
String or Fishing Line

How to make Paper Bag Stars.
1. Count out 7-9 paper lunch bags.
You want the kind that opens out flat at the bottom.
I used 7 paper bags for each of these stars. If you want a fuller star with more points you can use more bags. To create a rounder circle shape you’ll need 10-12 bags.
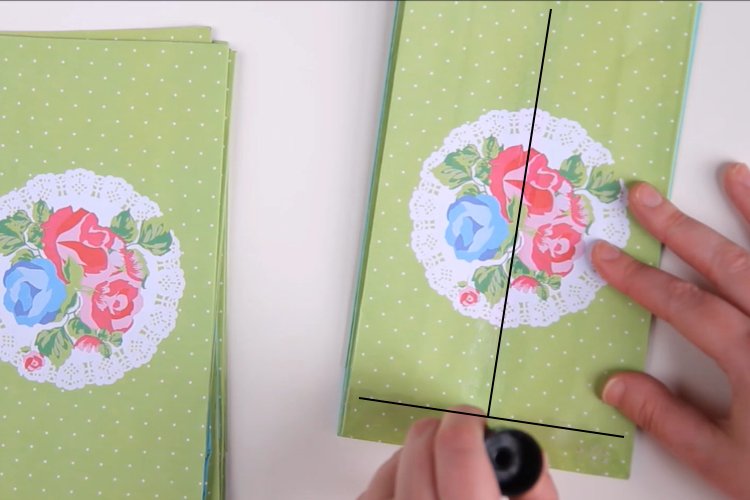
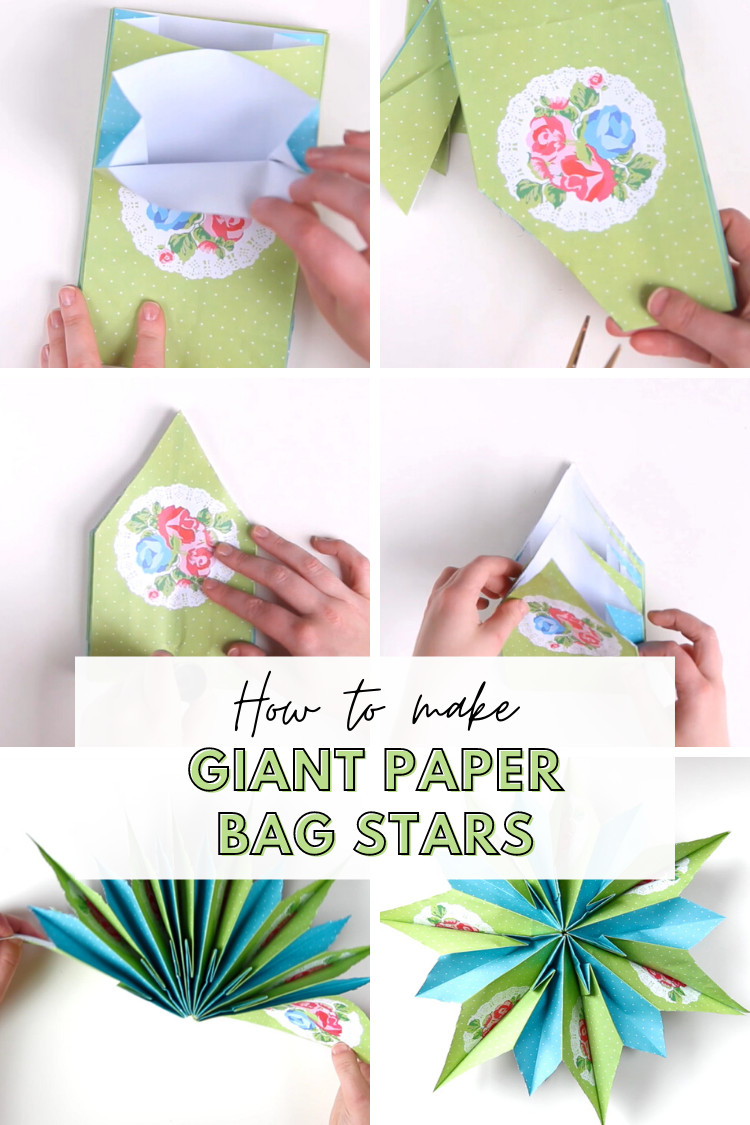
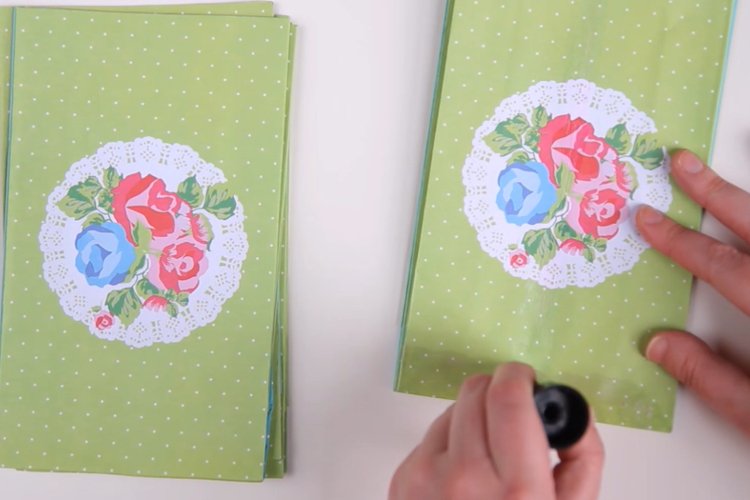
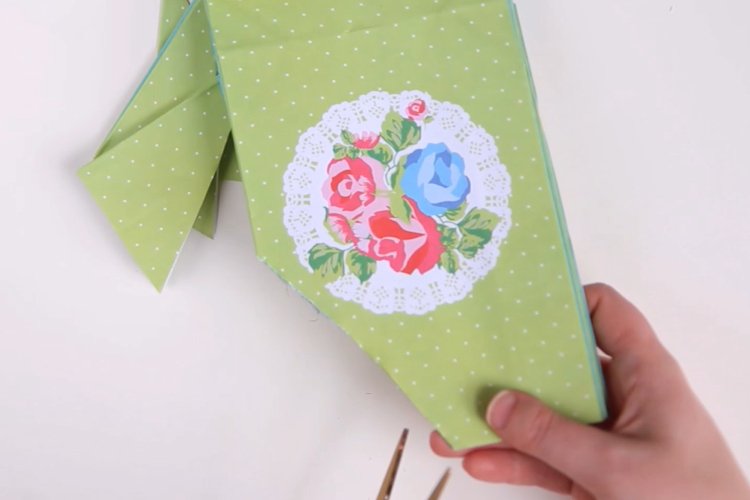
2. Take the 1st bag and lay it flat with the open part facing up.
3. Glue an upside-down ‘T’ shape on the bag along the bottom (the closed end) and up the middle.
4. Place another bag on top making sure it’s facing in the same direction and press firmly in place.
5. Keep adding and glueing your bags.
The more bags you add to the stack the harder it is to cut so keep this in mind as you glue them together.

6. Once you’ve glued all the bags together make sure they all open at the top. This is the part you’re going to cut.
If the stack is too thick to cut through with a pair of scissors you could either make two stacks of glued bags, cut them and then glue them together or use a craft knife and ruler.
7. Cut the top off the bags to form a point.
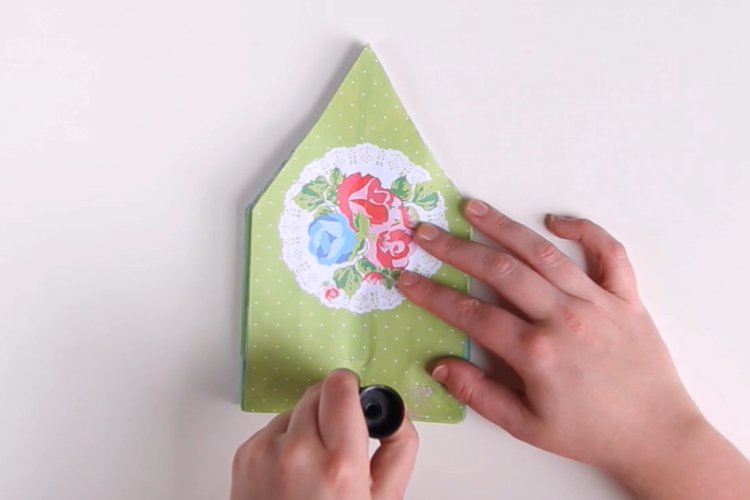
8. Glue another upside-down ‘T’ shape to the top of the bags.
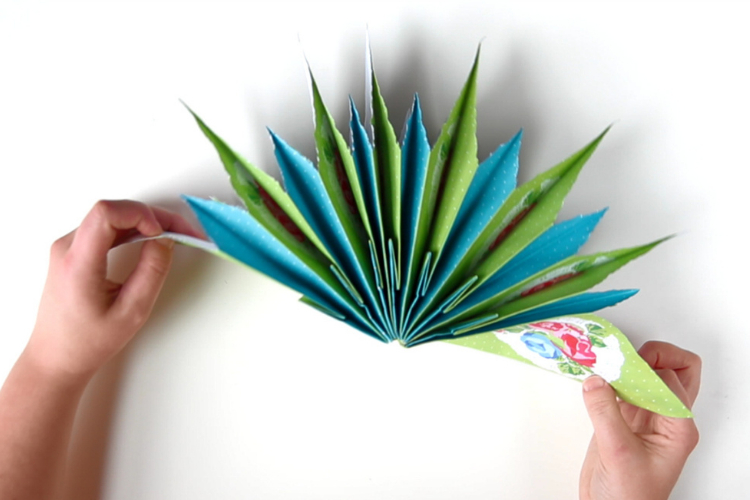
9. Open the bags out from the top.

10. Slide your hands into the first and last bags and press firmly together to glue in place.

11. Punch a hole on top of one of the points, thread through some string or fishing line and tie.
12. Hang from the ceiling or use a little tape to secure to the wall.
Top Tip: If you want to save your stars and use them again, instead of glueing them together at the end secure with a paperclip. That way you can fold them the stars back up and store them flat ready for your next party.