Easy Origami Santa
/Learn how to make an Easy Origami Santa. Fold a simple piece of paper into the cutest Father Christmas. A fun and simple paper project to keep both kids and adults busy over the Christmas holidays.
This page contains some affiliate links. This means that if you make a purchase after clicking a link I earn a small commission but it doesn’t cost you a penny extra!
Origami Santa.
Are you looking for a fun paper craft to do while listening to your favourite Christmas tunes? Then you’re in luck as today I’m sharing the last of my quick Christmas Origami projects. This time it’s an easy origami Santa Claus.
This simple project only requires two materials (one if you don’t count the pens needed to draw on the face) and the end result is seriously cute. It’s such a fun paper craft for all the family.
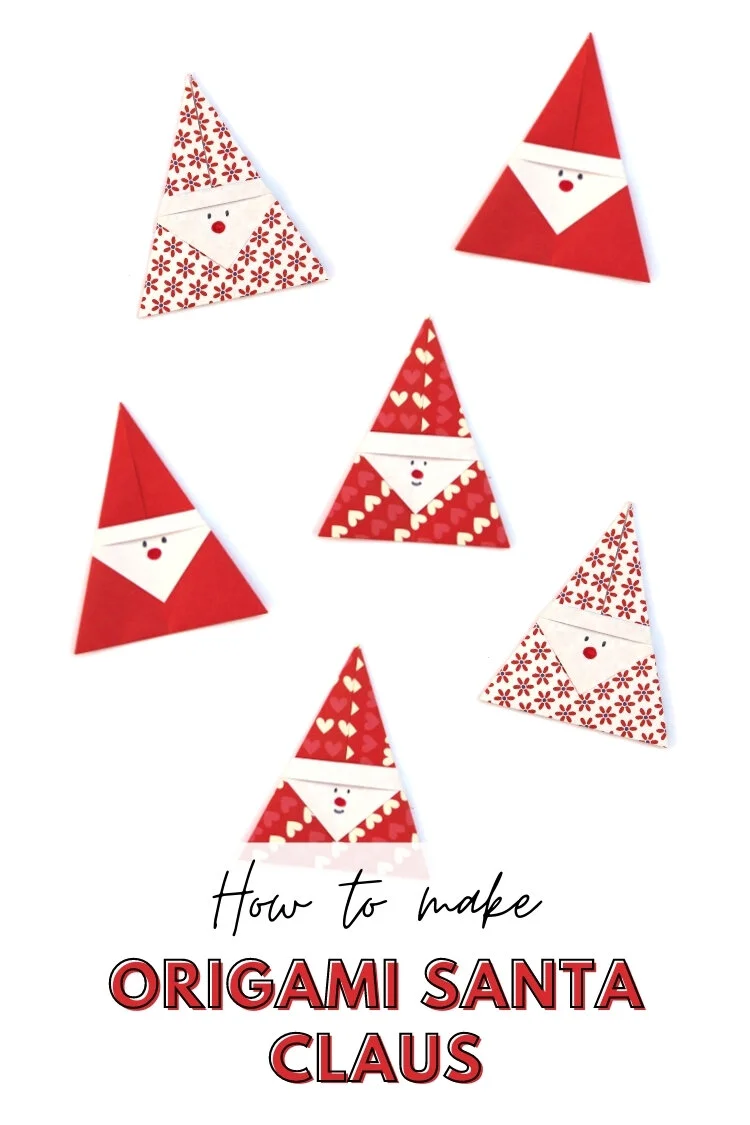
If you’ve got any kids that need entertaining over the Christmas break then this is an ideal craft to keep them busy. They can go to town drawing on the faces, glueing on buttons and decorating the hats. I mean, how cute would a mini pom-pom look on the top of each one?

What to do with your paper Santas.
My favourite thing to do with these flat origami projects is to string them up as a garland or tie on a piece of ribbon and hang from the tree but there are so many others ways you could use them.
Make as many Santas as you like and prop them up along the windowsill or fireplace.
Fold a giant Santa using a piece of gift wrap and hang it from a door or to decorate an empty wall.
Pop them on party invitations or Christmas cards.
Use them as gift tags.
Tuck them into your Holiday cards as an extra handmade surprise.
They even make fantastic place cards. The folded sides mean your finished origami Santas can stand upright. Write your guests names on the brim of the hat and stand them up on your table.
Don’t forget to check out my 25 Easy Christmas Origami projects.

Materials:
Paper (Origami Paper or Gift Wrap all work well. You can even get some red origami paper here or some festive Christmas themed origami paper).
Markers to give your Santa a face
While you can make these with most types of paper I recommend using origami paper or other thin paper like gift wrap as it’s easy to fold and helps your origami keep its shape.
I used some pretty red patterned origami paper for my Santas. It does work better if the paper has a white or different colour on the back so you have a contrasting colour for the hat, face and beard.
I even have some printable origami paper you can download and use for FREE. Simply download, print and cut into 7x7-inch squares.


How to make an Origami Santa.
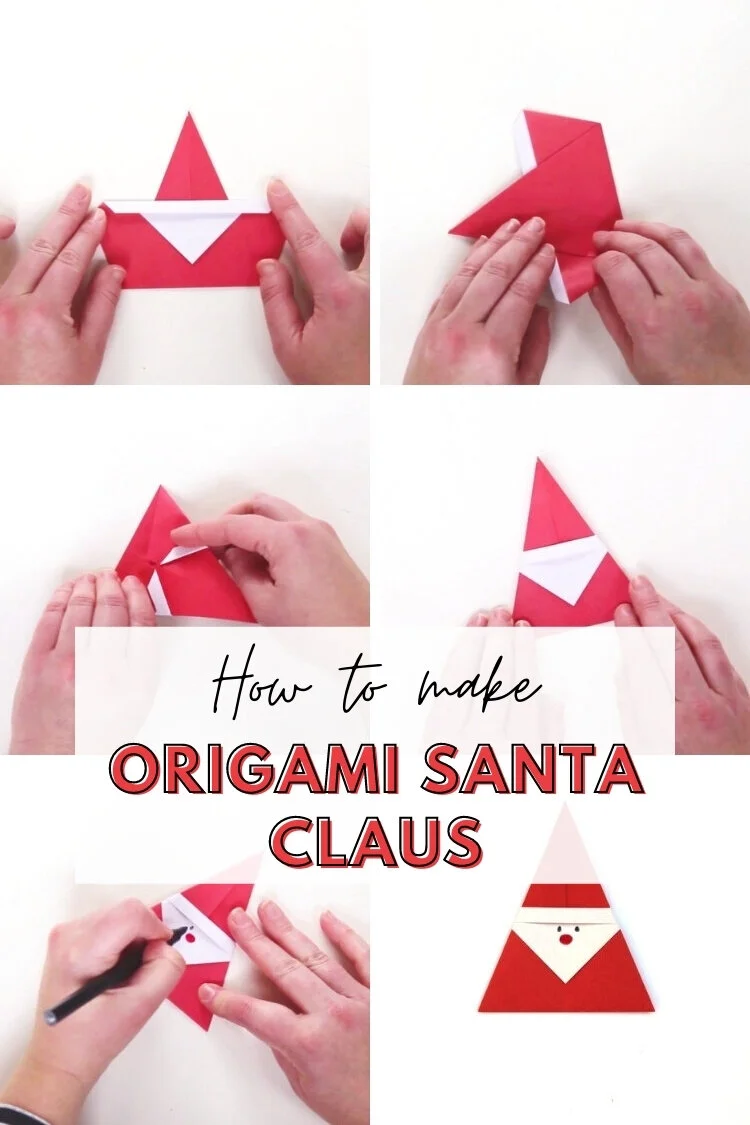
Start with the white side of your paper facing up.
Fold in half along the diagonal and open back out.

3. Fold in half along the other diagonal and open back out.

4. Fold each side into the centre to form a kite base.

5. Fold the bottom point up (red) to meet the top center (white).

6. Flip it over.
7. Fold the top of the paper down to make a white triangle. This will be the face and beard of your Father Christmas.
You want to leave around 1 cm of red showing at the bottom.

8. Fold the paper down again to make a small strip. This will be the brim of Santa's hat.
9. Flip it over.

10. Fold back the sides to create a triangle shape.

11. Flip it over.
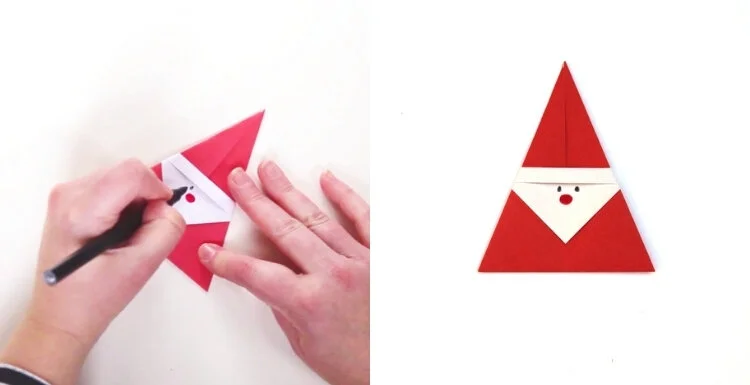
12. Draw on a cute face to finish.