DIY Clay Stars Decorations
/Are you looking for a simple Christmas ornament you can make and hang on the tree?
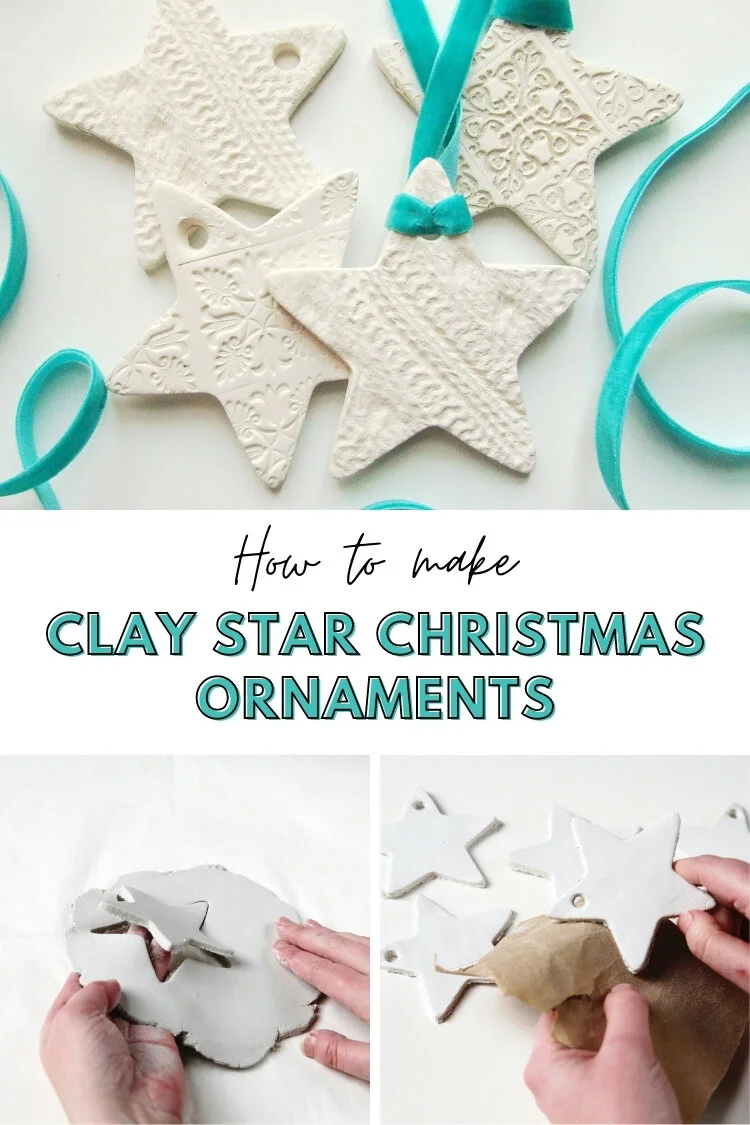
Learn how to make these pretty embossed stars using air dry clay in this step by step tutorial.
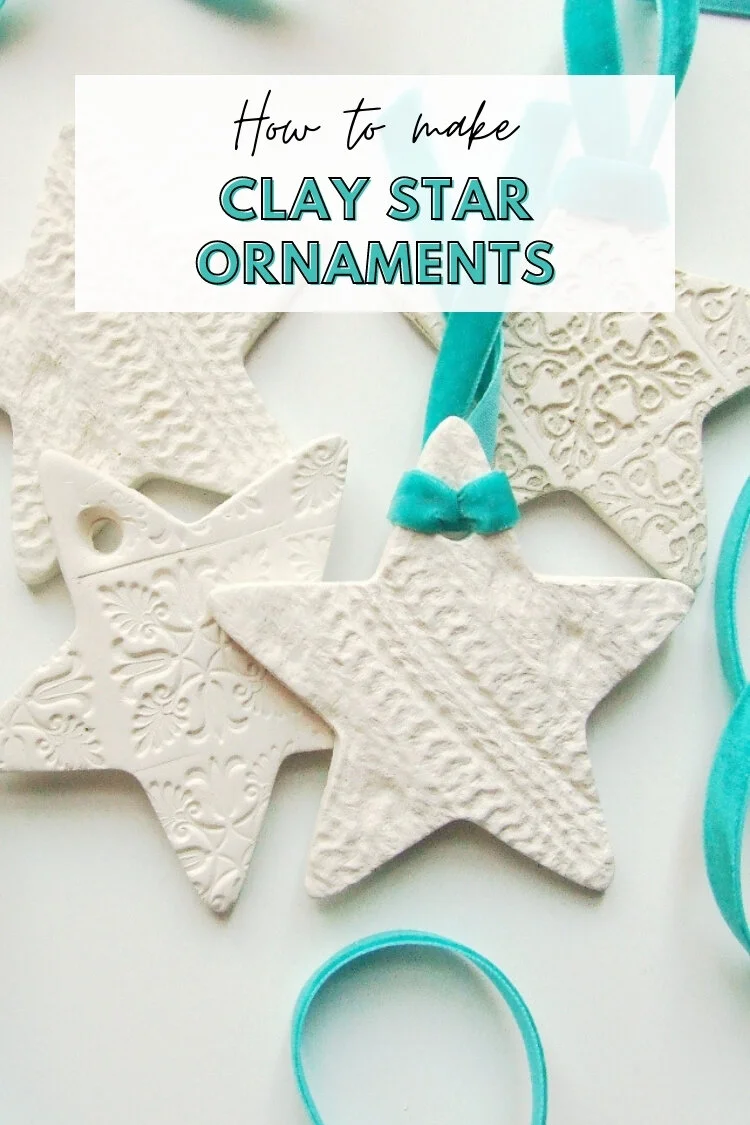
These pretty clay stars are fun to make and the perfect handmade decoration to add a personal touch to your collection.
This page contains affiliate links. This means that if you make a purchase after clicking a link I earn a small commission but it doesn’t cost you a penny extra!
Clay Star Decorations.
Making Christmas decorations is one of my favourite things to do. It’s become a bit of a tradition that every year we make a new decoration for the tree. This year we decided to try using air dry clay.
Have you ever used air dry clay before? It’s a fantastically versatile material that can be used in a lot of different ways. Not only is it lightweight, strong and durable but there is no firing or baking required. Simply leave it to dry overnight for a cute homemade ornament.
There’s just something so special knowing you’ve made your own ornaments from scratch and seeing them hanging from the tree, don’t you think?
Air Dry Clay Christmas Decorations
Clay ornaments are really easy to make and a lot of fun too. They’re a great project to get both the big and little kids involved with in the run-up to the festive season.
You can make them in a variety of shapes and sizes. Hang them individually or string them up together as a pretty garland. Make big ones and use them as gift tags on bags or teeny tiny mini ones and make a rustic Scandinavian look garland. Either way, they’re sure to impress.

Supplies:
There are several kinds of air dry clay available. I’ve tried quite a few but the Das Air-Hardening Clay is my favourite and the one I used to make these stars. Not only is it durable but it dries hard and can be sanded easily once dry for a smooth finish.
Here are my top three air dry clay recommendations:
Das Air-Hardening Clay White (my personal favourite)
And the rest of the supplies needed:
A Rolling Pin,
Parchment Paper/Greaseproof Paper
Stamps (I used these ones)
Cable knit knitting or anything else you want to use to make an impression in the clay,
Sandpaper.
And some ribbon or string.

How to make Air Dry Clay Christmas Decorations.
1. Start by taking your air dry clay and knead until soft and pliable.
Need a little help? You can find all my tips for working with air dry clay here.
2. Roll out your clay to about 3-5mm thick. The thicker the clay the longer it takes to dry.
To prevent the clay from sticking to your work surface you may need to roll it out onto some parchment paper.
3. Use a star cookie cutter to cut out your clay shapes.
Even though air dry clay is non-toxic it’s a good idea to keep any tools that touch the clay away from food in the future. Any cookie cutters or rolling pins should be kept separate and not used in any future baking projects. An acrylic rolling pin designed to be used with clay is perfect.
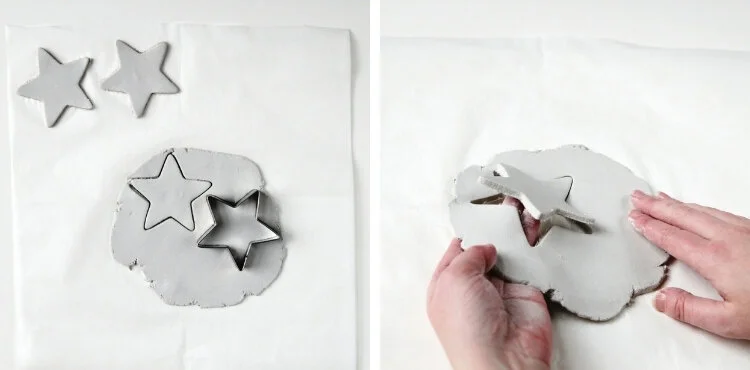
4. Carefully peel away the remaining clay.

5. . Use a straw or pen lid to make a hole in the point of each star.
Make sure you don't make the hole too close to the edge of your shape. The clay needs to be thick enough not to snap when the ribbon is threaded through.
6. Leave to dry for around 24-48 hours. As the clay dries and the water evaporates it will turn from a pale grey to white.
How fast the clay dries depends on the weather. In warm weather, the clay dried quickly (around 24 hours) but in cold, wet weather it took up to 72 hours.
Top Tip:
Remember the thicker the clay the longer it takes to dry. If you find your clay stars curl up as they dry simply turn them over halfway through the drying process.

7. Sand away any rough edges using fine sandpaper.
8. Thread some ribbon through the hole and hang.
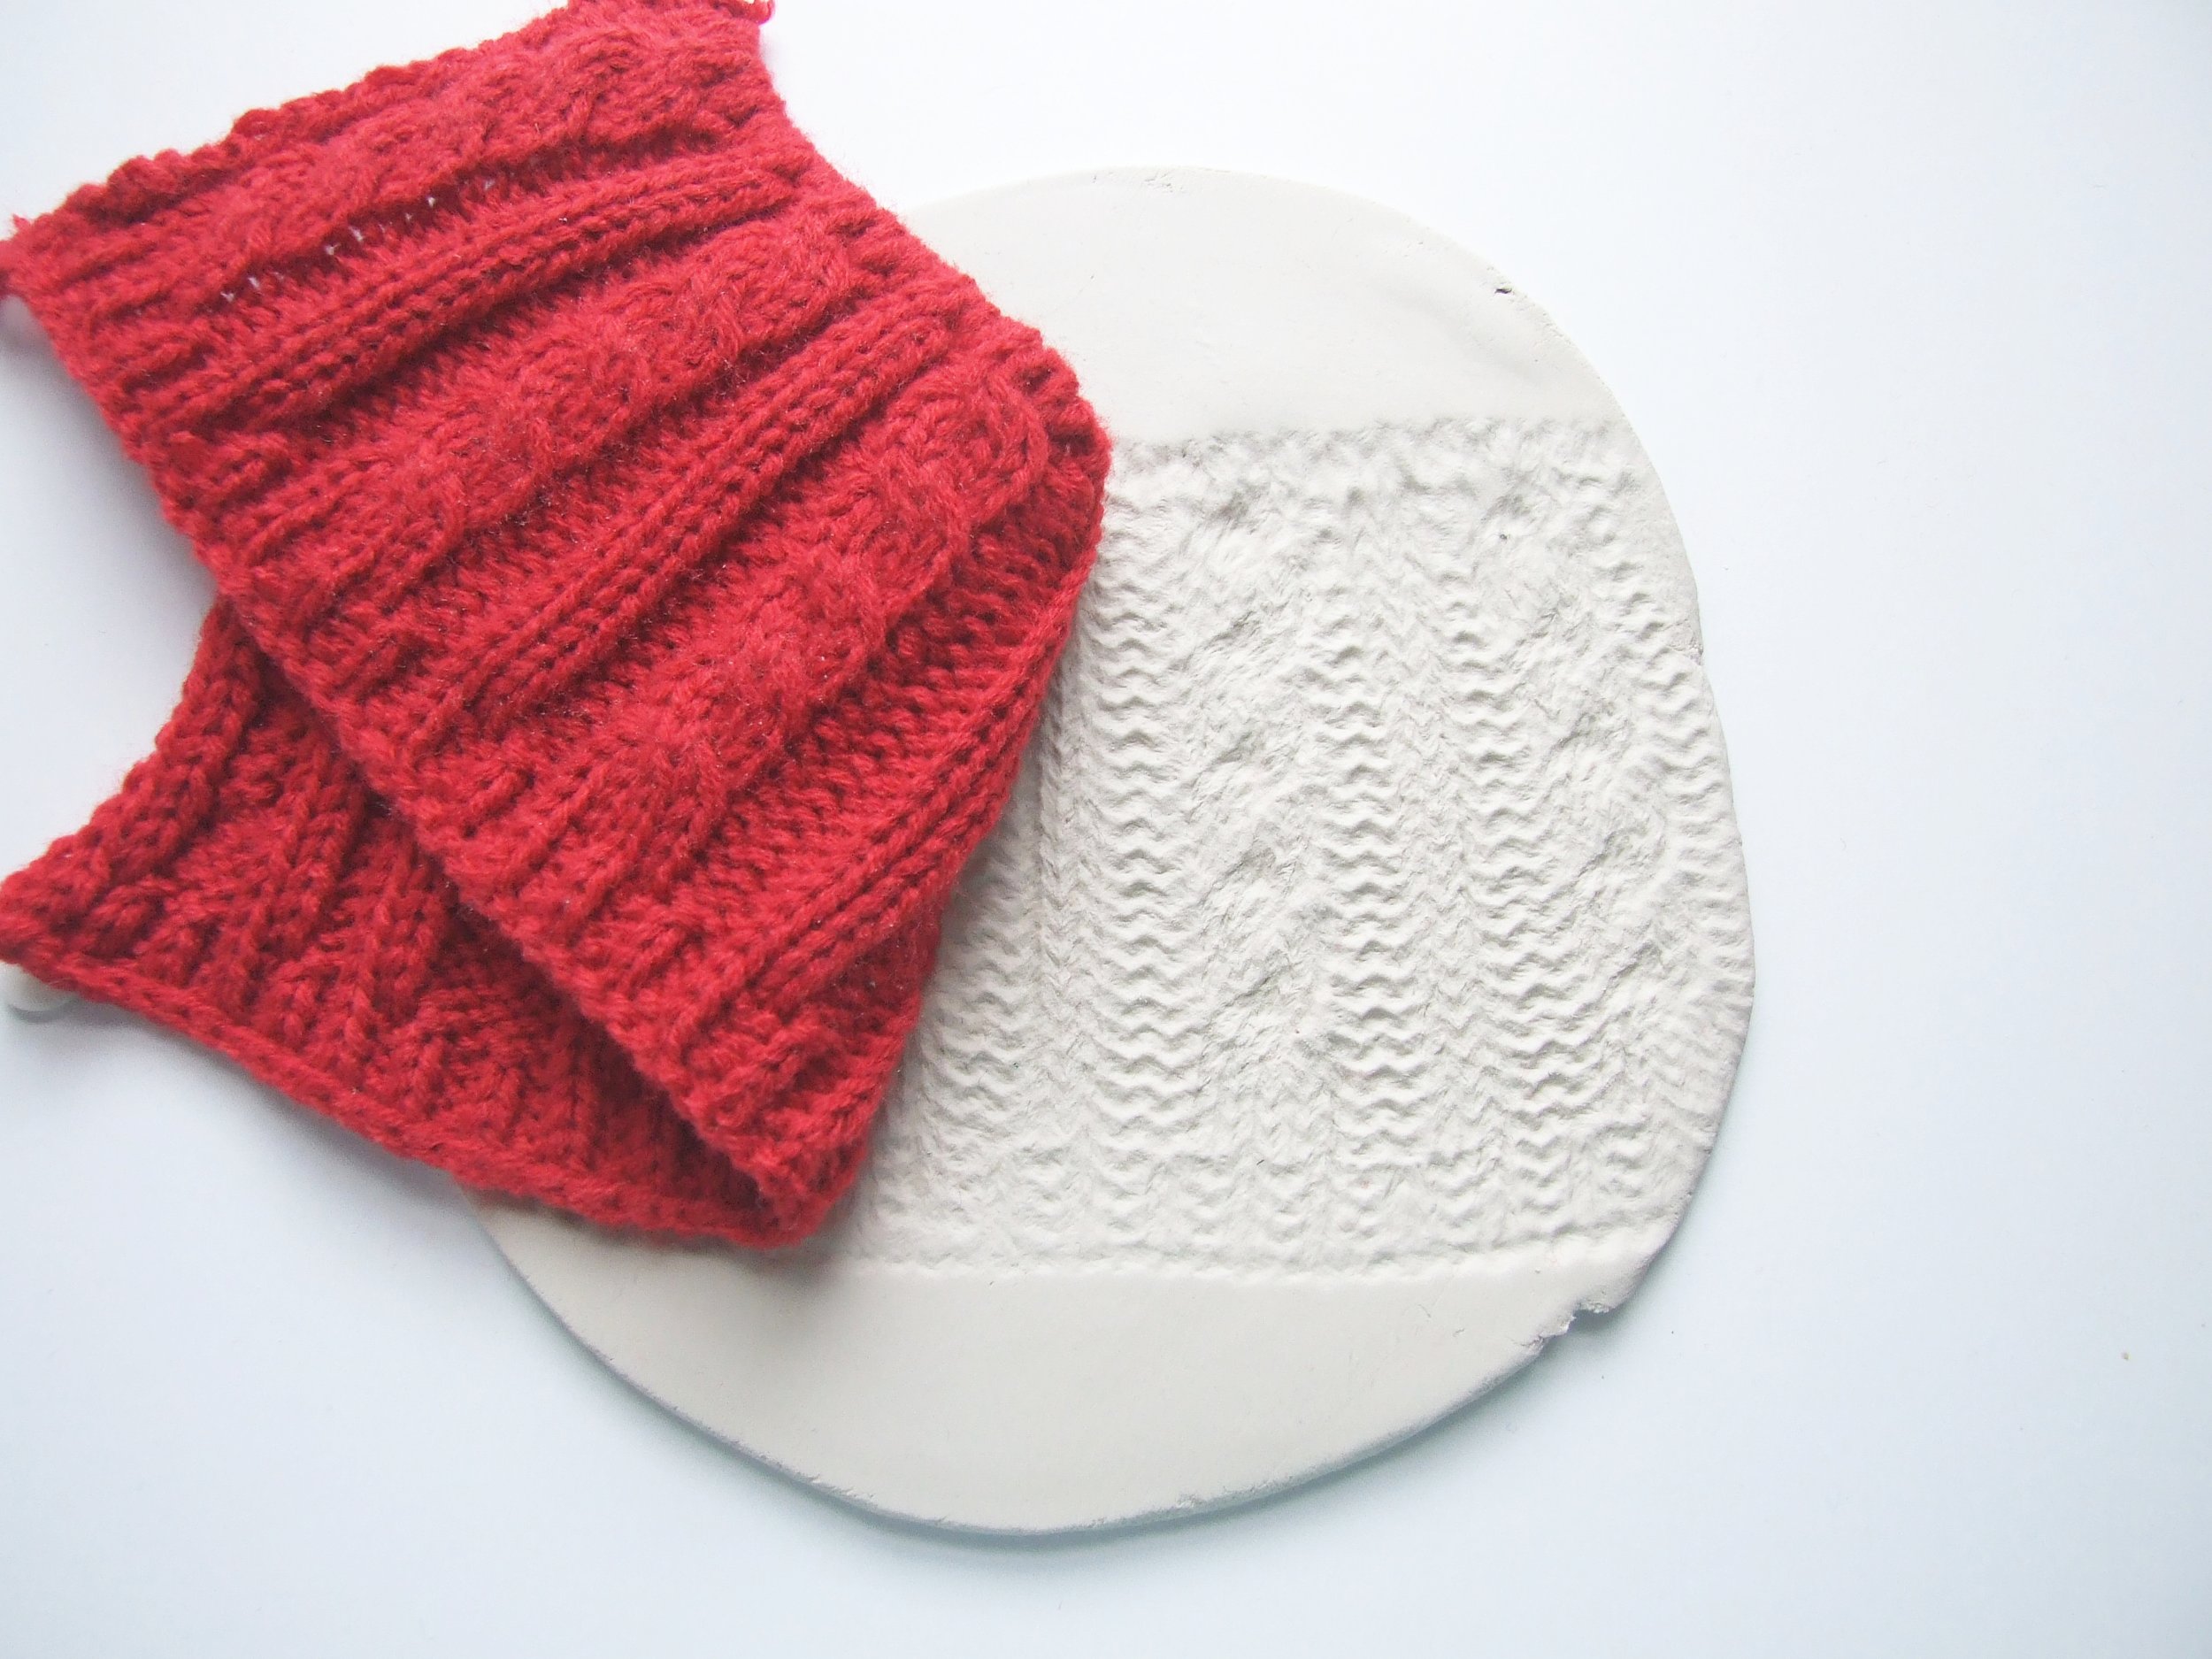
How To Emboss Air Dry Clay.
1. Take your cable-knit wool or whatever you’re using to give the clay texture and place it on top of the clay.
2. Use the rolling pin to press the wool firmly into the clay.
Make sure to apply even pressure with the rolling pin. You can always peel back a corner first to make sure you're happy with the pattern before you remove the whole thing.

3. Cut out the star shape using a cookie cutter.

4. Use a straw to cut out a hole and leave to dry like the other stars.
5. Thread on some ribbon and hang.

Remember you don't have to use wool to emboss your clay. You can use stamps or anything else that will leave an impression. I used these stamps to decorate some of my stars.
Depending on the humidity and thickness of the clay it can take up to 72 hours for the clay to dry. If you don’t have the time to wait you could try using polymer clay that you can bake in the oven or how about making a simple salt dough instead?
I love these. I think they'd make great gift toppers as well as tree decorations and you could even make teeny tiny ones and string them together to make a sweet star garland.
What do you think?