How To Make Air Dry Clay Bowls
/Learn how to make your own beautiful stamped clay bowls using air-dry clay. Not only is it strong and durable, but no firing or baking is required.
Using these simple techniques, you’ll soon be creating pretty catch-all clay dishes to decorate your home or give as gifts.

This page contains affiliate links. This means that if you make a purchase after clicking a link I earn a small commission but it doesn’t cost you a penny extra!
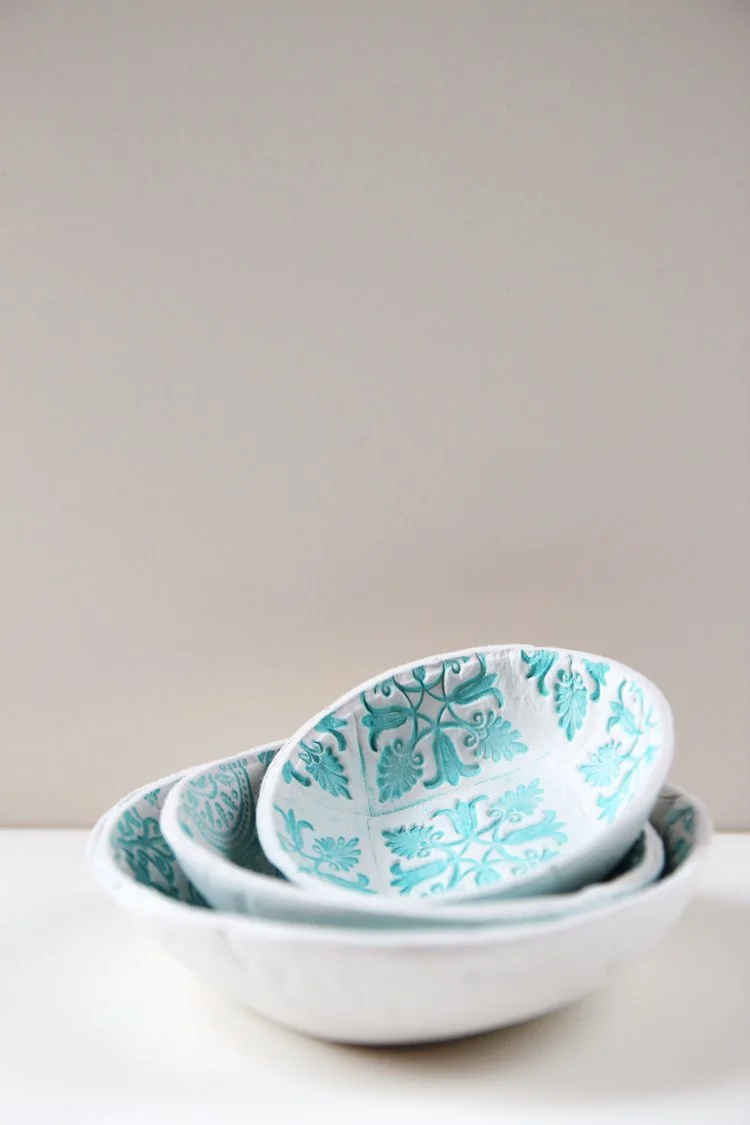
Air Dry Clay Bowls.
I'm obsessed with air dry clay. It’s easy to use, cheap to buy and can be used to make almost anything. From small dishes to plant pots and jewellery to candle holders. It’s an incredibly versatile product. If you’ve never worked with air dry clay before, trust me, you’re going to love it.
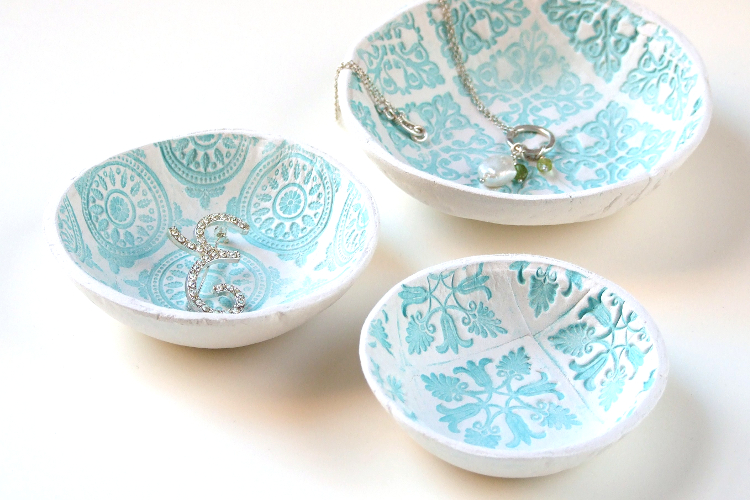
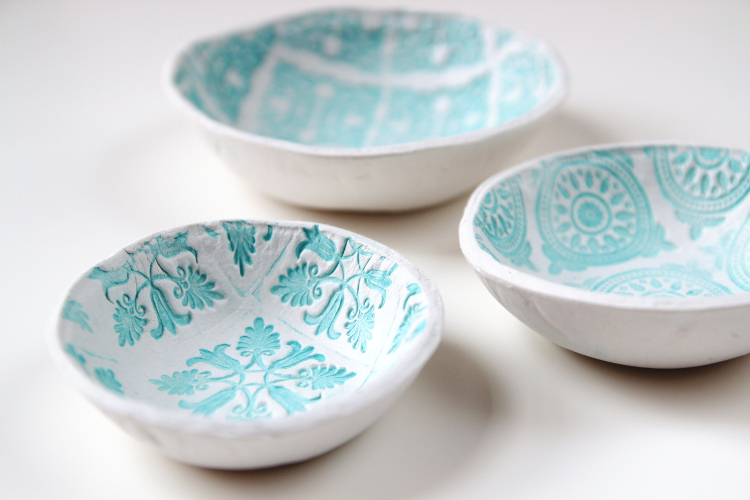
One of my favourite things to make is these pretty little bowls. They can be used as a ring dish, personalised and given as a keepsake or used as home decor.
I currently have mine out on my desk and use them to hold washi tape and paperclips but I’ve also used to keep loose change and keys safe as well.
Related: DIY Air Dry Clay Marbled Bowls
Making Clay Bowls At Home.
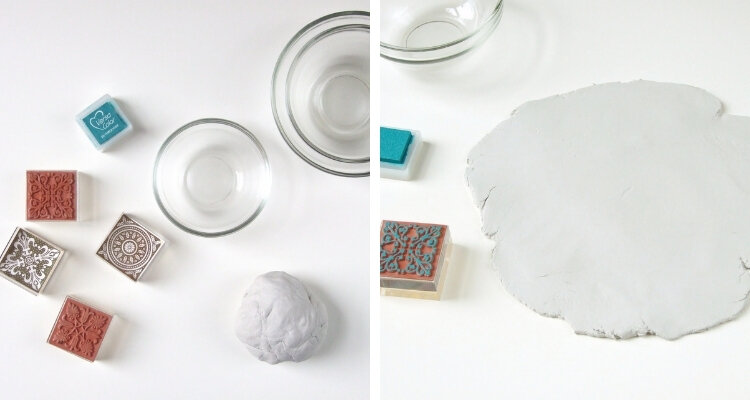
Making your own DIY clay bowls is easier than you may think. All you need is some air dry clay, a collection of rubber craft stamps, an ink pad and something to cut around.
Apart from the clay, you’ll probably find you have a lot of the supplies already on hand. A knife, a glass to cut around and a small bowl to use as a mould.
If you don’t have any rubber stamps or ink you could use anything textured to leave an impressive, the bottom of a vintage glass or maybe an old cable knit jumper as I did with these embossed clay stars.
Customise them by changing up the ink and stamps and create your own decorative works of art. They’re a lovely craft project to make on a rainy afternoon.

Supplies:
Air Dry Clay
There are several kinds of air dry clay available. I’ve tried quite a few but the Das Air-Hardening Clay is my favourite and the one I used to make these bowls.
Not only is it durable but it dries hard and can be sanded easily once dry for a smooth finish.
And the rest of the supplies needed:
A Selection of Stamps or anything else you could use to make an impression (I used these ones to make the bowls),
An Ink Pad ( I used the Tersacolor Pigment Ink Pad - Turquoise US / Tersacolor Pigment Ink Pad - Turquoise UK),
A Craft Knife,
And Sandpaper.
Please remember that these bowls are not food-safe. They are to be used for decorative purposes only.
How to Make A Clay Bowl.
1. Take your air dry clay and knead until soft and pliable. This makes it easy to work with.
You can store any leftover clay in an airtight container.
2. Roll your clay out to about 3-5 mm thick. Any thicker than this and it will take longer to dry.
Top Tip:
Even though air dry clay is non-toxic, it’s still a good idea to keep any tools that touch the clay away from food in the future.
Any cookie cutters or rolling pins should be kept separate and not used in any future baking projects. An acrylic rolling pin designed to be used with clay is perfect.
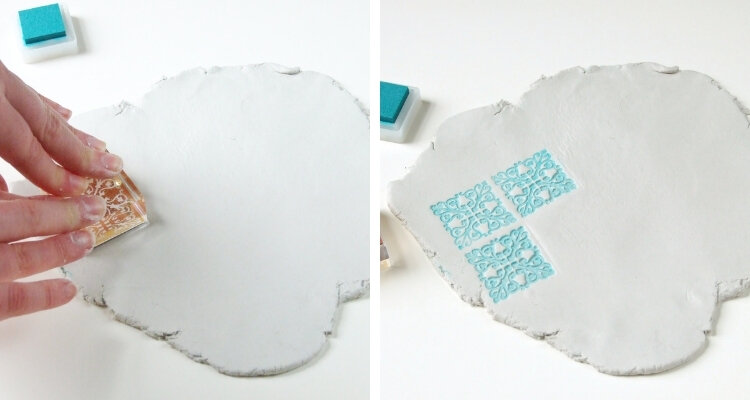
3. Ink up your stamp ( I used these stamps) and press firmly onto the clay.
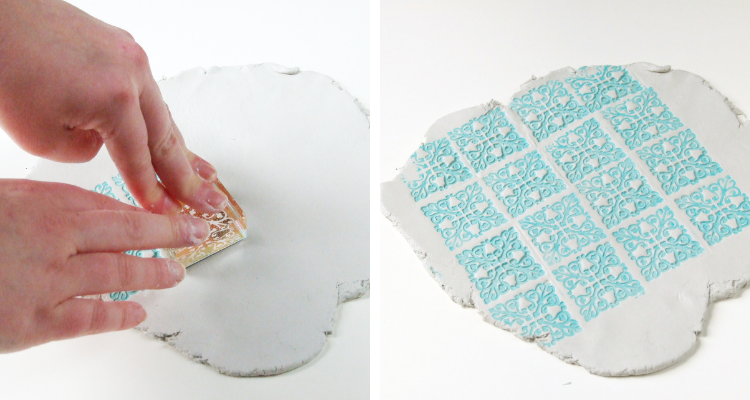
4. Repeat until you have covered the clay with your stamped design.
Try not to press too hard as you want to be able to lift the clay away from the table easily and not stretch out the design.
If you have problems with the clay sticking to your work surface you can roll the clay out onto some greaseproof paper or a silicone mat first.
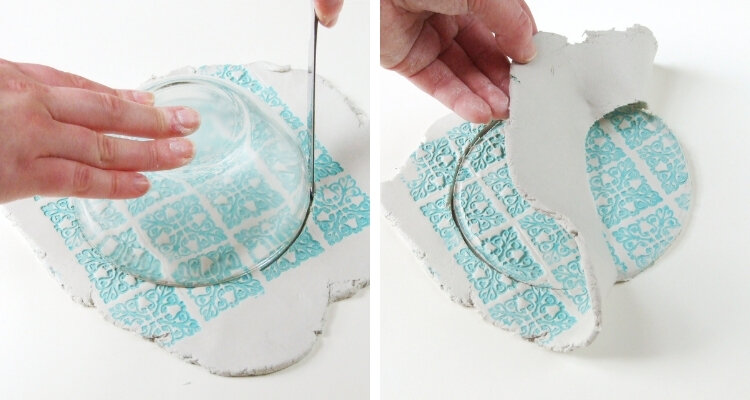
5. Take your bowl and place it upside down on your clay.
6. Use your knife to cut around the edge of the bowl.
7. Peel away the remaining clay to leave the circle of clay behind that will form your bowl. Any rough edges can be smoothed using your fingers and a small amount of water in a bowl.
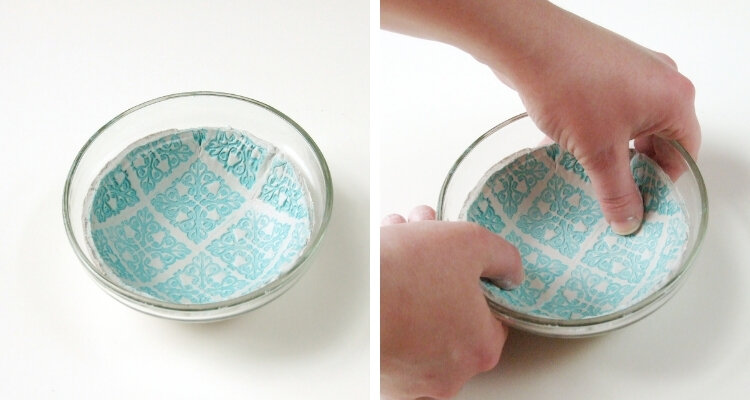
8. Lift your clay circle carefully and place it inside your bowl. Using your thumbs press the clay down gently into the bowl.
I found it works best if you try and apply even pressure as you work your way around the bowl. Where I pressed too hard the clay bunched up and creased and the pattern became warped.
Check out the video for two more ways to make your bowls.
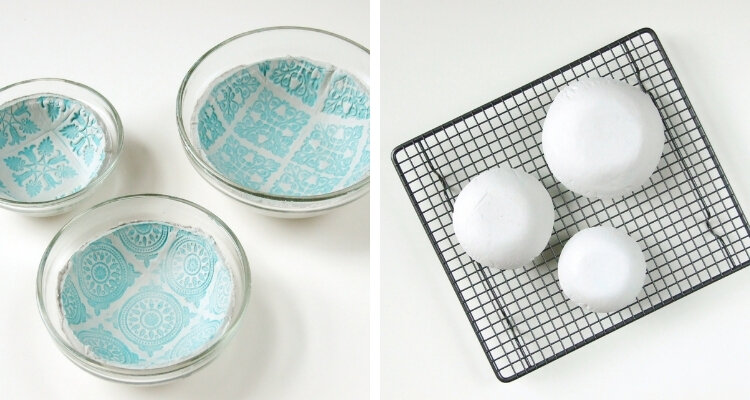
9. Repeat until you have as many bowls as required and leave to dry overnight. As the clay dries and the water evaporates it will turn from a pale grey to white.
By the next day, the printed side of the clay should be hard enough for you to remove it from the bowl. You may find the clay is still damp where it's been touching the glass bowl. Place your bowls upside down on a baking cooling rack to allow both sides to dry fully.
I found the drying time for this air dry clay differed greatly depending on the weather. In warm weather, the clay dried quickly (around 36 hours) but in cold, wet weather it took up to 72 hours to dry.
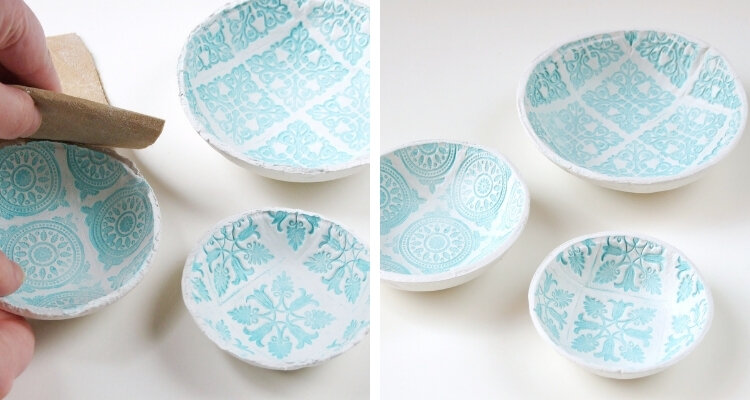
10. When your bowls are dry, sand away any rough edges.
11. Leave your bowls as they are or seal with a layer of varnish. You can find more tips on how to glaze air dry clay here.
How to varnish air dry clay.
There are a few ways you can seal air dry clay. You can find all my tips and tricks for glazing air dry clay here. Wait until your bowls are completely dry, at least 72 hours but I’d recommend leaving them longer if you can before apply a thin layer of varnish with a foam brush.
I’ve used and had good results with the Mod Podge Waterbase Sealer and the Crayola Model Magic Glossy Glaze. If you want to go the DIY route you can use my DIY glaze for clay crafts. I’ve made both a clear and coloured version and find it works really well.
Please remember that sealing your air dry clay will not make it food safe or waterproof. These bowls are for decorative purposes only.
Got questions? Don't panic, keep reading for my top tips.
F.A.Q's.
1. I've opened my clay and it looks grey. Does the clay change from the grey I'm seeing to the white in the pictures?
Yes, the clay starts off white and dries to a matte, white finish.
2. Argh, help. My clay is sticking to my work surface, what can I do?
If you haven't got a glass cutting mat or silicon mat I recommend using some greaseproof or parchment paper. It makes it much easier to lift and peel the clay away. As it absorbs the moisture from the clay it does begin to wrinkle so try not to leave the clay on it too long.
3. Is the clay food safe? What can I use them for? Can I use these bowls for snacks?
The air dry clay isn't food safe and should be used for decorative purposes only. So far I've used mine for storing jewellery, keys and office supplies.
4. My ink has faded, what can I do to fix this?
When choosing an ink pad look for a permanent pigment ink. It takes longer to dry but is fade-resistant. Dye-based inks whilst also considered permanent can fade over time when exposed to the sun.
5. The sides of my bowls have wrinkled? How do I stop this from happening?
Apply a light, even pressure when pressing the clay into the bowls. When you press too hard the clay can bunch up and wrinkle. Sandwiching the clay between a large bowl and a smaller bowl like in the video above, is the best way I've found to stop this from happening.
6. It's been days and days and my clay still isn't dry help!
As the clay is self-hardening, the drying time can vary greatly depending on the weather. In warm, dry weather, the clay can dry in around 24 hours.
However, in cold, wet weather (which feels like most of the time here in the U.K.), it can take several days so make sure to allow for extra drying time.
7. How long will they last?
5 years on and I still have mine. They sit on my desk holding washi tapes, paperclips and other bits and pieces. I've used them so much and they still look just as good as they did when I first made them.