Easy Origami Box With Lid
/Want to know how to make an Origami Gift Box? Then look no further. These easy boxes can be used for gifts, storing trinkets or as handy desk tidies.
Follow these simple step-by-step instructions and you’ll be able to make these pretty origami gift boxes with lids in minutes. Perfect for any last-minute gift-giving occasions.
This page contains affiliate links. This means that if you make a purchase after clicking a link I earn a small commission but it doesn’t cost you a penny extra!
Origami Gift Box.
Are you looking for a cute gift box you can make yourself? Then these easy origami gift boxes are a fantastic place to start. I’ve been making them for years and they never fail to make a simple gift look extra special.
They’re a traditional origami box also known as a masu box. Originally a square wooden box used to measure rice, this small paper version can be used as a gift box to hold small trinkets or sweets. For anyone who wants an easy origami project, this is the box for you.
Gift Box Origami.
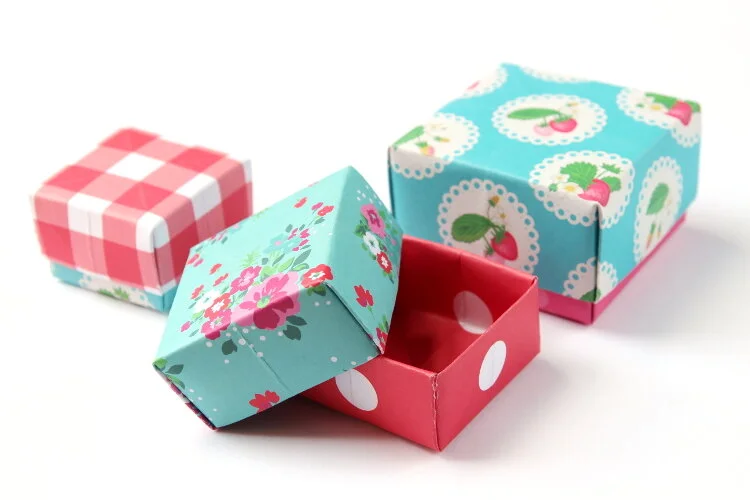
If you’ve been here a while, you know I love making DIY gift boxes as well as everything origami so obviously, I couldn’t wait to share a craft that combines the two. I’ve made a few different origami boxes but these are by far the easiest.
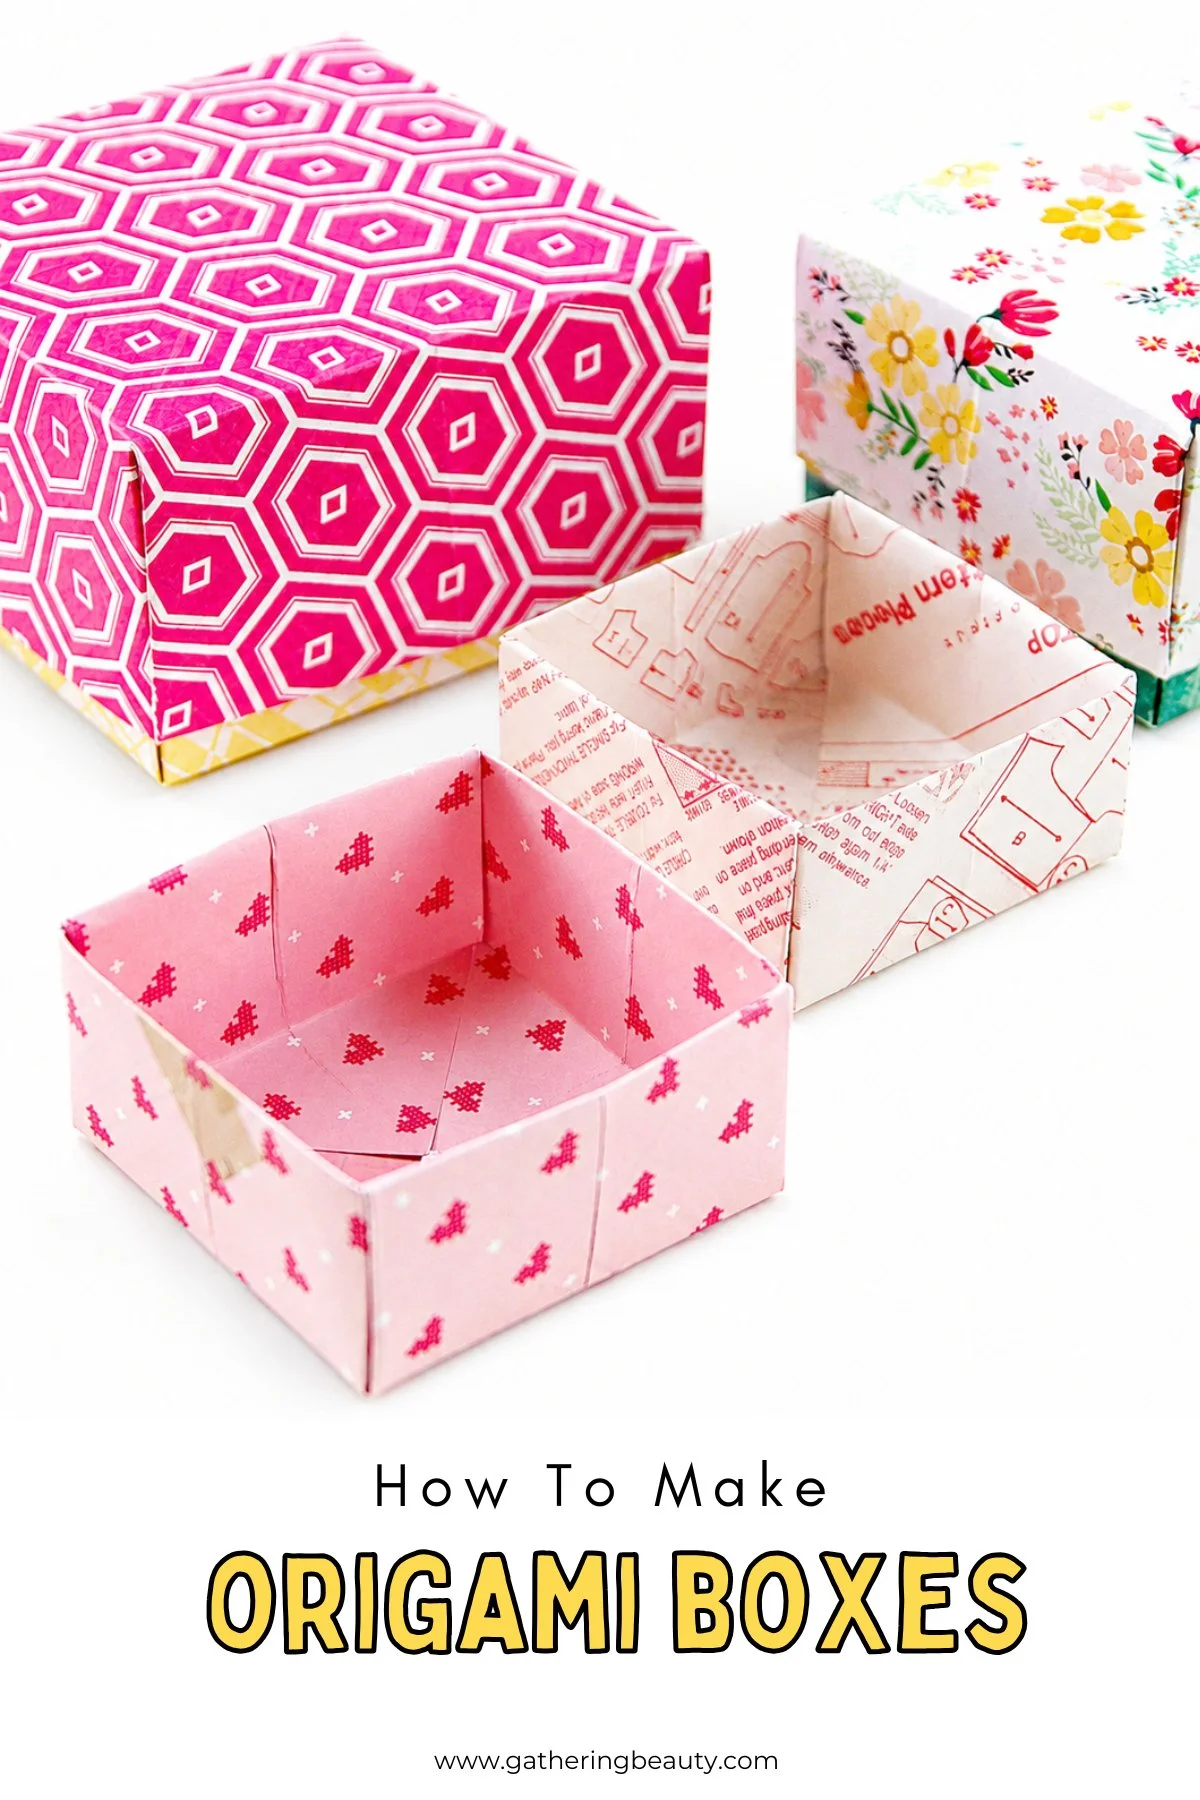
They can be made using paper, lightweight cardstock or even scrapbook paper. Customise them using your favourite patterned paper and make them any size you want. The smallest I’ve made were 2 x 2 inches square and I used them to make an origami advent calendar.

Origami Gift Box Step By Step.
For each box, you need to make two pieces. One for the base and one slightly larger for the lid. Each half only takes a couple of minutes to make.
Once you’ve had a bit of practice, it shouldn’t take longer than five minutes for you to make a whole gift box from scratch.
To make a sturdy gift box, I recommend using scrapbook paper or lightweight cardstock. It’s harder to fold but means your box will be stronger and able to hold something heavier like delicious homemade cookies.
To make mine, I used 12 x 12-inch scrapbooking paper. I find that scrapbook paper is thick enough to make a sturdy box but not too thick (like a piece of cardstock) that folding becomes too difficult.
Supplies:
Paper Trimmer or a Craft Knife,
Ruler,
And a Cutting Mat.
Sadly, the paper I used is no longer available but you can check out the rest of the American Crafts range for more pretty papers.
To make the medium size box I used 10 x 10-inch and 9.5 x 9.5-inch squares of paper, for the small box I used 8 x 8-inch and 7.5 x .7.5-inch paper.
I even have some printable origami paper you can download and use for FREE. Simply download, print and cut into 7x7-inch squares to make some sweet mini gift boxes. Click the image below to get yours.

To make your origami box, you are going to need 2 pieces of square paper; the second needs to be 1/2 inch smaller than the first.
So if you're using a 12 x 12-inch piece of scrapbook paper, the second piece needs to be 11.5 x 11.5 inches. The larger piece will form the lid of your box.
Top Tip: The inside of the boxes should sit flat but if you have any problems, you can always secure it with a little glue or maybe hold it in place with some cute stickers.

How To Make An Origami Gift Box:
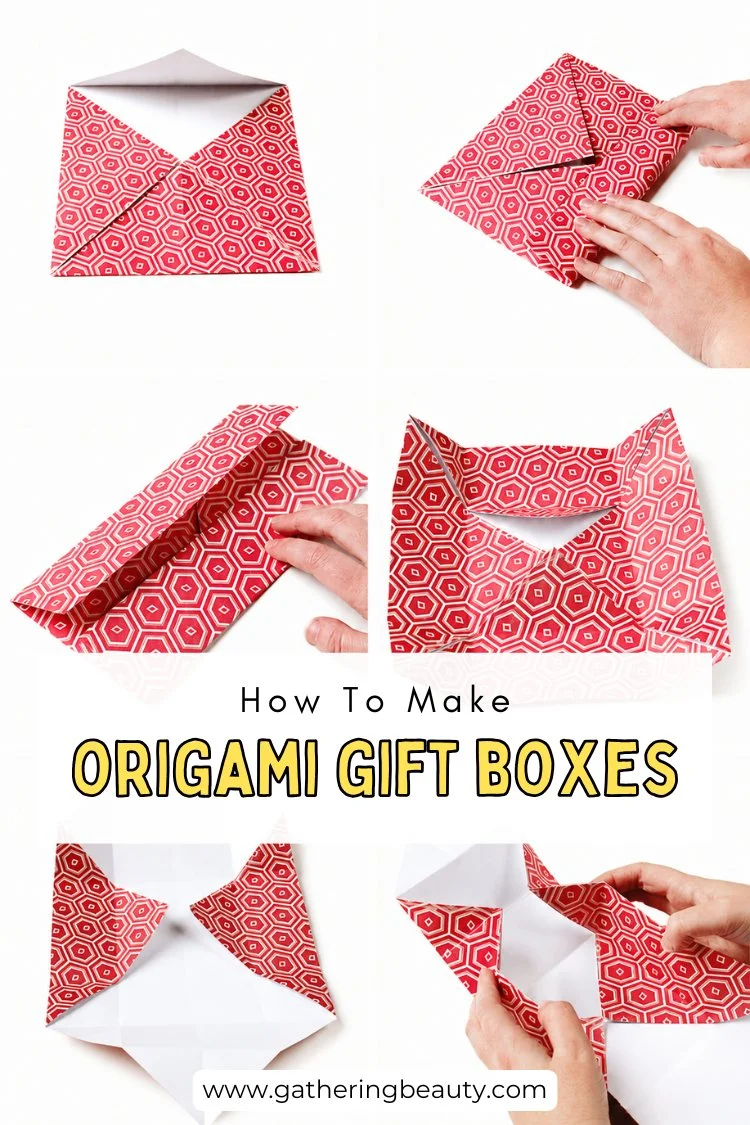
1. Place your paper pattern side down, fold in half and crease. Open your paper out.

2. Turn 90 degrees and fold in half again. Open out. Your paper should now be divided into 4 squares.
3. Next fold your paper corner to corner on the diagonal to form a triangle.

4. Open it out, turn 90 degrees and repeat.
5. Fold one of the corners into the center of your paper square.

6. Repeat for the other 3 corners.
7. Take your square and fold the bottom and top edges into the center. Open back out.

8. Rotate 90 degrees and repeat step 7.
9. Open back out.

10. Lift up 2 opposite triangles and lay them flat.
11. To form the box lift and fold the sides towards the centre.

12. As you pull on the sides the top triangle will start to pull up. Collapse in the corners and crease.
13. Lift the top triangular flap up and over to form 3 sides of your box.

14. Turn 180 degrees and repeat on the other side.
15. Repeat the whole process again this time using the smaller square of paper.
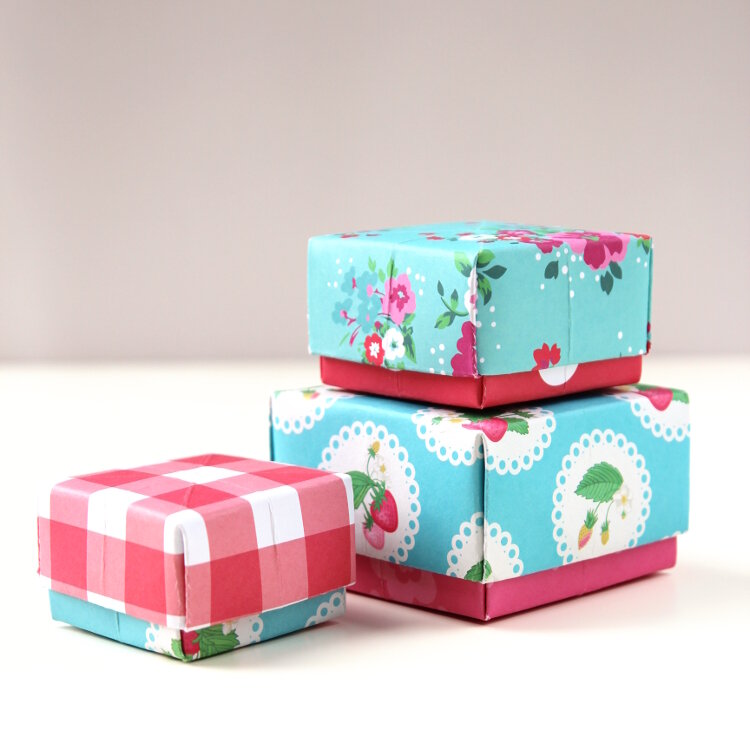
Once finished the larger box should fit easily on top of the smaller one to form your origami gift box.

I've been using them for Christmas presents but you could use them all year round to hold whatever you want. Tie them up with a pretty ribbon and I think they’d make beautiful wedding favours.