DIY Mini Weaving - Using Clipboard Loom
/Learn how to make a DIY mini weaving using a simple clipboard as a loom! This beginner-friendly craft tutorial shows you how to create a beautiful woven wall hanging using yarn, twine, and textured trims. Perfect for trying weaving without buying a loom.

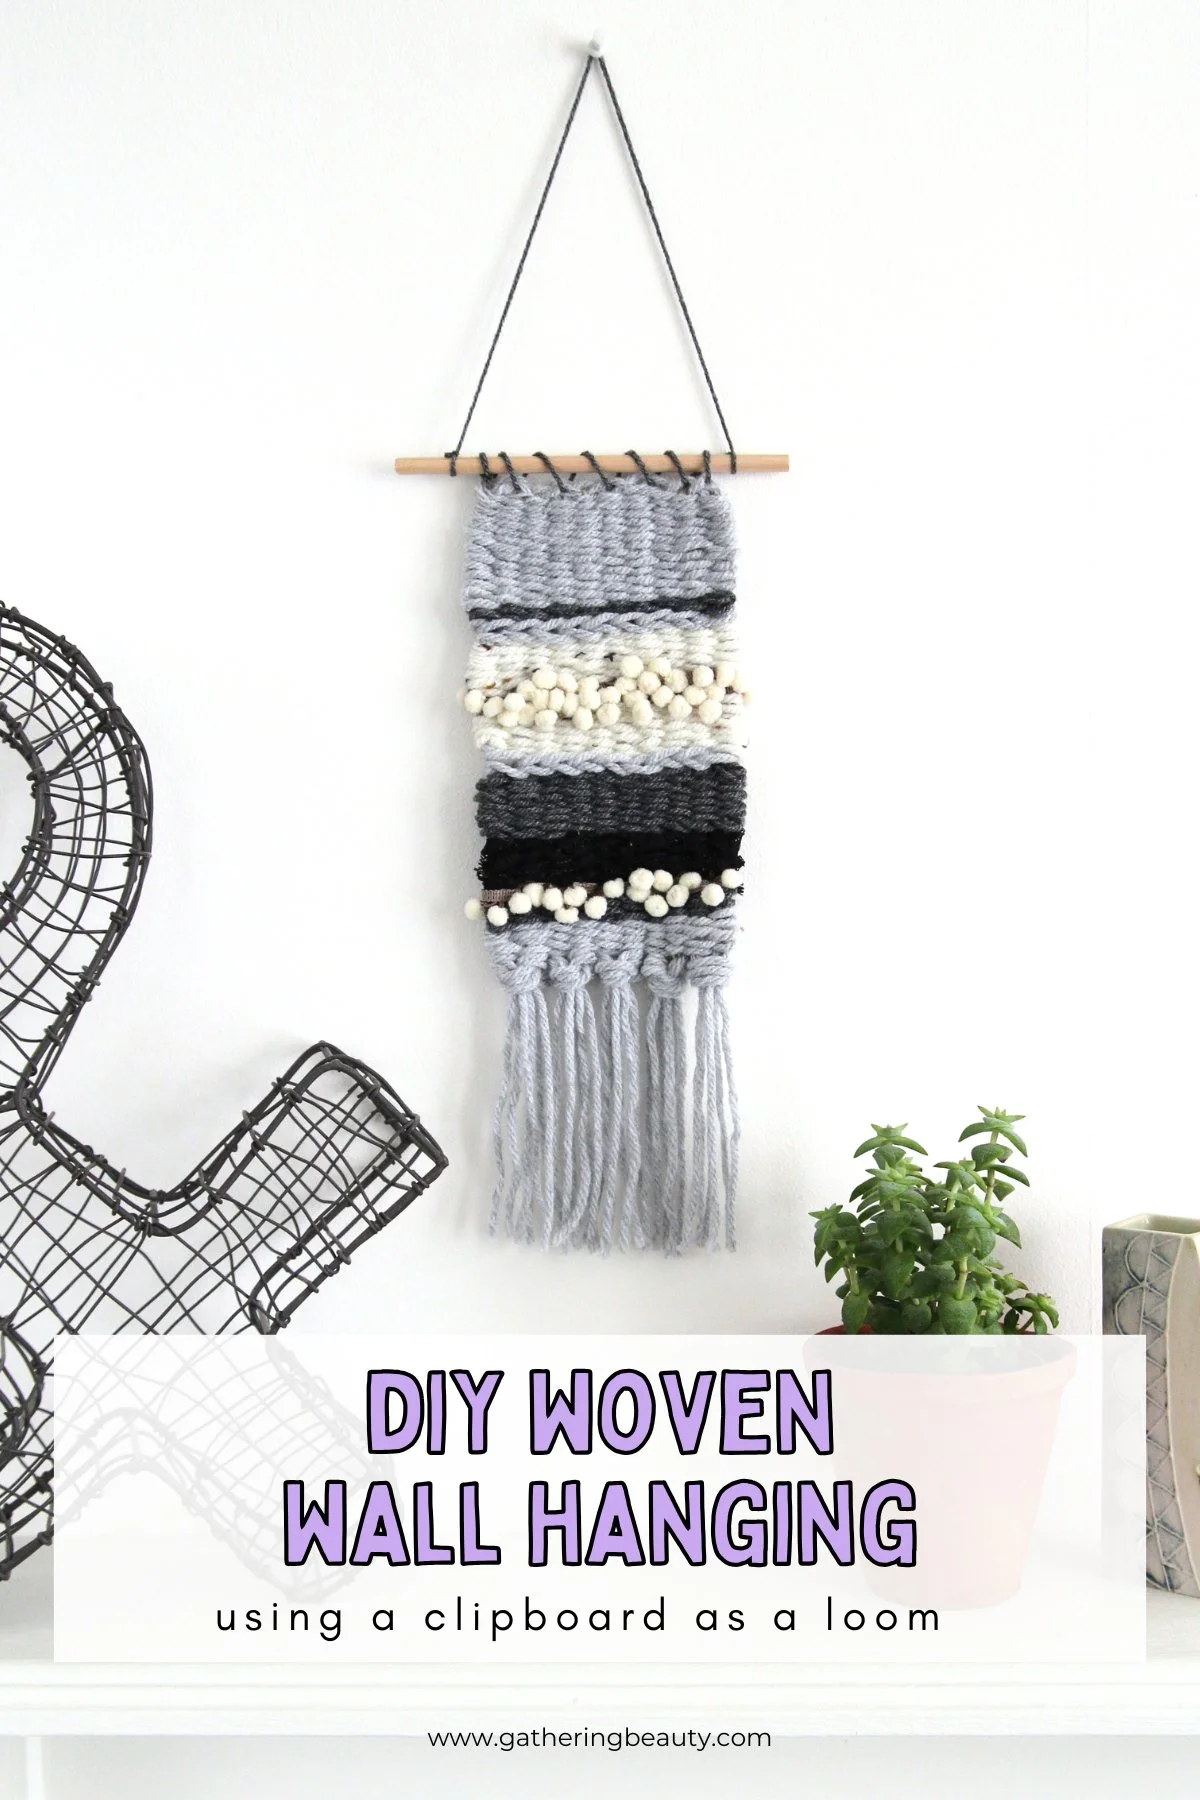
How to Make a Mini Weaving on a Clipboard Loom.
Have you ever wanted to try weaving but didn’t have a loom? Good news, you don’t need one. Today, I’m sharing a fun and simple project where you can create a mini woven wall hanging using nothing more than a clipboard as your loom.
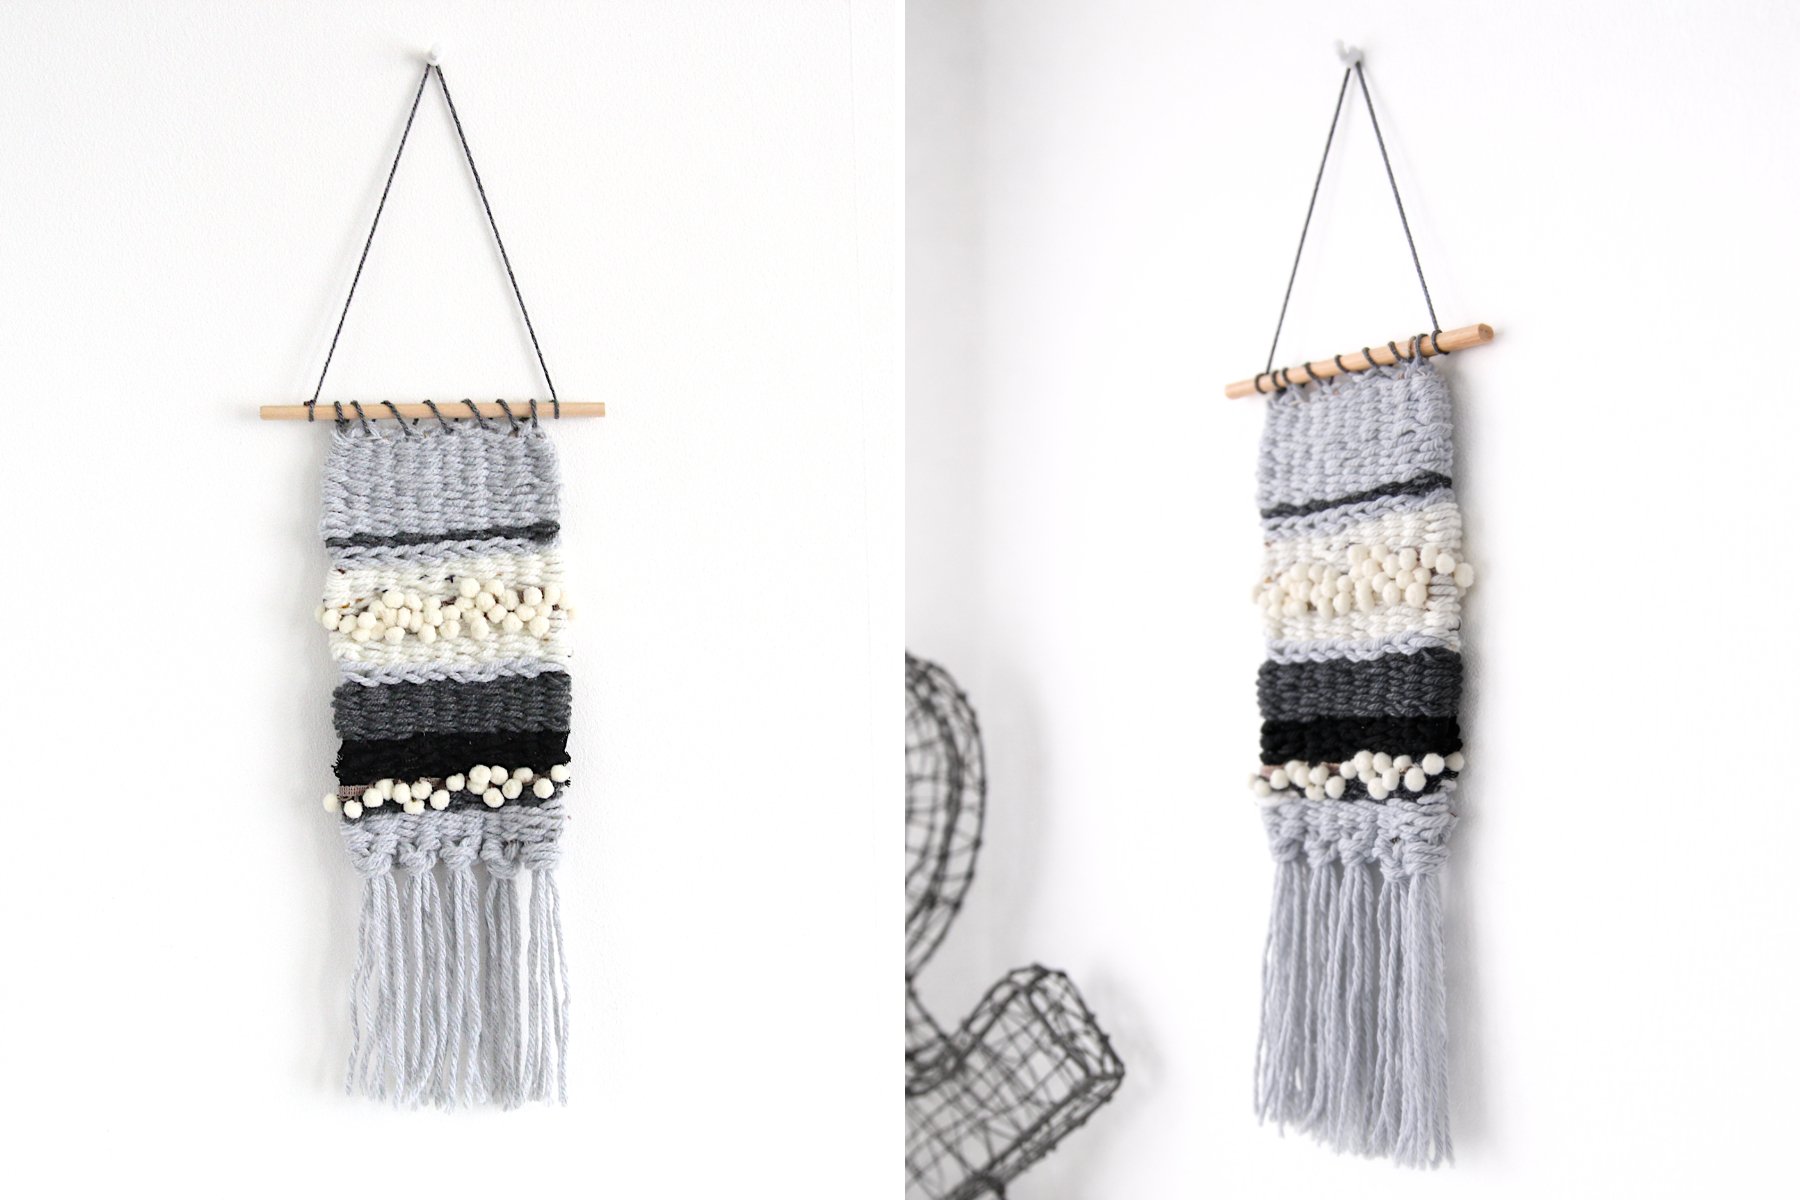
This is a great beginner project if you’re new to weaving. It’s quick, inexpensive, and perfect for experimenting with different yarns, textures, and colours. Best of all, the finished piece makes a lovely handmade decoration for your home.
If you’ve been curious about weaving, this little DIY is the perfect place to start.

Supplies:
To make your own mini weaving, you’ll need:
Natural twine or jute (for the warp threads)
Wool or yarn in different colours
Optional trims such as ribbon, lace, or pom-pom trim
A fork (for packing down the rows)
Scissors
Wooden dowel for hanging
Using a mix of yarn textures, chunky wool, thin yarn, or decorative trims will make your finished weaving more interesting.

Easy DIY Mini Woven Wall Hanging Using a Clipboard Loom.
1. First, we are going to make the warp.
To do this, wrap your twine around your clipboard. You want 10 rows on the front of your clipboard.
Tie the 2 loose ends in a diagonal knot at the back of your clipboard.
To make your mini weaving wider, all you need to do is add more rows, but remember to add them in an even number so you can tie them off in pairs at the end.
I'd also recommend using a twine or string that doesn't have any stretch to create your warp so your weaving will hold its shape when it's removed from the clipboard.

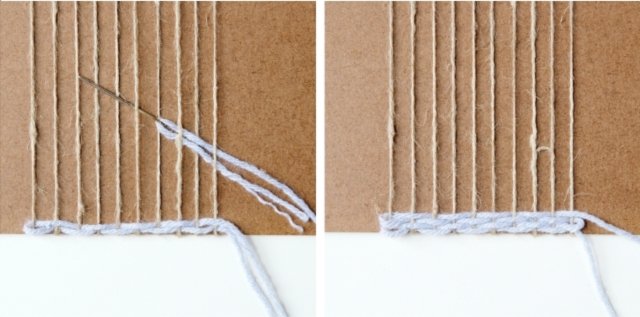
2. To start the basic weave, thread your chosen wool onto a tapestry needle and thread it under the 1st warp thread and over the 2nd, under the 3rd, over the 4th etc until you get to the end.
Make sure not to pull your wool all the way through.
You want to leave a tail of about 4 inches at the end. Don't worry about any loose ends at the moment as we'll be tidying them up later.
3. To stop your weaving from getting tighter and tighter and ending up in an hourglass shape, you can do something called the slanting technique.
4. When you get to the end of a row, pull the wool through on a slanted angle, use a fork to push down the wool at either end to make a hill and then push the hill down flat in the middle.
Try not to pull the wool too tight.

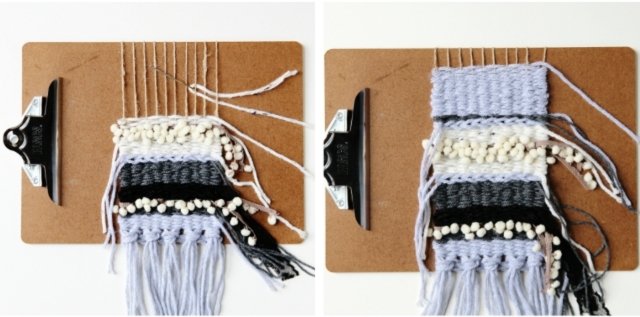
5. Keep going with your basic weave until you're happy with it. I added 4 rows.
I then did a row of 5 tassels. You can see how I made them in more detail over on my Diy Woven Wall Hanging post.
6. Keep weaving in different materials and textures until you reach the top of the clipboard.
Make sure to leave tails at the beginning and end of each row.
I doubled up the dark grey wool and did another 4 rows of basic weave.
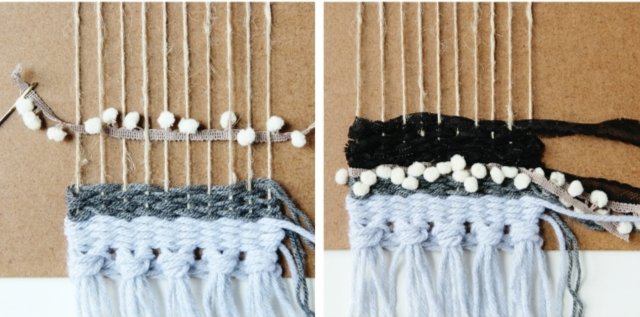
7. Next, I added some pom pom trim and black lace ribbon. The mini pom poms can be a bit tricky; you may need to help them through as you weave.

8. I did a couple of rows of the soumak stitch. You wrap the wool behind and around each warp thread, rather than over or under.
You can find a great tutorial for the soumak stitch over on A Beautiful Mess, scroll down to step 28.
9. Carry on weaving in different textures and materials until you reach the top of the clipboard.

10. When you're happy with your weaving, turn it over and cut through the warp threads about halfway up with a pair of scissors.
11. To secure your weaving and tidy up the loose ends, tie each pair together in a double knot.
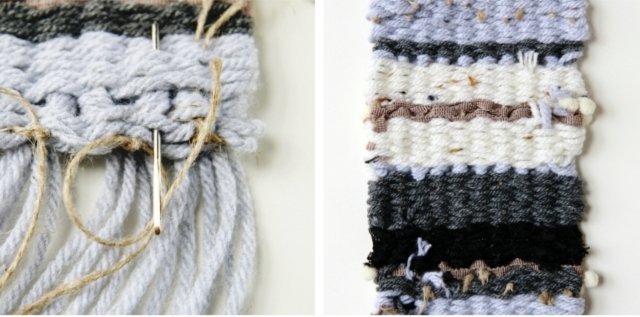
12. Thread the ends onto a tapestry needle and pull them up through some of the stitches on the back. Trim away any excess.
13. Tidy up all the loose tails at the end of the rows in the same way.

14. Attach your weaving to the dowel by stitching through the top, then tie the end tail to the dowel.
15. Keep stitching and looping the wool over the dowel until you reach the end. Tie another double knot at the end to secure.
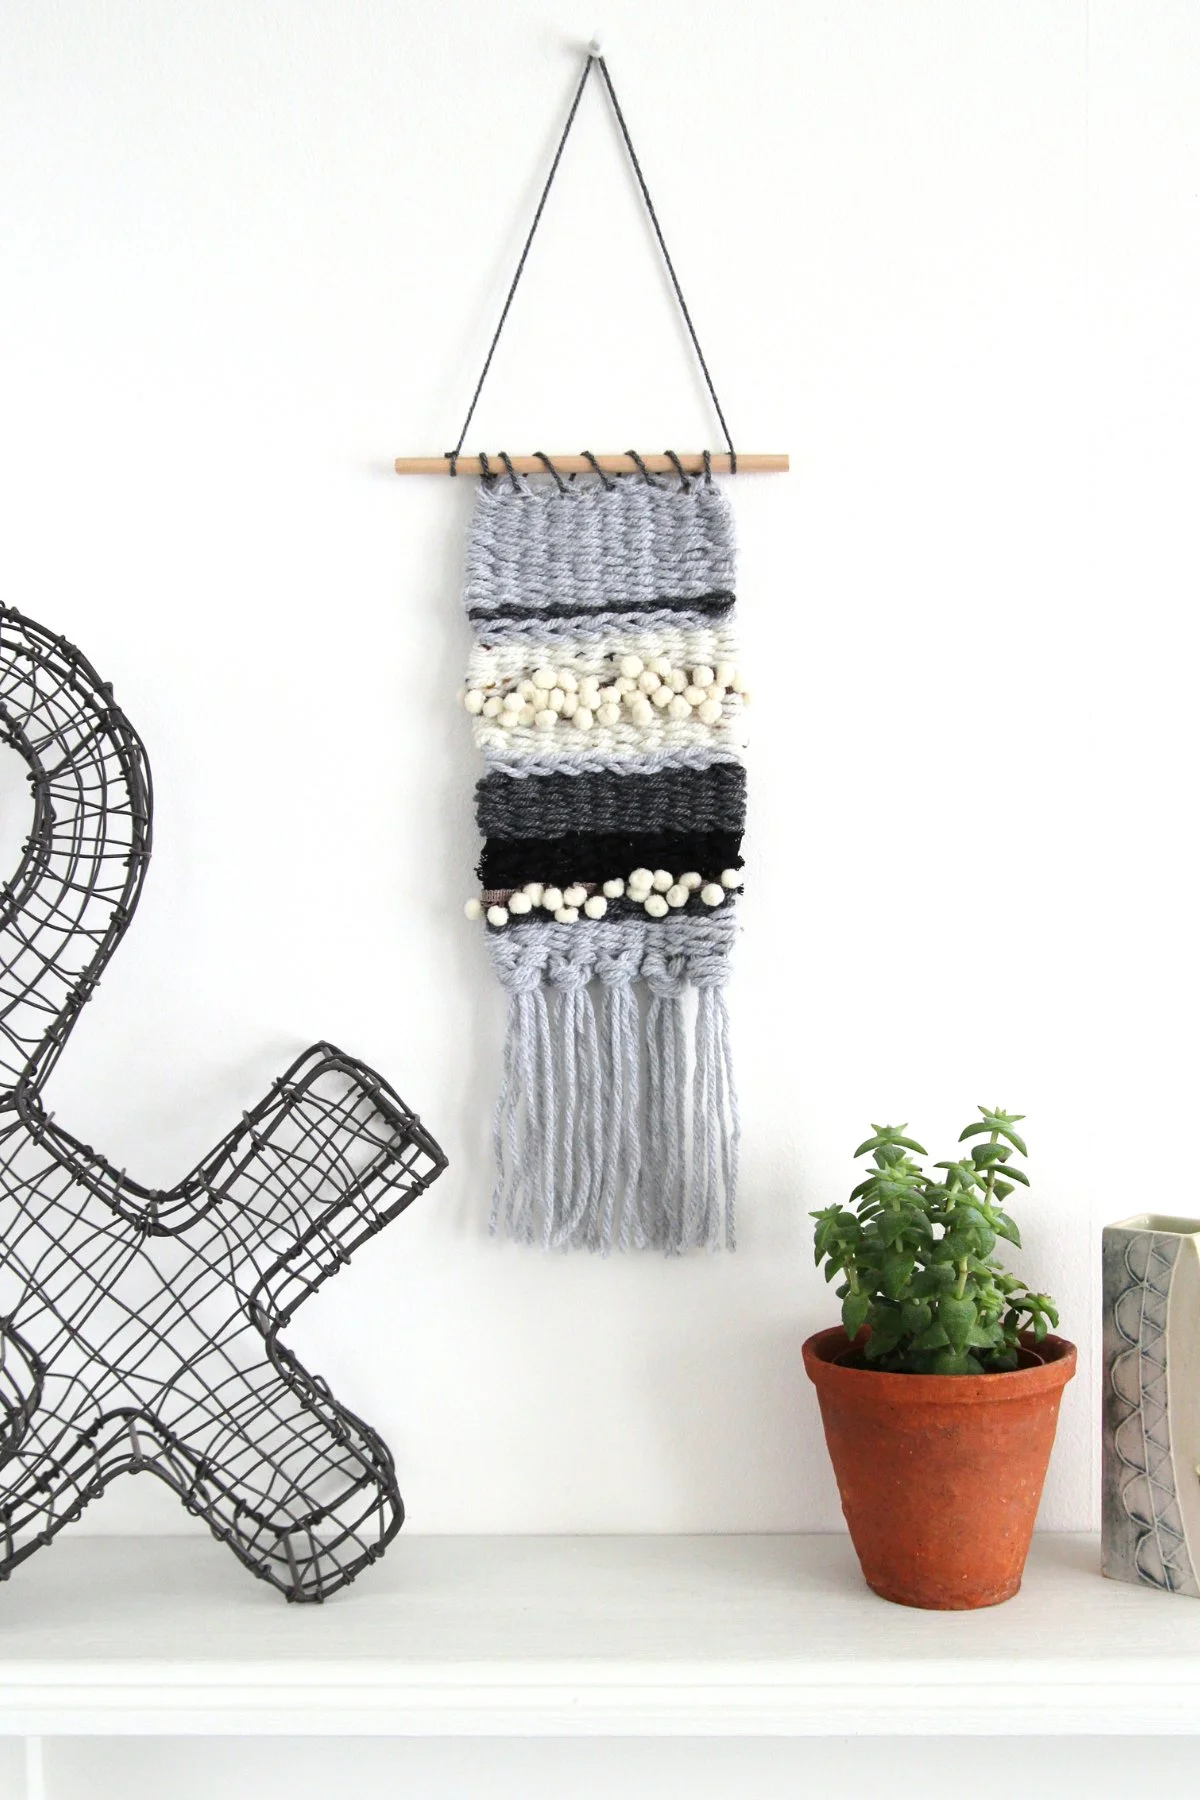
16. Tie some more wool or string to each side of the dowel and hang.