Quick And Easy DIY Mini Clipboards
/Looking for a quick and adorable way to display your wall art? Check out our latest tutorial on making DIY mini clipboards using scrapbook paper and binder clips.
It's super easy and adds a pop of personality to any space!
This page contains affiliate links. This means that if you make a purchase after clicking a link I earn a small commission but it doesn’t cost you a penny extra!
DIY Binder Clip Clipboards.
Today, I've got a quick and easy project. We're going to make DIY clipboards using scrapbook paper, cardboard, and trusty binder clips.
These adorable clipboards are not only practical but also perfect for displaying art prints and adding a touch of creativity to your home decor.
I'm really loving making these quick DIYs and I think this could be one of the easiest and quickest yet.
Easy DIY Clipboards.
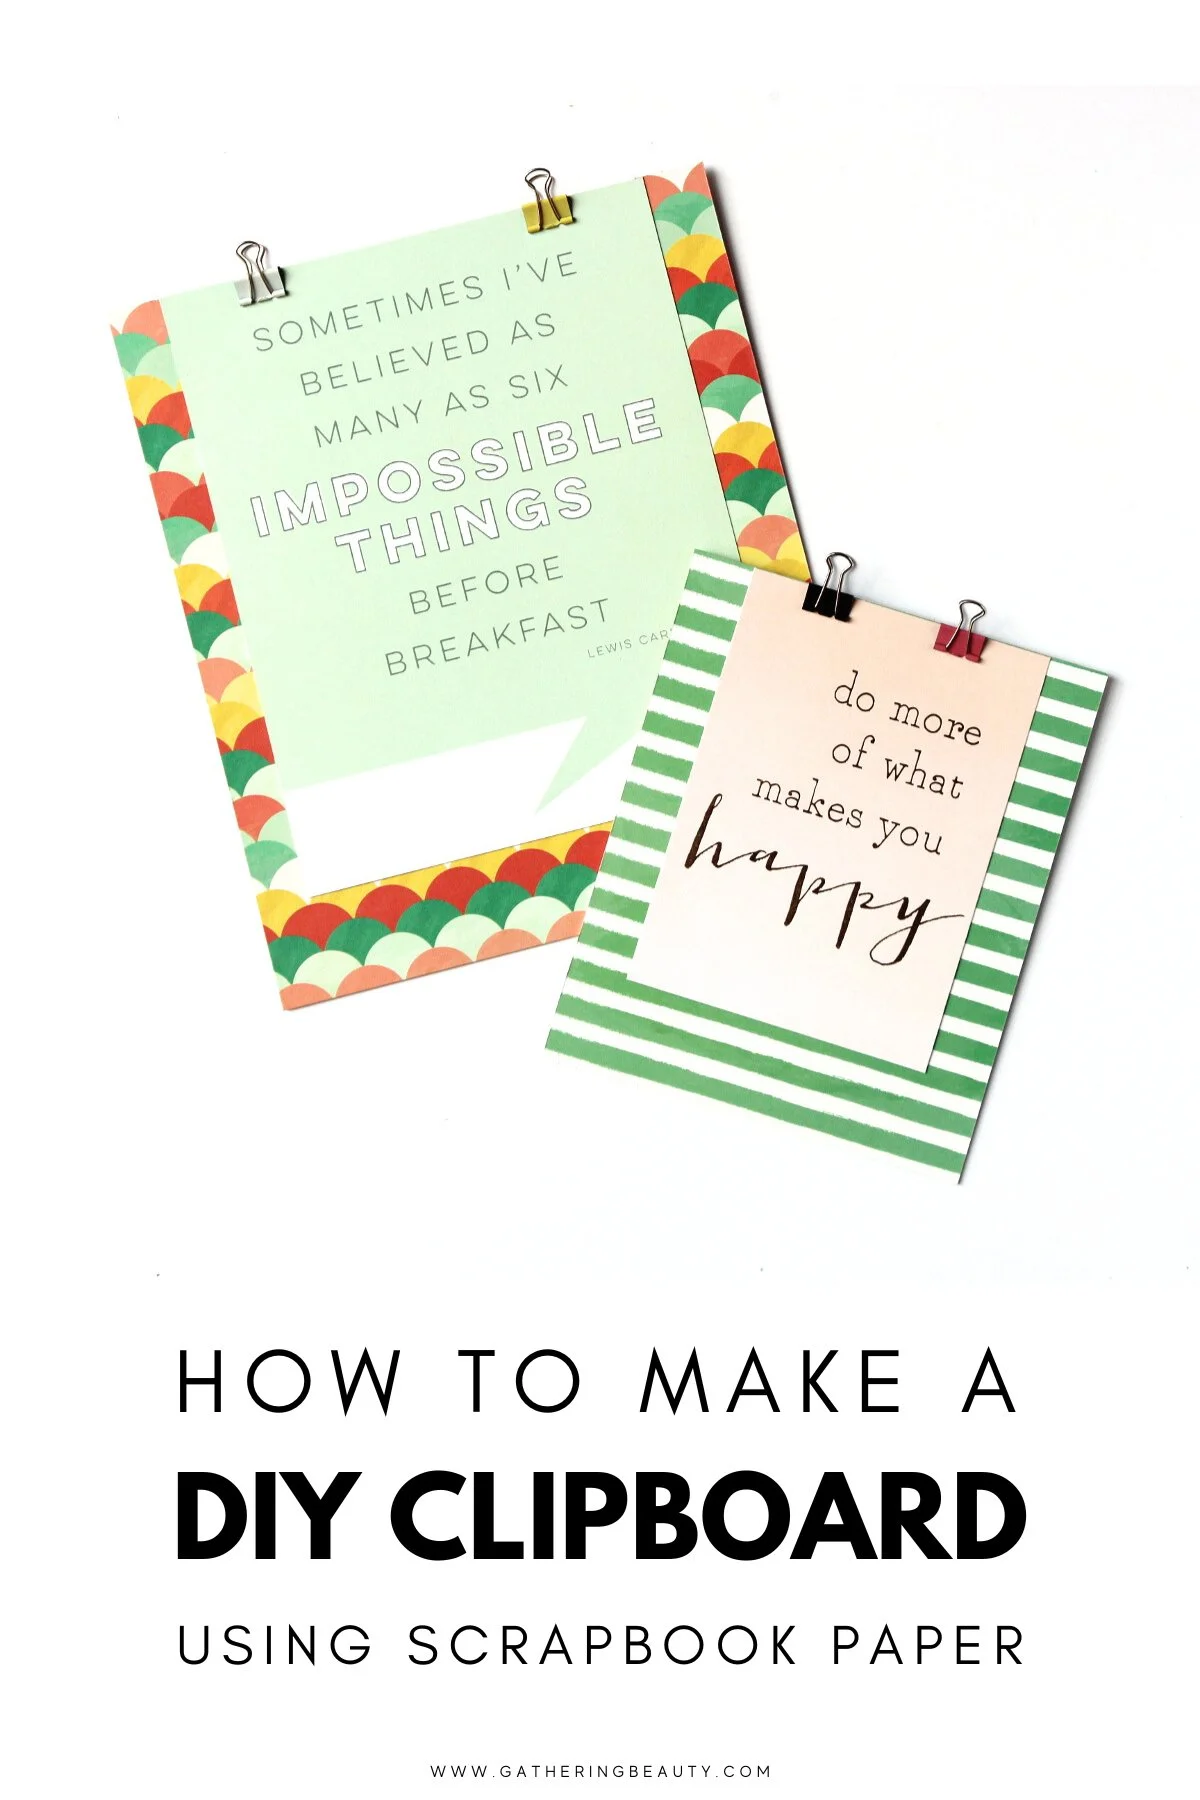
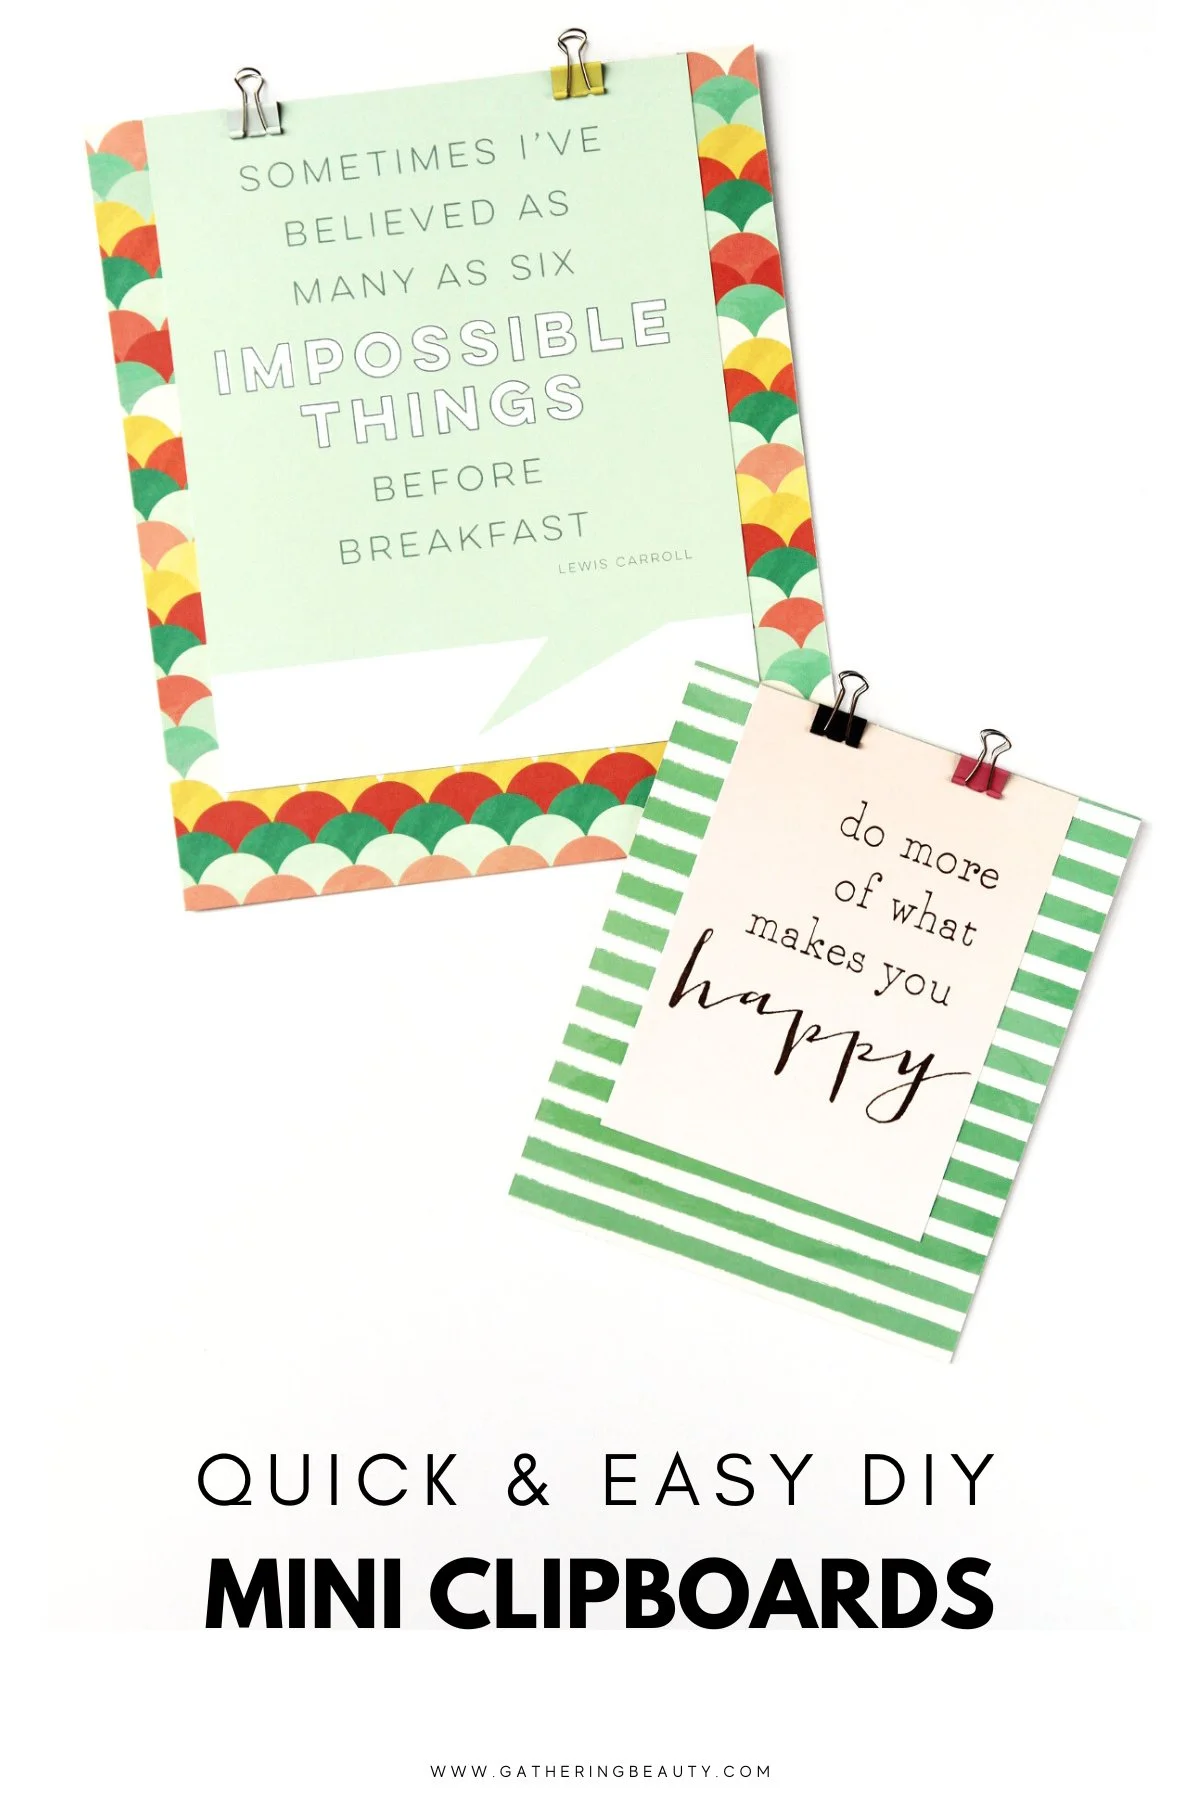
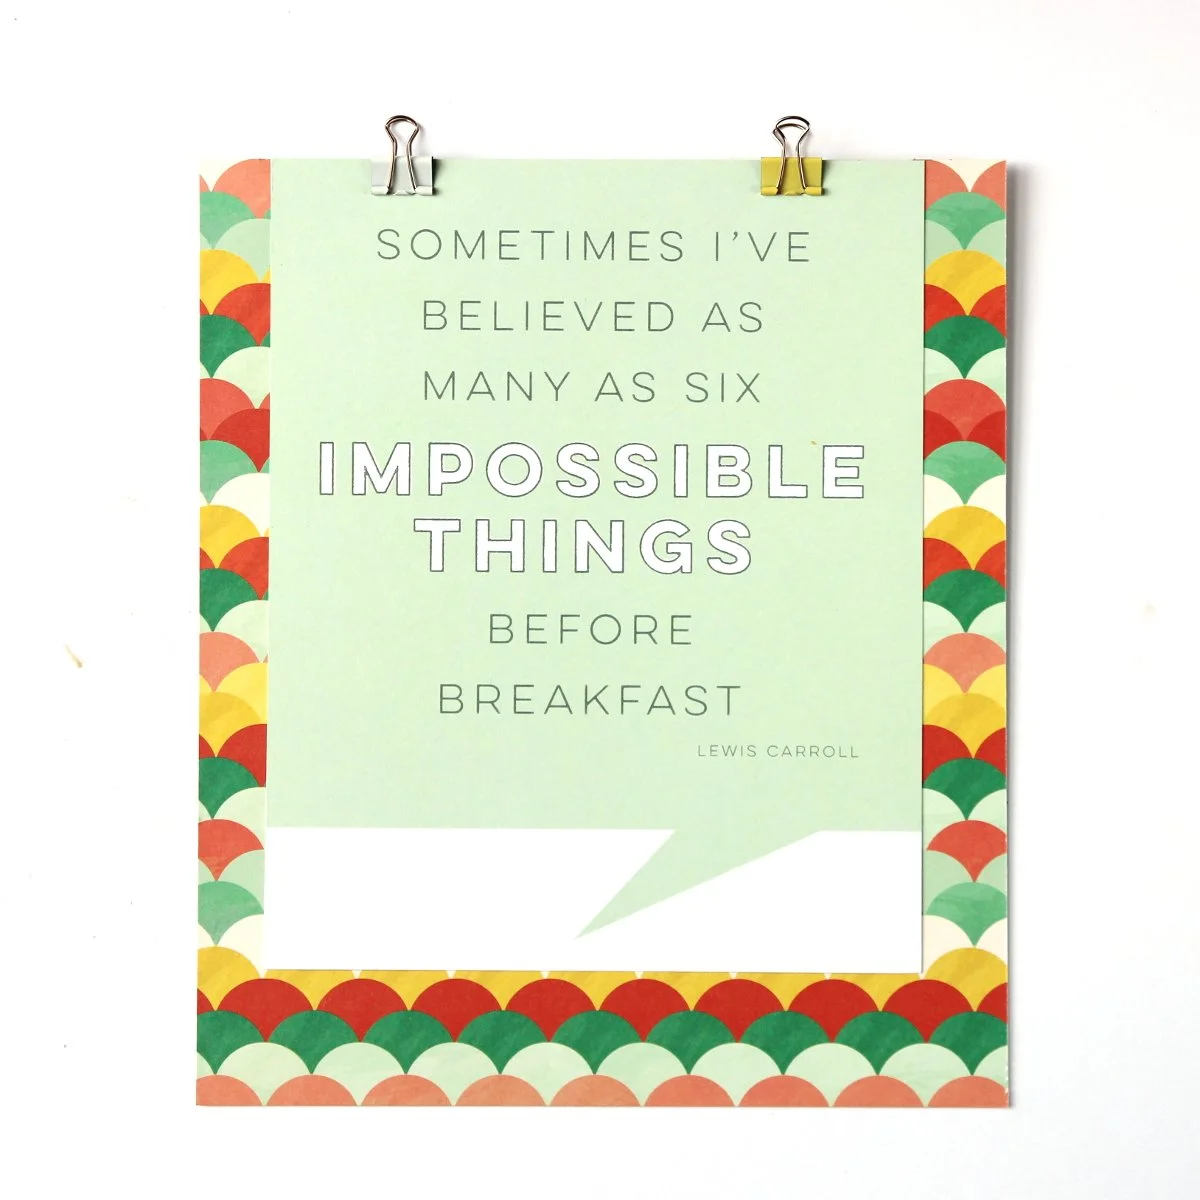
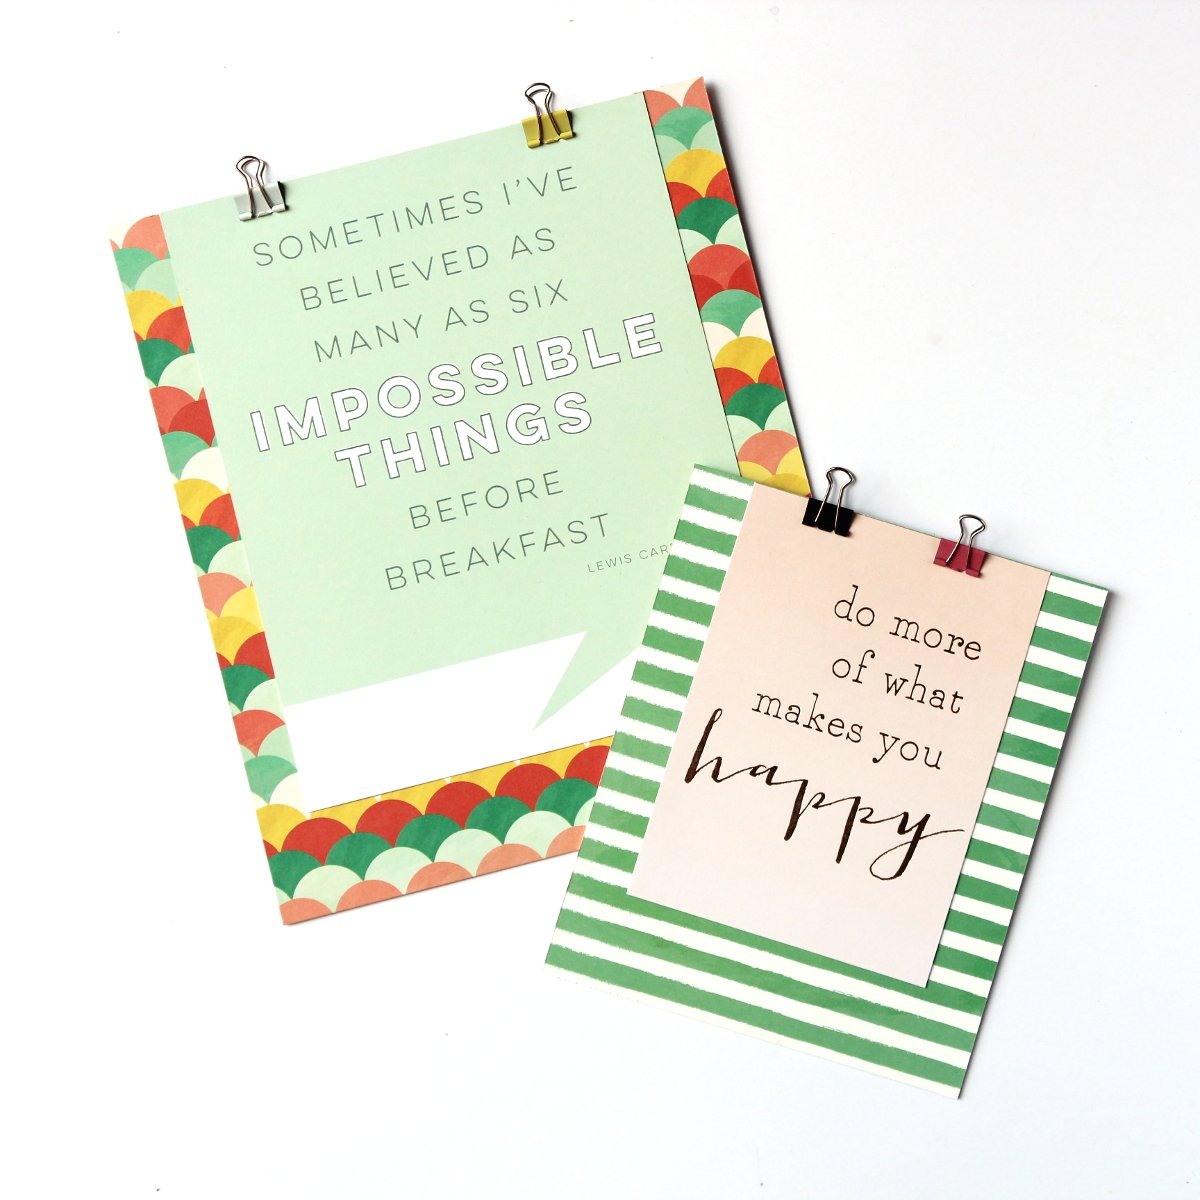
I love the idea of using a clipboard as a frame. They make it super simple to swap out the artwork or photo whenever you fancy a change.
They’re a great way to display art on the wall or a printable calendar page above your desk.
Use it to keep track of your tasks, display inspiring quotes, or hold important reminders. Hang it in your office, craft room, or kitchen—wherever you need a little extra organization and creativity.
I chose this Lewis Carroll quote and the 'Do more of what makes you happy' quote.

Supplies:
Scrapbook Paper - I used the Market Street Paper & Cardstock which is no longer available. You can find a wide variety of designs at your local craft store or even online.
Quote Wall Art - I used the Niche Gallery Art Pad which is no longer available.
Thick Cardboard / Mounting Board or Hardboard
Steel Ruler
Scissors
Glue

How To Make A DIY Clipboard Frame.
1. Start by laying your print down on your mounting board and cutting it down to size.
I left a 1-inch border around my print with 2 inches at the bottom.

2. Glue the board down onto your chosen cardstock or scrapbook paper.

3. Trim off any excess paper around the edges for a neat finish.
Feel free to add stickers, ribbons or any other decorative embellishments that you fancy!

4. Once dry attach it's time to attach the binder clip to your mini clipboard.
Open the clip and position it at the top centre of the cardstock, ensuring it is securely attached.
The clip will act as a holder for your wall art, making it easy to swap out pieces whenever you feel like a change.

5. Now, it's time to find the perfect spot on your wall to display it. You can use a couple of nails to hang it up securely from the binder clips or leave standing propped up against the wall or on a picture ledge.
Once it's in place, simply clip your favourite pieces of wall art or quote onto the binder clips, and voila! Your artwork is now on proud display.
Pro tip: If you want to hang multiple mini clipboards together, you can punch a hole at the top centre of each clipboard and string them together with a pretty ribbon or twine.
It creates a delightful hanging gallery effect!
I hope you enjoyed this quick and easy tutorial on making your very own DIY mini clipboard for displaying wall art.
It's a simple yet effective way to add a touch of personality to your space while keeping things organised. Plus, it makes for a great personalised gift idea too!