
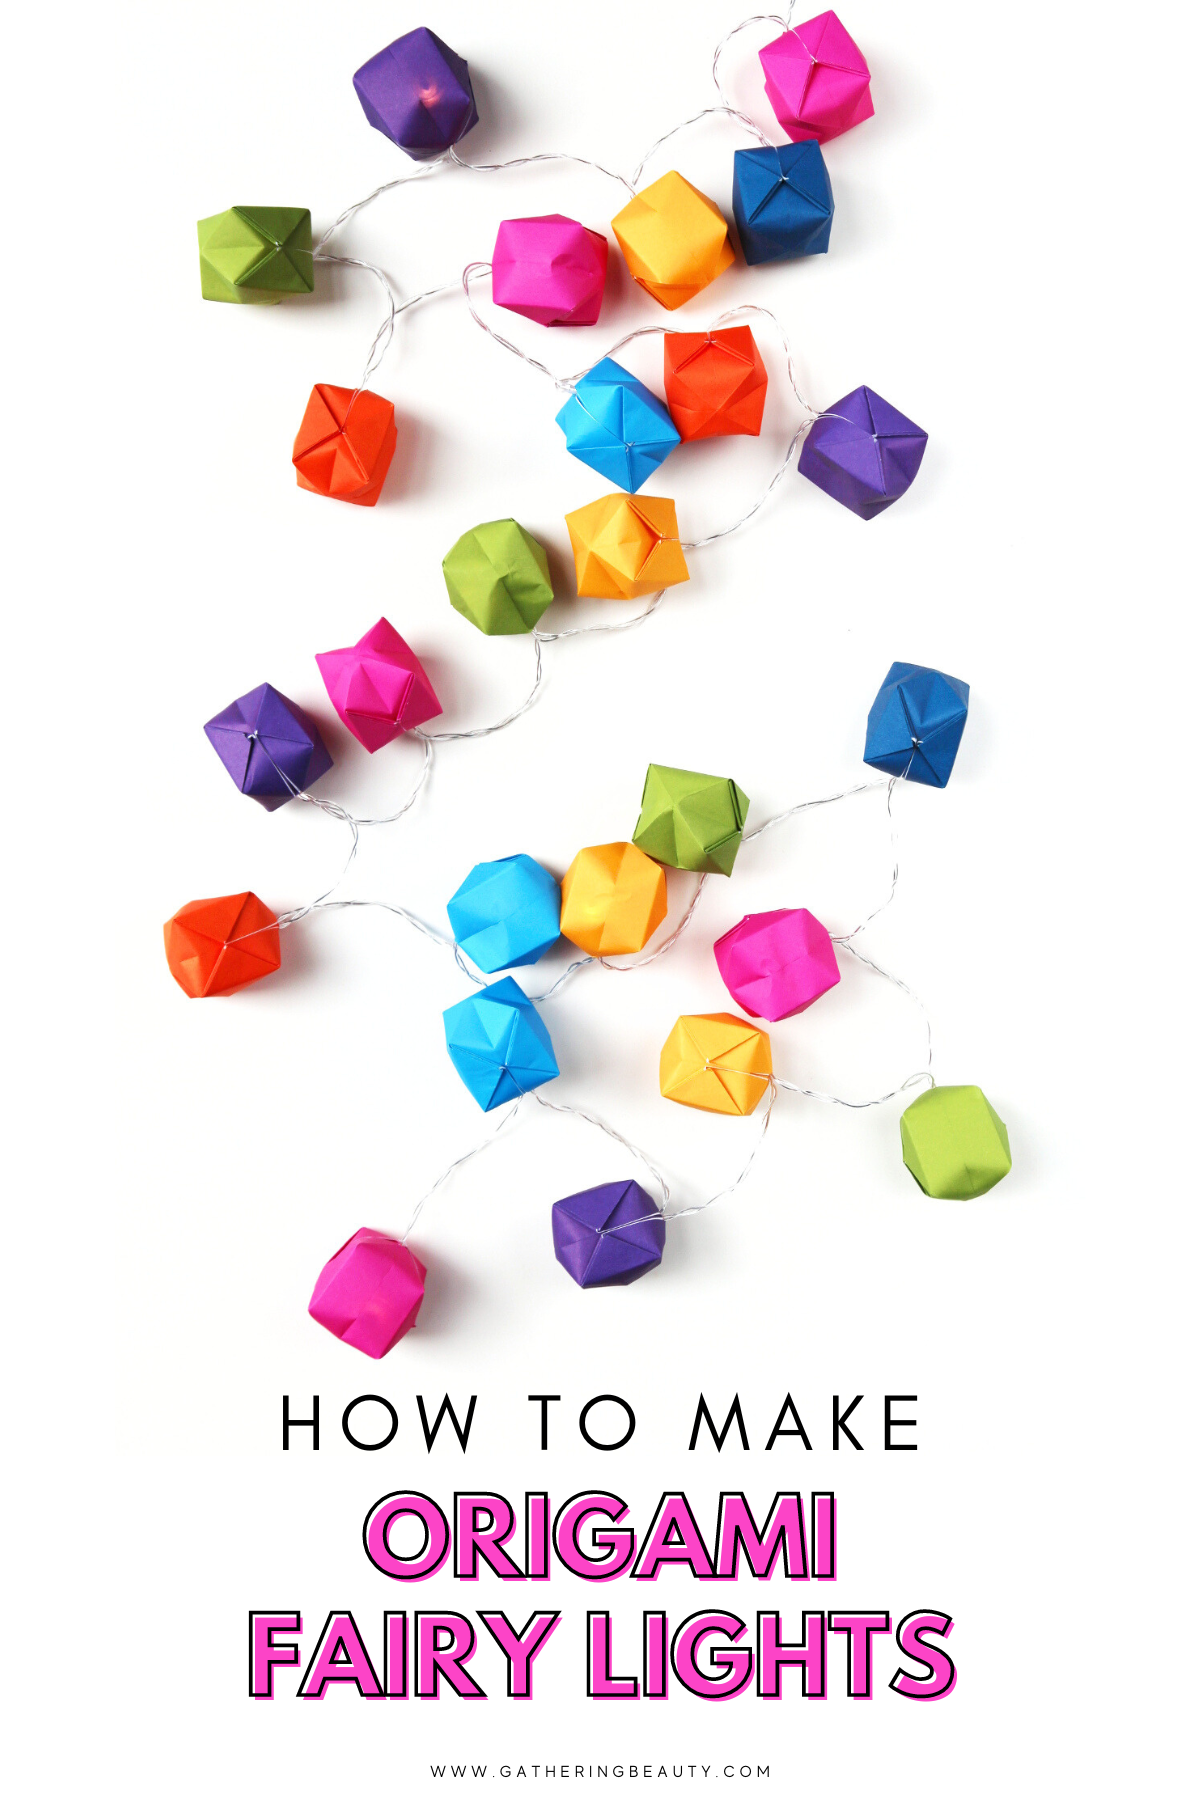
DIY Origami Fairy Lights
/Transform plain origami paper into cute DIY Origami Fairy Lights! Perfect for parties, cosy reading nooks, or adding a homemade touch to your bedroom decor.
This page contains affiliate links. This means that if you make a purchase after clicking a link I earn a small commission but it doesn’t cost you a penny extra!
Easy Origami Fairy Lights.
Who knew that the simple origami water bomb could double up as a home decor staple? Not me, until recently! They really are the simplest thing to make and look beautiful all lit up.
Did you ever make an origami water bomb as a kid? They used to be one of my favourite things to make in the summer.
The great thing about these little bow-up paper boxes is that not only can they hold water but they're also perfect for popping over a a string of lights and making pretty paper lanterns.
And the best part? You don't need any special crafting skills to make them. They're a super easy, basic origami model that even a beginner can make. A perfect paper craft for both grown-ups and kids of all ages.
Whether you're a newbie to origami or a seasoned paper pro, these fairy lights will sprinkle magic in any corner of your home.

Origami String Lights.
For these origami lights, I used some paper from Folded Square. It comes in a fantastic range of Pantone colours. I ordered the contemporary colour collection and I absolutely love it. The paper is of lovely high quality and the bright colours are fantastic.
Of course, you can use any origami paper that you have to hand. Imagine these little water bombs crafted from semi-translucent vellum or pretty patterned beautiful origami paper. From bright and colourful to floral and geometric – the possibilities are endless.
So, the next time you're looking for a unique and affordable way to spruce up your space, remember the origami water bomb. An ideal project for weekend crafters or those looking to add an artistic touch to a special event. Follow these easy steps to add a unique, handcrafted touch to your décor.

Supplies:
A set of LED fairy lights (LED ones, please! We don’t want any fire hazards).
Glue or tape – You may need a teeny bit to secure your origami boxes.
To make your origami fairy lights the first thing you need to do is make a lot of boxes. This is a good sitting in front of your favourite TV show type of craft. Each one only takes a minute or so and the whole thing from start to finish took me around an hour.
How to make Origami String Lights.

1. Fold your paper in half with the coloured side on the inside. Open out and fold in half again.

2. Open out and fold along both the diagonals this time with the coloured side on the outside.

3. Collapse the paper along the folds and fold it down to make a triangle.
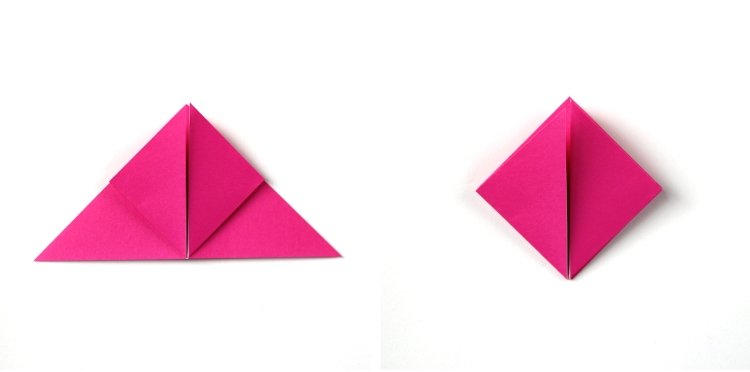
4. Fold both the bottom corners up to meet the center. Flip it over and do the same on the other side.

5. Now fold the 2 side corners in to meet in the centre. Flip it over and do the same on the other side.

6. Take the top flap and fold it down using the previous fold as a guide. Take this triangle and fold it back on itself to make a smaller triangle.

7. Lift the small folded triangle and open up the pocket that is underneath. Slide the small triangle inside the pocket.
8. Do the same for the 3 remaining flaps.

9. One end of your origami box should have a small hole in the bottom.
This is also the hole that the lights will fit into.
10. Inflate the origami box by gently blowing into the hole.

11. Carry on making your boxes until you have enough for each light.

12. Inflate and push a light into the bottom of each box.

Hang them in your craft room, drape them over your bed frame, or even wrap them around your bookshelf. The mesmerizing glow of your new origami fairy lights will make any space instantly magical!


