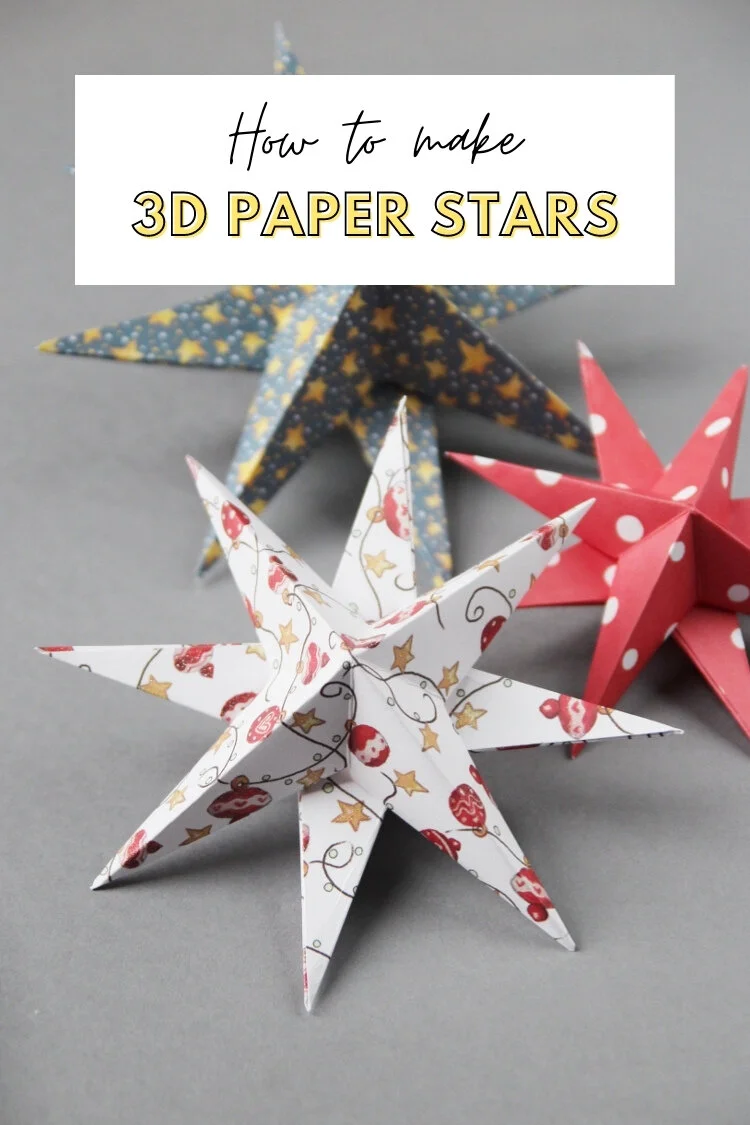
DIY 3D Christmas Star
/Try this DIY Christmas Star and make beautiful paper stars to decorate your home. Easy to make with just a piece of paper, scissors and glue.
Use them hung by thread from the ceiling or a mini version as a star ornament hung from a tree branch. For a simple yet effective display simple prop them up on a windowsill or mantle for a festive fireplace.
They're a great way to make beautiful Christmas star decorations. A fun holiday craft that the whole family can make.
This page contains affiliate links. This means that if you make a purchase after clicking a link I earn a small commission but it doesn’t cost you a penny extra!
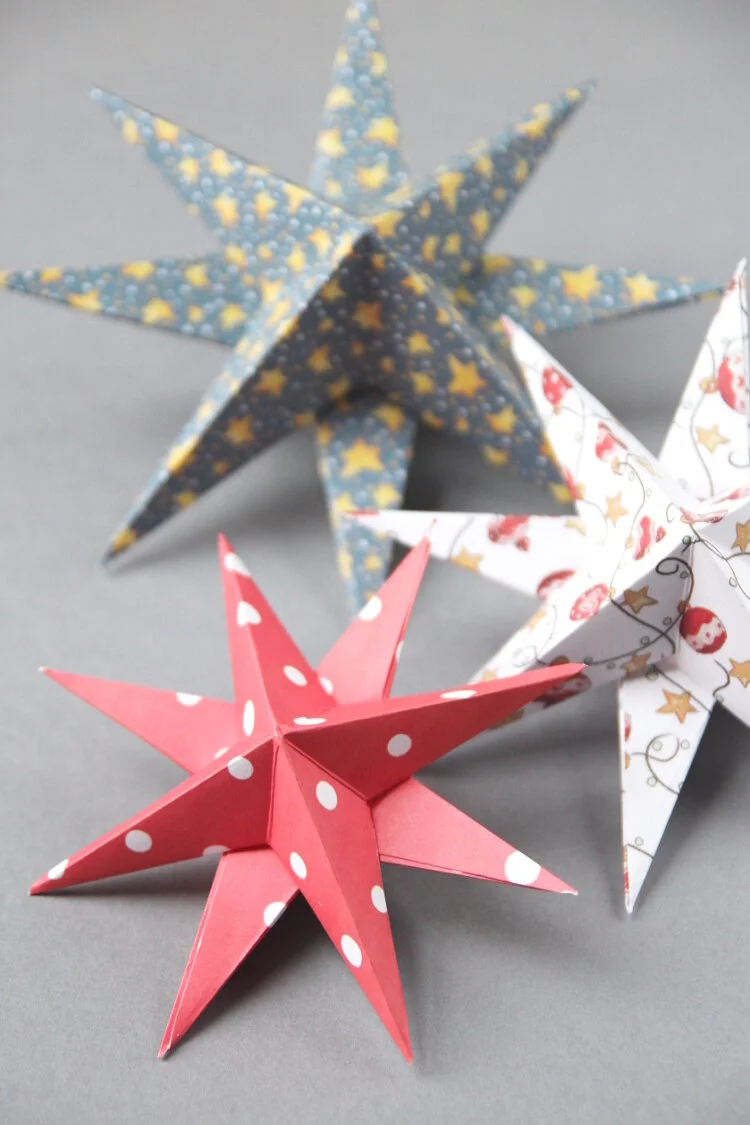
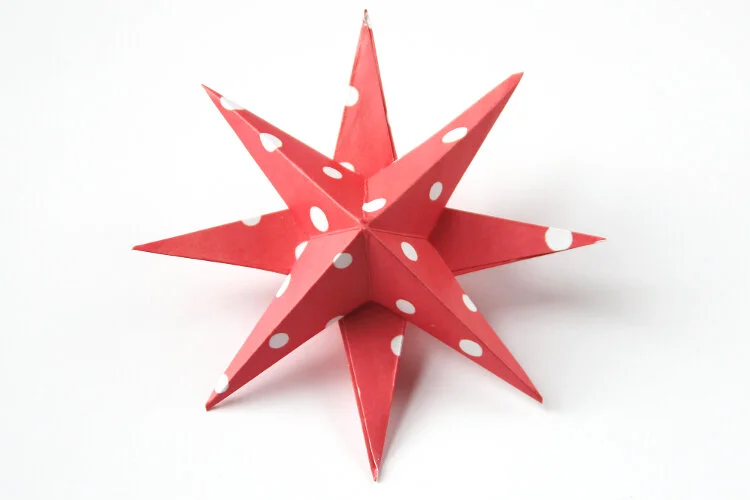
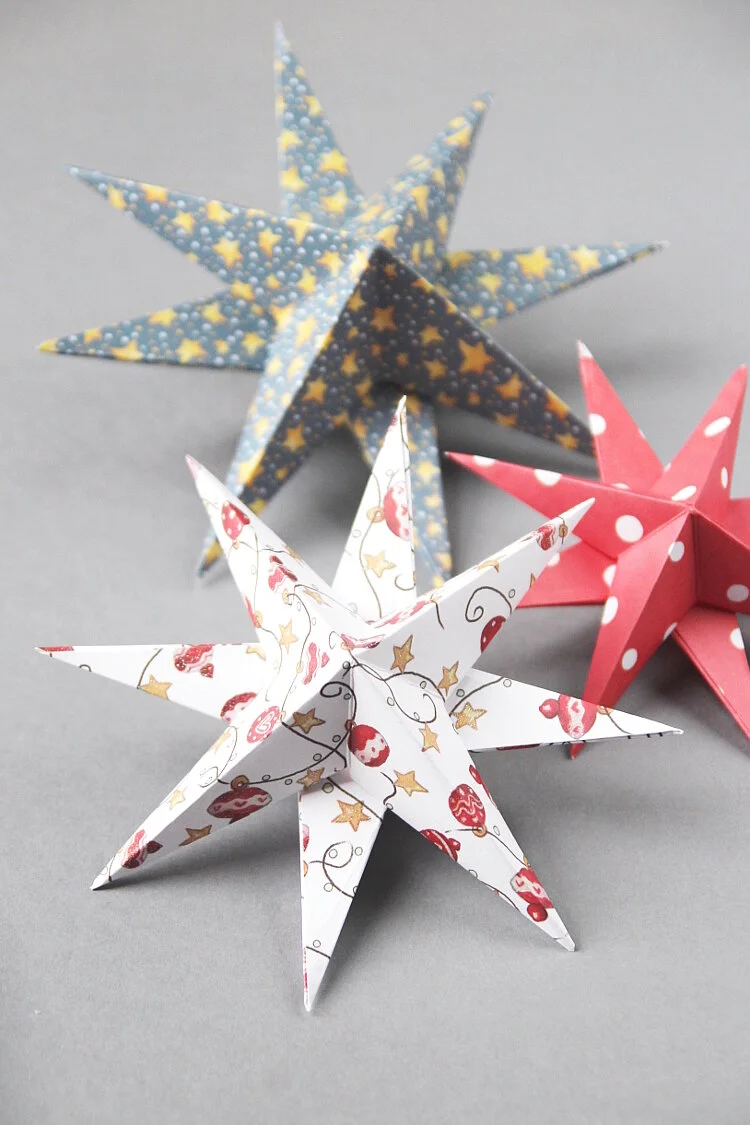
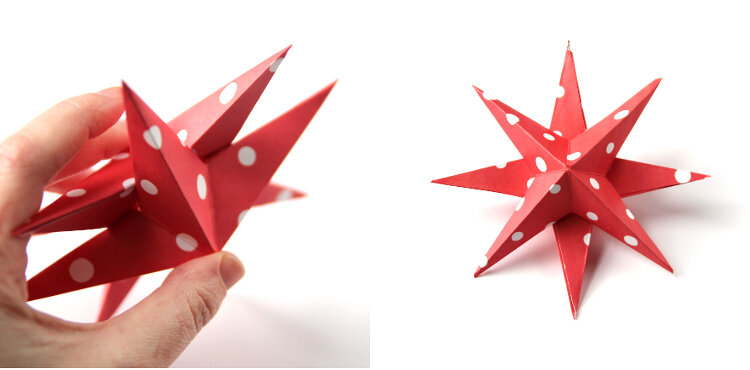
3D Paper Stars.
One of my favourite Christmas traditions is making new decorations. Every year I like to make a couple more. Last Christmas I made these wooden stars made out of beads. They're a great addition to my DIY Christmas ornaments.
These 3D paper star decorations are another one of those crafts I first remember making in school. Last year I decided to see if they were as quick and easy as I remembered. They turned out to be one of the simplest and fastest Christmas decorations I've ever made.
I’ve made them a few times now (they’re also great for New Year and birthdays) and they’re always admired so I thought it was about time I shared them with you. They’re a lovely one to get the whole family involved with on a cold wintery evening and make fantastic holiday decor.
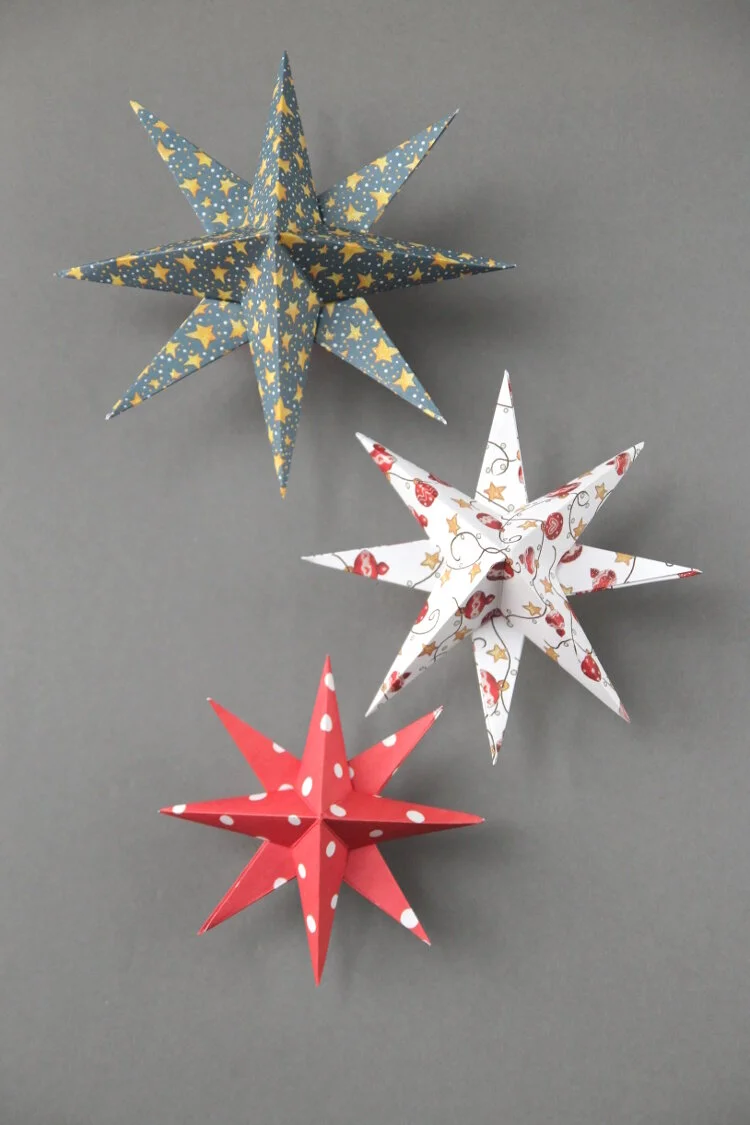
DIY Christmas Star.
The thing I love about these simple stars is how easy they are to make and how versatile they can be. By simply using different colours, you can use these stars for all kinds of occasions.
Bright pastels for a summer party, maybe some blue, white and red for the 4th of July, creams and golds for New Year’s or the classic red and green for Christmas.
I'm a big fan of simple paper projects, especially when they don’t take up much time or money. So trust me when I say these are a totally budget-friendly project that anyone can make.
All you need is two squares of paper, a pencil, a pair of scissors and some glue to make each star.
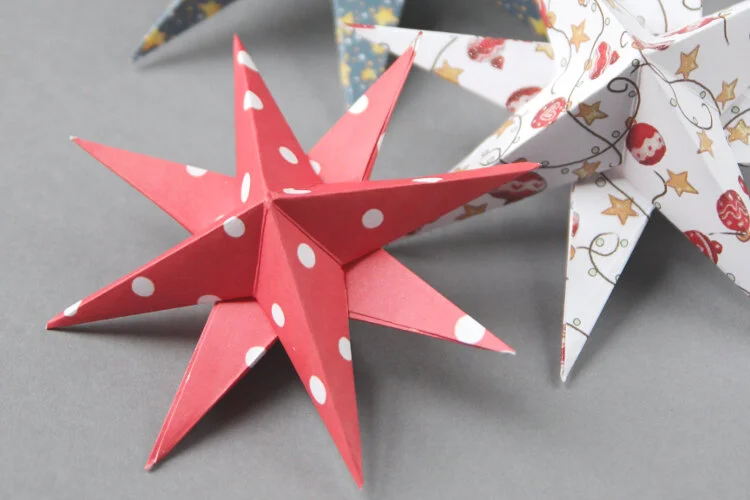
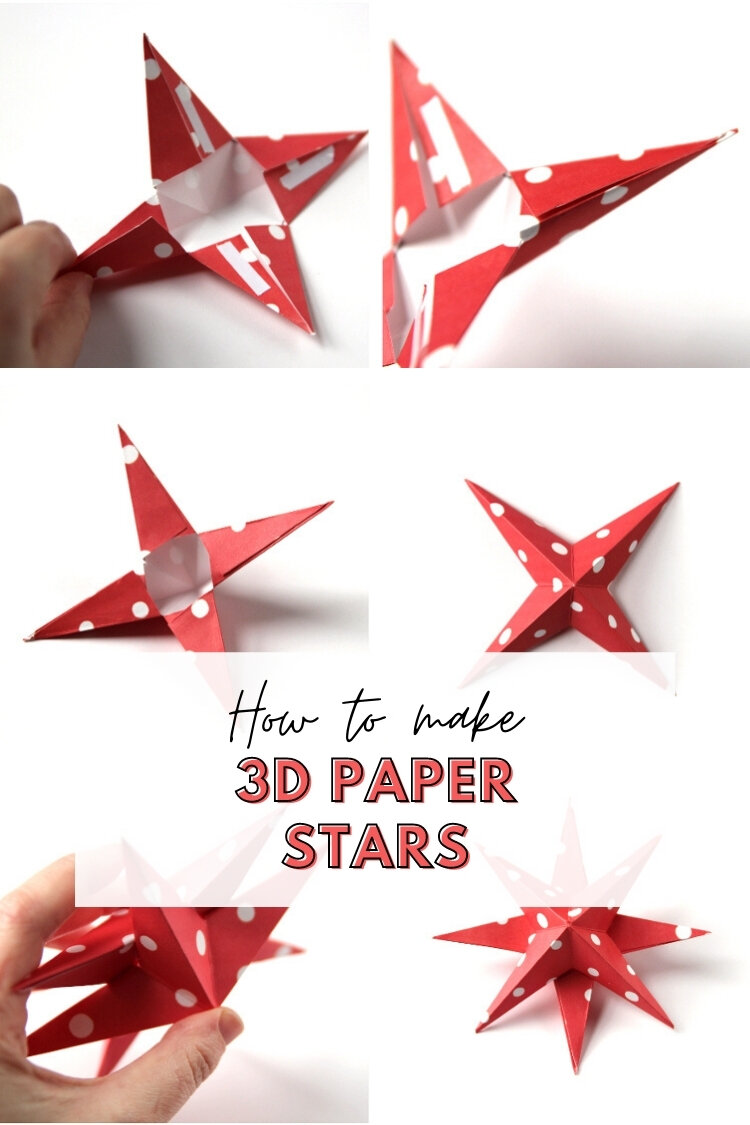
The clever 3D design is formed by making two separate 4-point star shapes and glueing them together (a hot glue gun is great for this part). They look so intricate but are actually incredibly easy to put together.
I like to make my 3D stars in a range of sizes and prop them up along the mantel but you could easily hang them above your dining table. Use fishing line to create a magical floating star or make mini versions and hang them using a ribbon from a tree.
Supplies:
12 x 12 Christmas Scrapbook Paper or Coloured Card
Paper Trimmer ( I recommend this one)
Scissors
Pencil
Double-sided Tape/Paper Glue (this tape runner is great) or Hot Glue Gun
Of course, you don't have to use patterned paper. You could make your stars using plain cardstock and spray paint them in different colours. How pretty would a metallic silver star look hanging from the wall?
Want to make it even easier? You can download and keep this tutorial in a handy PDF here complete with templates to make large, medium and small 3D Paper Stars.

How to make 3D Paper Stars for Christmas.
1. Take a square of paper and fold it in half.
For the large star, I used a piece of 12x12 inch scrapbook paper. To make a different size star cut your paper or card stock to a smaller or larger size. I have a template here that you can print out onto some card and use as a guide.

2. Open out, rotate 90 degrees and fold in half again.
3. Open out and fold your paper in half again this time along both diagonals.
4. Flip the paper over and mark a little less than halfway down each of the horizontal and vertical creases.
5. Cut down to the pencil marks.
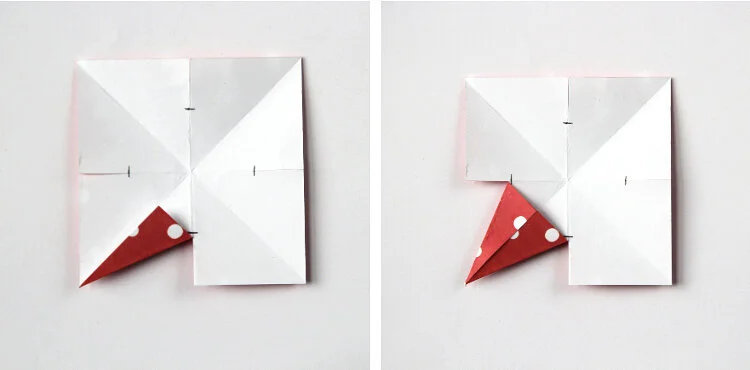
6. Fold the paper in on each side of the cut to form a point.

7. Repeat on all remaining sides.
8. Apply a line of glue or double-sided tape to 1 side of each of the points.
I found the best way to stick the sides down was with double-sided tape or a tape runner. Runny glue like PVA glue or Elmers Glue will make the paper buckle and a glue gun can get messy when you're glueing a small area.

9. Peel back the tape and fold 1 side of the point over the other and stick down.

10. Do the same on the remaining points to make a four-pointed star shape. This will make half your star.

11. Repeat the steps above to make the 2nd half.
12. Apply some more glue to the centre corners of each point.
I used some PVA glue here but a hot glue gun would also work well.
13. Stick both halves together making sure the points are at 45 degrees from each other.
14. Leave to dry and hang.
Top Tip: There are a couple of ways you could hang your beautiful stars. The 1st is to sandwich some fishing line or cotton thread between the two halves as you glue them together. The 2nd would be to use a needle and thread your fishing line through the top of one of the points.