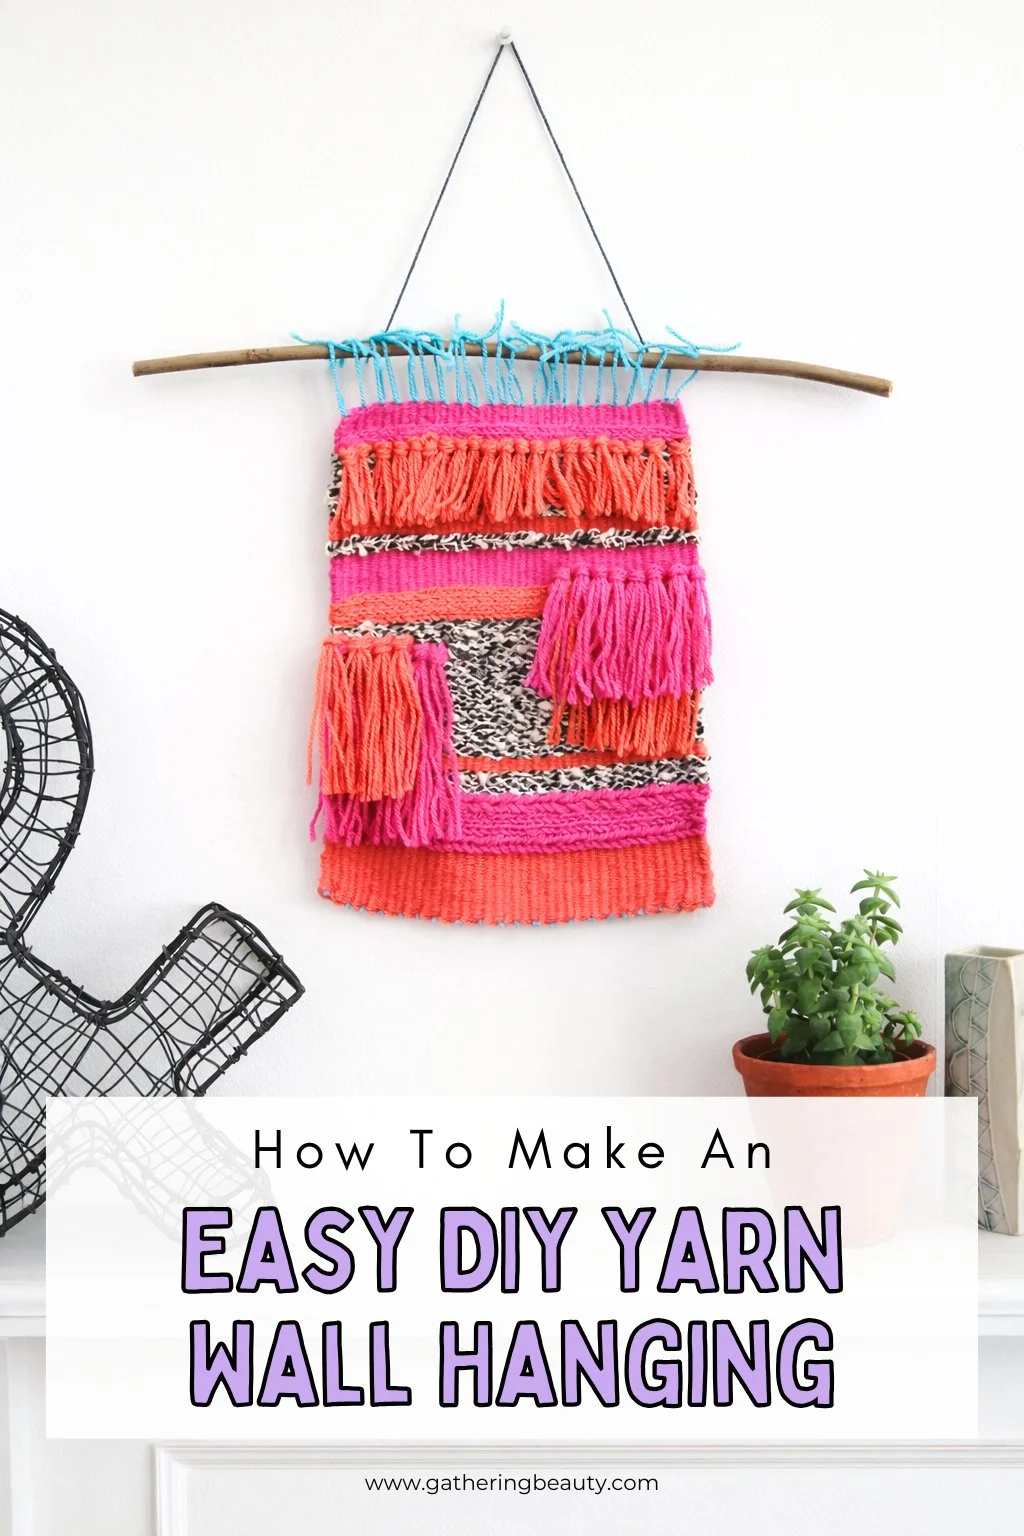
DIY Woven Wall Hanging
/Learn how to weave your very own boho-inspired wall hanging, step-by-step instructions and tips for beginners included. Perfect room décor + a fun DIY project!
This page contains affiliate links. This means that if you make a purchase after clicking a link, I earn a small commission but it doesn’t cost you a penny extra!
Easy Woven Wall Hanging.
Loom weaving has truly had a moment lately. After admiring so many beautiful pieces, I finally decided it was time to try weaving one myself. And honestly? I was surprised by how simple and relaxing the whole process felt.
If you’ve been curious about learning to weave your own simple wall hanging, this is your sign to start. You don’t need fancy equipment or years of experience, just a small loom (or even a DIY version as I did with my art canvas frame), a few strands of yarn, and a willingness to experiment.

This beginner project is all about keeping things simple: learning the basic over-under weave, playing with texture, and embracing the imperfect charm that makes handmade pieces so special.
I’m excited to share my first weaving project with you and hopefully inspire you to create one of your own.

Supplies:
A frame, I used a cheap artist’s blank canvas I already had lying around and stripped the canvas off of it, but you could use an old picture frame or loom if you have one. This one has great reviews.
Assorted yarn (I love these mini bonbons packs from Lion Brand Yarn),
A fork,
Scissors,
And a stick or wooden dowel.

How To Make Your Weaving Warp Using a Canvas Frame.
1. We're going to start by making the warp.
We do this by looping the wool over the frame in vertical strands. Tie the wool to the bottom corner of your frame. Take the wool and wrap it up and under the top of the frame and then under and over the bottom of the frame.
Don't wrap it too tightly. You're trying to make a figure of eight. Keep going until you fill your frame.
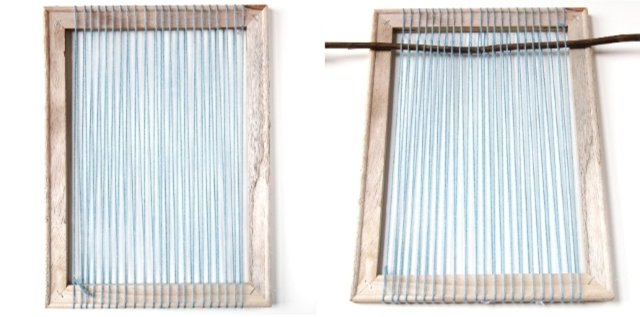
2. Next, take your dowel or stick and thread it through your warp.
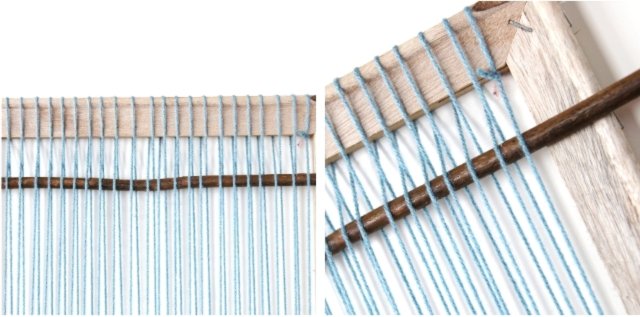
You want to do this below where the wool crosses. You should now have a separate layer of top and bottom strings.

The Basic Weave.
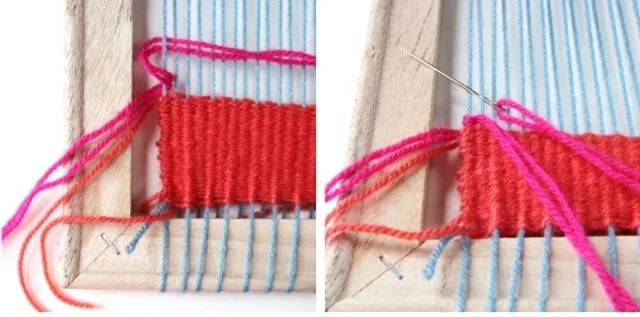
3. To start the basic weave, take your chosen wool and thread it onto a tapestry needle (the needle shown above kept catching as I threaded it through, it was too sharp so I swapped it for a blunter one halfway through).
We're going to thread it over the first warp string and under the second, over the third and under the fourth, etc.
Keep going until you have completed the first row. When pulling your wool through, don't forget to leave a few inches at the end. We'll be neatening up these loose strands at the end.

4. Make sure you don't pull your wool through too tight and after each row use your fork to gently beat the wool down.
If you've tried weaving in the past and have had a problem with wonky edges these are the things that will help solve that problem.

The Loom and Spindle tutorial shows a few different ways of doing this.
I started off using the arching technique, but found it much quicker as I went along to use the slanting technique instead.
Try a few out and see what works best for you.

5. Keep going until are happy with the amount of basic weave.
Next I did four rows using the soumak stitch. This one took a little practice.

You can find a more detailed look at how to do the soumak stitch in step 8 of my DIY Mini Weaving - Using Clipboard Loom.
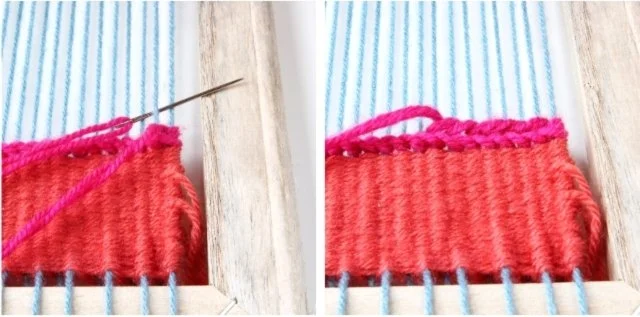
I added 8 rows of soumak.

I added some more rows of basic weaving until I was happy with the design.

6. To add the tassels, I slid the wool under the first two strands, made a loop by pulling it up through the middle, then lifted the strands up and down through the loop I'd just made.

Pull tight and slide it into position.

Fill in any gaps around the tassels with basic weave.

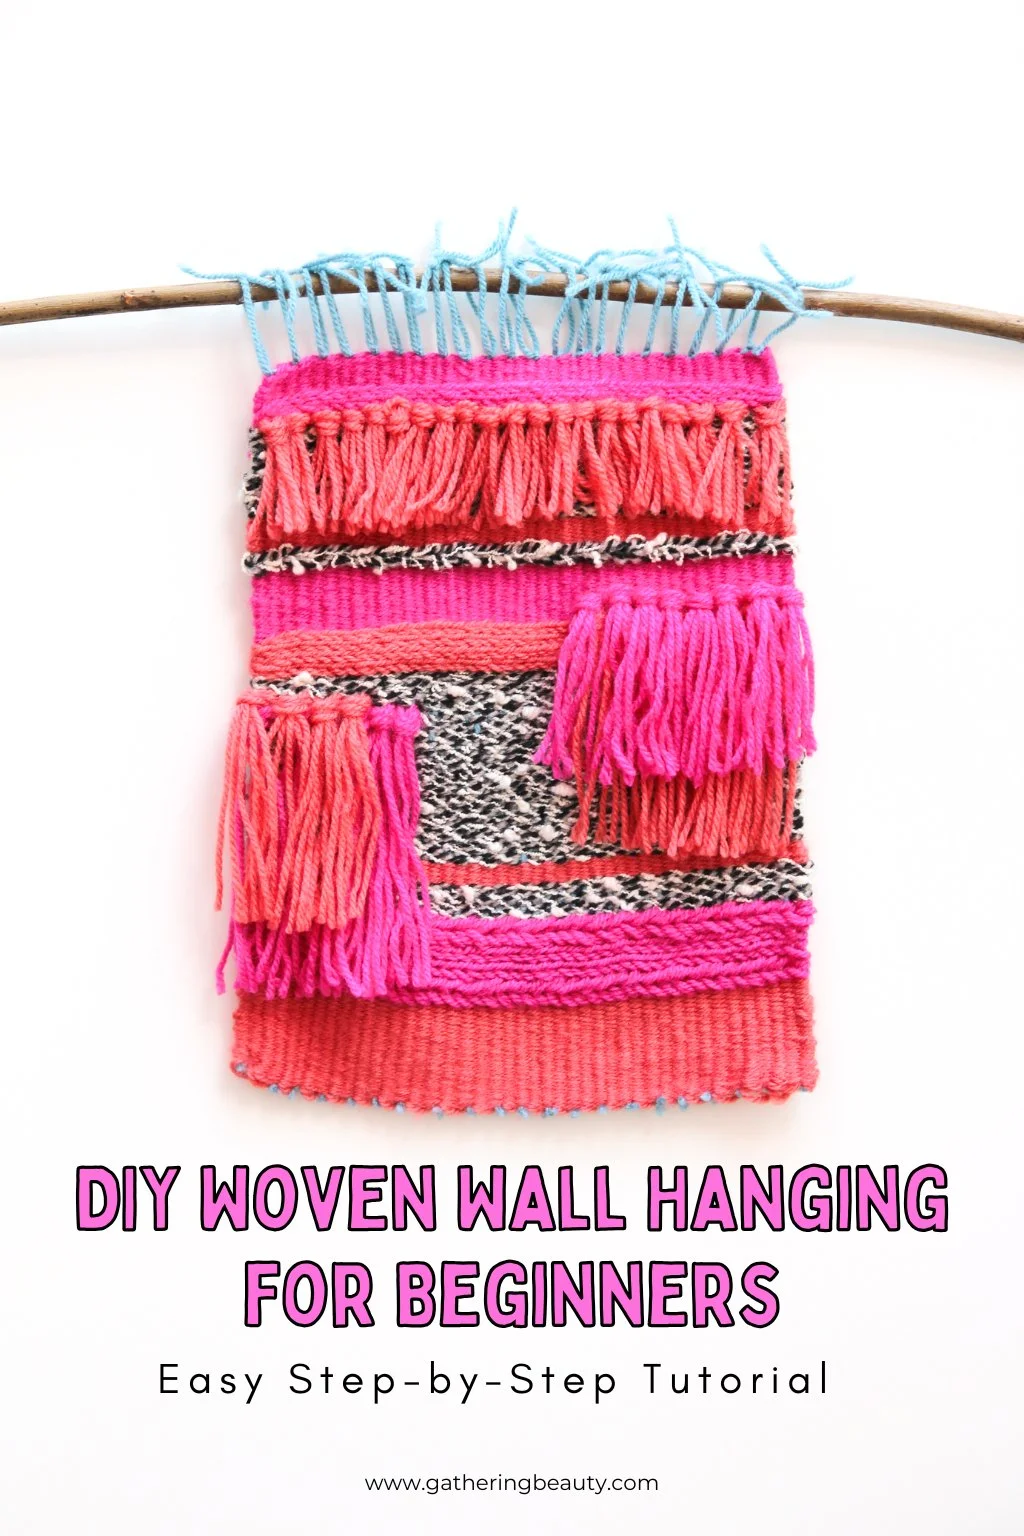
7. Carry on filling your loom with different colours, textures and stitched until you're happy with the pattern.
8. To finish your weaving and tidy up all those loose ends you're going to need to flip your weaving over. Re-thread the wool back onto your needle and pull it through some of the stitches on the back. Trim away any excess.

9. The last thing you need to do is remove your weaving from your frame. To do this, cut away two warp threads at a time and knot them together.
You can either stitch the ends back into the weaving, as you did with the loose ends, or use them to tie your weaving to a stick and hang it, as I did below.