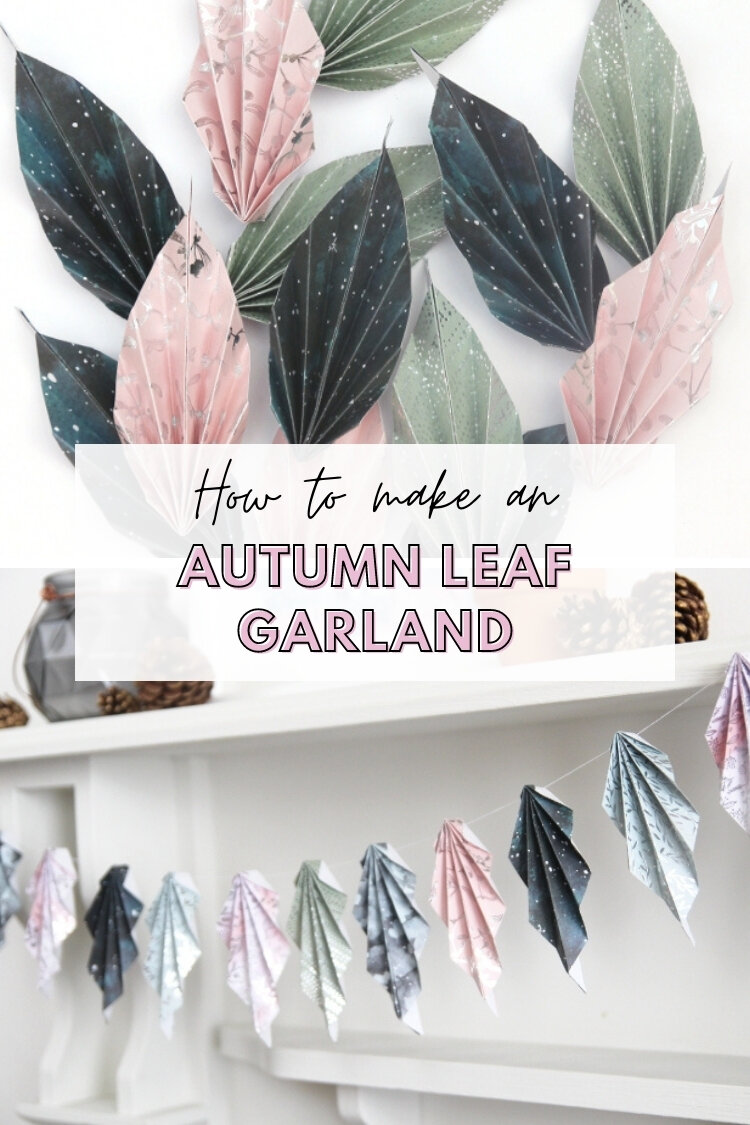
Origami Leaf Garland
/Who’s ready for Fall? Learn how to make these origami paper leaves and turn them into the cutest garland.
Quick and easy to fold they make a lovely Fall origami decoration. Add them to a wreath, drape across a mantel or tie them on a package.
Perfect for decorating your home this Autumn and Winter.

Origami Garland DIY.
Autumn is my absolute favourite season. I love the crisp air and the changing leaves and of course, nothing beats bonfires and roasted chestnuts. Yep, definitely my favourite.
To celebrate my favourite season, I decided to make an Autumn leaf garland. You know how I feel about garlands. DIY garlands are my favourite way to decorate for a new season. You can never have too many!
One of my favourite things about origami is how quickly you can turn a simple flat piece of paper into a cute decoration. This paper leaf is a fantastic example.
You can easily make a garland like this in an afternoon. You can customise it to match any theme. Green for a natural look, oranges and reds for a Halloween/Thanksgiving party or pretty metallics like I did for a Winter/New Year theme.

Origami Fall Decorations.
These paper leaves are so easy to fold. I’m calling them origami leaves but as there’s some glueing involved in the final step, they’re probably more of a paper-folding project.
Once you have all your paper triangles cut and ready to go, each leaf takes less than a minute. It’s a simple concertina fold, so if you ever made a paper fan as a child, then you’ll have no problem making these.
And don’t think you have to use these leaves as only a garland. They can be used in so many Fall and Autumn craft projects.
You can add them to a wreath, fill a glass bowl with them, tie them to a gift or pop them on a card. Drape across a mantel, over a door or even just tape to a wall. Change up the paper depending on the season and they’d made a great decoration all year round.

Supplies:
Origami Paper or Decorative Patterned Paper.
I used silver embossed decorative paper from Sostrene Grene that is sadly no longer available but keep your eye out for similar papers in the store.
Scissors
Glue
Tapestry Needle and Thread
Any thin paper like origami paper, will work well for these leaves. Be careful not to use thick paper as it will be extremely difficult to thread a needle and thread through the end.
How to make Origami Leaves.
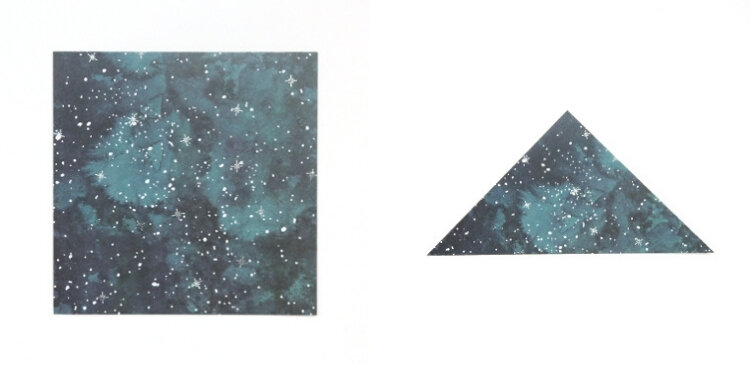
1. Take your square and fold it in half along the diagonal.
2. Cut along this crease to make two triangles.
Each triangle makes a leaf.

3. Lay your triangle of paper pattern side down with the widest point at the bottom.
4. Start folding the bottom edge up by around 1/2 cm (5mm).
5. Flip your paper over and repeat.
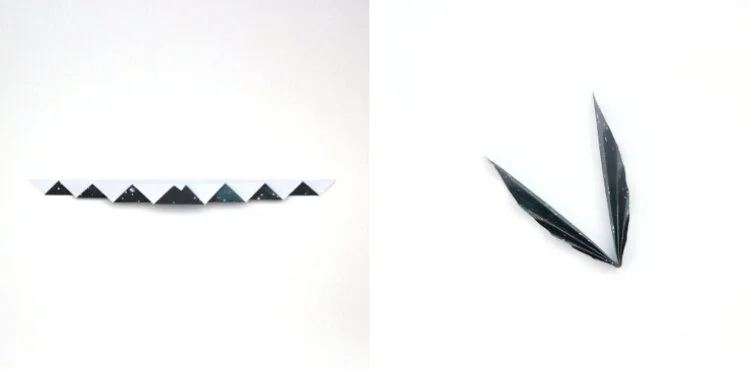
6. Keep flipping and folding to make a concertina (accordion) fold until there’s no paper left to fold. Just like making one of those paper fans when you were a kid.
7. Fold your concertinaed triangle in half.

8. Apply glue to the inside and stick together.
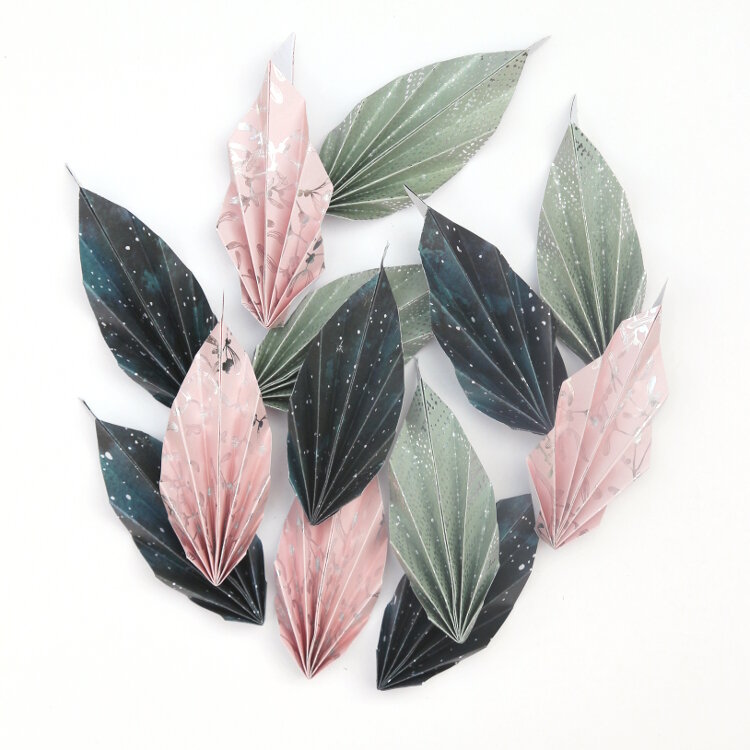
9. Keep folding leaves until you have enough for a garland.
10. Pull your triangle apart slightly to shape.

11. Thread onto some cotton using a tapestry needle.
Depending on how thick your paper is this part might be a bit tricky. Using a thimble to protect your fingers could help.
12. Hang from the fireplace or wall to for a pretty origami fall decoration.

Aren’t they simply stunning? I’m so pleased with how they turned out. The sparkly paper definitely adds another dimension to them and I can’t wait to see how they look in the evening with some pretty candlelight flickering around.