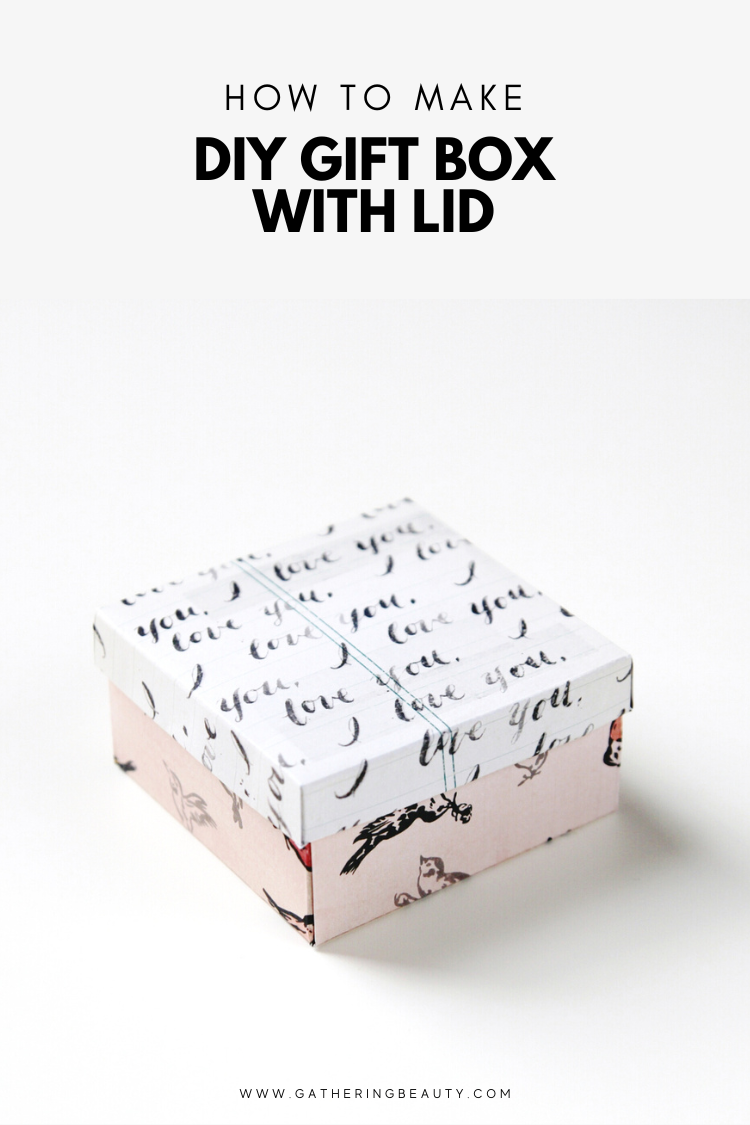
Easy DIY Gift Box With Lid
/Learn how to make your own DIY Square Gift Box with a lid using a scoring board! Perfect for any occasion, and it's easier than you think!
By using scrapbook paper you can easily make them match a theme, Christmas, Easter, a party or even a wedding. Ideal for those last-minute gift-giving emergencies.
This page contains affiliate links. This means that if you make a purchase after clicking a link I earn a small commission but it doesn’t cost you a penny extra!
DIY Box With Lid.
Add a personal touch to your gift-giving with a DIY Square Gift Box! Using a scoring board, you can create a custom-sized box with a matching lid.
Now, I know what you're thinking. Making a gift box from scratch sounds a bit daunting. But fear not, because I've broke it down into easy-to-follow step-by-step instructions to show you just how easy it can be.
And to make things even simpler, we're going to use a scoring board. No rulers necessary.

What is a Scoring Board?
If you're not familiar with scoring boards, they are a fantastic tool that helps you create precise folds in paper or cardstock. They have grooves and measurements, making it super easy to score straight and accurate lines.
They make crafting your own boxes super easy. Trust me, once you start using a scoring board, you'll wonder how you ever crafted without one!

Quick And Easy DIY Gift Box.
I really like the idea of having a simple go-to gift box you can make quickly when needed. From start to finish including cutting out all the pieces it took around 20 minutes.
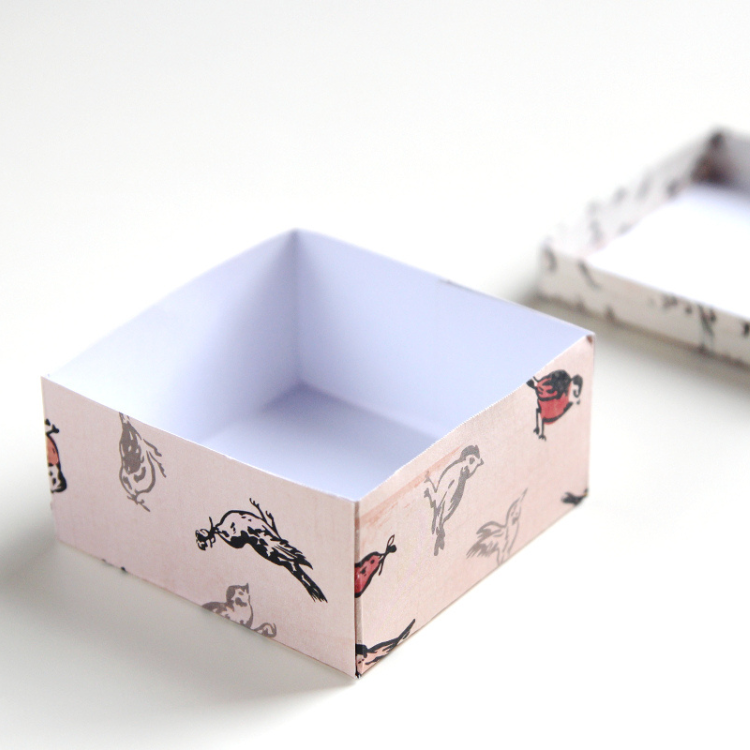
I made this simple DIY gift box out of scrapbook paper as it's something I always have on hand but card stock would've worked just as well if not better.
As much as I love scrapbook paper, you just can't beat the colours and patterns, it's not the sturdiest of things, it is paper after all so I made extra tabs on the lid to reinforce it.

Supplies:
Scrapbook paper or card stock, I used the Maggie Holmes Paper Pad for Crate Paper
A Scoring Board or if you don't have one of those a ruler and embossing tool,
Paper glue or double-sided tape.

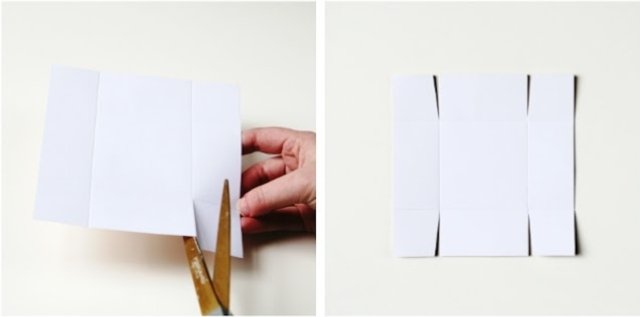
1. Cut your paper to size.
This box measures 3x3 inches. To make it you'll need 2 pieces of paper, one measuring 5x5 inches to make the lid and the other measuring 5 and 7/8 inches by 5 and 7/8 inches to make the base.
When folded the base of the box is 1/8 of an inch smaller than the top so it can slide easily on and off.

2. We're going to make the lid first. Take the 5x5-inch square and score creases at the 1/2-inch mark and the 1-inch mark.
Turn the paper 90 degrees and repeat. Do this for each side.

3. To make sure the box all folds in neatly we're going to need to cut away an 'L' shape from each of the corners.
I've marked the part you need to cut away in the third square down on the left. You should be left with a square in each corner.
4. Next we need to turn each of those squares into a tab. Cut along the folds to make the tabs.

5. Fold along all your creases. We want to fold all the tabs inside the lid.
6. Apply glue to the back (patterned side) of each tab and glue it down.
I used double-sided tape to stick mine but you could use any paper glue or adhesive as long as isn't too runny. Liquid glue if applied too heavily can warp the scrapbook paper.

7. To finish off the lid we need to fold down and glue the last tabs. It's these tabs that reinforce the lid.

8. To make the base score at the 1.5 inch mark on each side.
9. Cut your tabs.

10. Fold along the creases and fold the tabs inside the base. As well as holding your box together these tabs also help support and strengthen the sides.
11. To finish the base apply adhesive to the back of each tab and stick down.

And voila! You've just made a simple diy gift box with a reinforced lid using a scoring board. Now, all that's left to do is fill it up with goodies and surprise someone with your handmade creation.
Remember, this is just a basic guide to get you started. Feel free to experiment with different measurements to make your own unique boxes.

I filled mine with some leftover angel hair from Christmas and some of these white chocolate hearts. If you're going to fill your box with anything edible it's probably best to also line it with some greaseproof paper to stop any grease bleeding through.