
MAKE YOUR OWN AIR DRY CLAY AND MACRAME WALL HANGING.
/Looking to fill some of that blank wall space? I’ve got the perfect diy air dry clay and macrame wall hanging for you. This pretty craft combines the basic macrame square knot with matte, white clay to add texture and colour to any space.

Air Dry Clay Macrame Wall Hanging.
Who doesn't love a good air dry clay craft? Can you believe it’s been nearly six years since I made my first clay craft?
I actually still have and use my stamped clay magnets. They’re on the magnetic memo board above my desk and still going strong even though they’ve been a bit bashed about over the years.
Today’s project is a minimalist clay and macrame wall hanging. A craft that combines two of my favourite materials, air dry clay and yarn.
It’s inspired by this ceramic wall hanging I stumbled across on Pinterest. A collaboration between fiber artist Cathy Callahan and potter Beth Katz.
I loved the combination of the glazed pottery with the natural fibres and wanted to try my hand at making my own version using air dry clay and adding some macrame square knot braiding.
I decided to keep mine simple and left the clay white and added some pretty pink yarn but don’t let that stop you putting your own spin on it. Change up the colour of the wool, use jute instead for a more natural look and add a paint effect to the clay.
I love this mottled effect Molly used on her diy polymer clay wall hanging by sponging on the paint. So pretty, don’t you think?
Here’s what you’ll need to make your own air dry clay wall hanging.
SUPPLIES:
Various Round Cookie Cutters or other household objects to cut around (I used a bowl, candle and a bottle top to cut my clay circles),
A Paintbrush or Straw,
Cotton Yarn (similar here),
And some Washi Tape.

How To Make An Air Dry Clay And Macrame Wall Hanging:
Making The Clay Circles.
1. Take your air dry clay and knead until soft. Roll the clay out onto your work surface until it’s around 5mm thick. If you have trouble with the clay sticking to the work surface try rolling it out onto some parchment paper first.
To make this wall hanging you need to cut out 3 clay circles each one smaller than the last.
2. Start by cutting out a large clay circle using the largest cookie cutter or a bowl as a guide.
3. Take your clay circle and cut a smaller circle out of the middle. Keep the middle piece as this will make your next circle.
Note: I cut mine slightly off centre as I liked the way it looked with a thinner part at the top but this is totally optional.
4. Take the circle you cut out of the middle and cut a third and smaller circle out if it.

5. Once you have your three circles make holes in the top and bottom of each one. I used a marker pen lid for the larger holes and the end of a paintbrush for the smaller ones. The smaller one should look similar to a button.
I made larger holes in the biggest circle as I wanted to be to thread a large tassel through it.
6. Leave to dry. This can take anywhere from 24 to 72 hours depending on the weather and how humid it is. It helps to turn the clay over halfway through to speed up the drying process.

7. Once dry sand down all the rough edges.

8. If you want to varnish or paint your clay now is the time.
I left mine as it was but I can recommend this varnish by Deco Art DuraClear and have used it on other clay crafts in the past. If you want to go the diy route I’ve made and shared my own homemade varnish for clay crafts and you can find it here. There’s both a coloured and clear version so if you don’t want to paint it you can add some colour this way instead.

9. Loop and knot some yarn through one of the holes in middle sized clay circle. Hold the circle in place by taping down the loop you just made.
How To Tie A Square Knot.
10. Loop four strands of yarn through the other hole and pull tight.
11. Separate the strands with two in the middle and one on either side.
12. Lay the right strand over the two central strands and under the strand to the left.
13. Thread the left strand under the two central strands and then up and over the right strand. Pull tight.
14. Repeat the above steps this time in the opposite direction. Lay the left stand over the central strands and then under right strand. Take the right strand under the central strands and then up and over the left strand. Pull to tighten. This is your first complete square knot.
Having trouble mastering the square knot? Check out this video. I think you’ll find it really helpful.

15. Repeat until you’ve made two to three inches of square knot braid.
16. Thread the smallest button shape clay circle onto all four strands of yarn. Position below the end of your square knot braid.
17. Continue on with more square knots until you’re happy with the length. I did about another 2 inches.
18. Thread all four strands through one of the holes in the large clay circle and loop back through.
To do this thread your yarn through the hole from the back to the front. Then pull the yarn up and push it back through the middle of your strands above the clay circle.
19. To take care of any loose yarn flip your hanging over and thread the strands onto a tapestry needle (you may need to do this two strands at a time depending on the size of your needle) and thread back up through your square knot braid.
20. Trim away any excess thread to leave a neat finish.
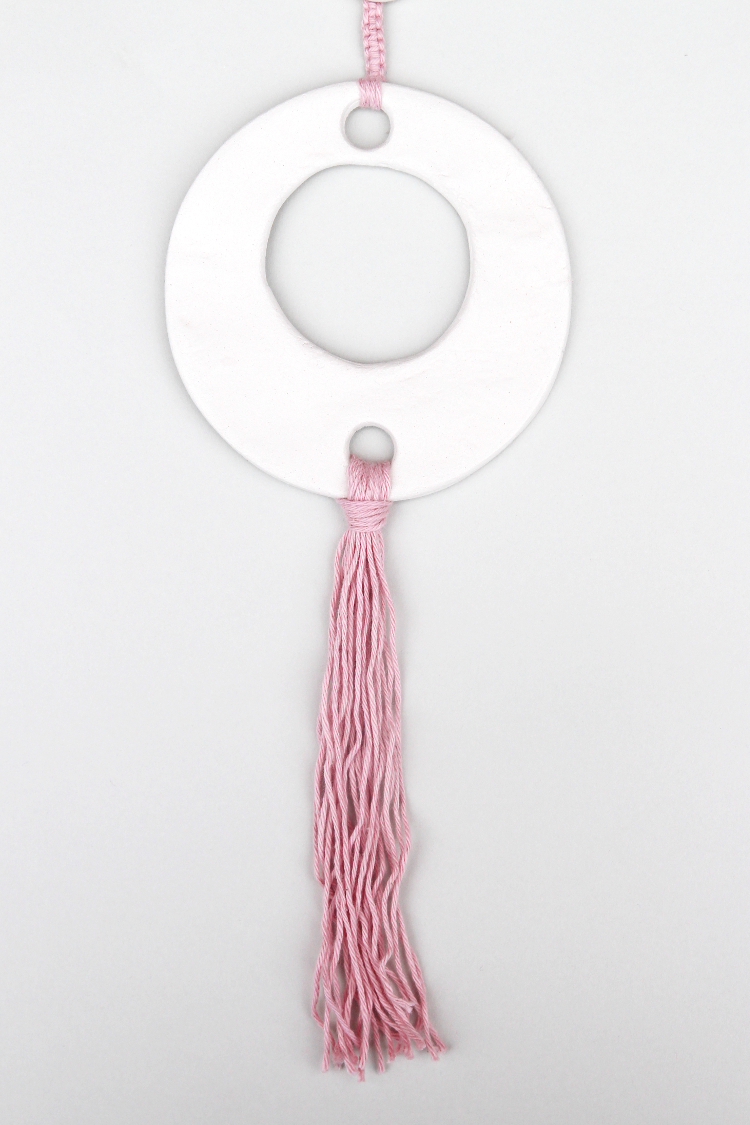
The Final Stage: Making The Tassel.
21. Cut lengths of yarn to around twelve inches long. Remember your end tassel will be roughly half this size so bear that in mind when you cut your strands.
22. Lay them flat and fold them in half. Loop them through the bottom hole in your large clay circle. Try to get them as neat as possible but you can always tweak them and move them around a bit after you’ve pulled them through.
I did this a couple of times before I got them to look neat so don’t be out off if it doesn’t go right the first time. Undo them and try again.

23. Hang your air dry clay and macrame wall hanging and admire.


I’m a big fan of how this project turned out. I love how delicate it is. You don’t always need a big piece that dominates the room to add some colour and texture to a space. I think it’s the perfect way to add some pizzazz to a room. How about you?
