
DIY Halloween Pumpkins With Vinyl Lettering
/Transform your Halloween decor with these cute Vinyl Lettered ‘Trick or Treat’ pumpkins. These not-so-spooky decorations are the perfect no-carve pumpkin craft.

This page contains affiliate links. This means that if you make a purchase after clicking a link I earn a small commission but it doesn’t cost you a penny extra!
DIY Trick or Treat Cricut Pumpkins.
It's that spooky time of year again, and I have been itching to share this absolutely adorable craft project with you. You won’t believe how simple it is!
And if you're like me (a little obsessed with Halloween crafts), you're going to love this Vinyl Lettered DIY Pumpkin project. And there's no carving required!
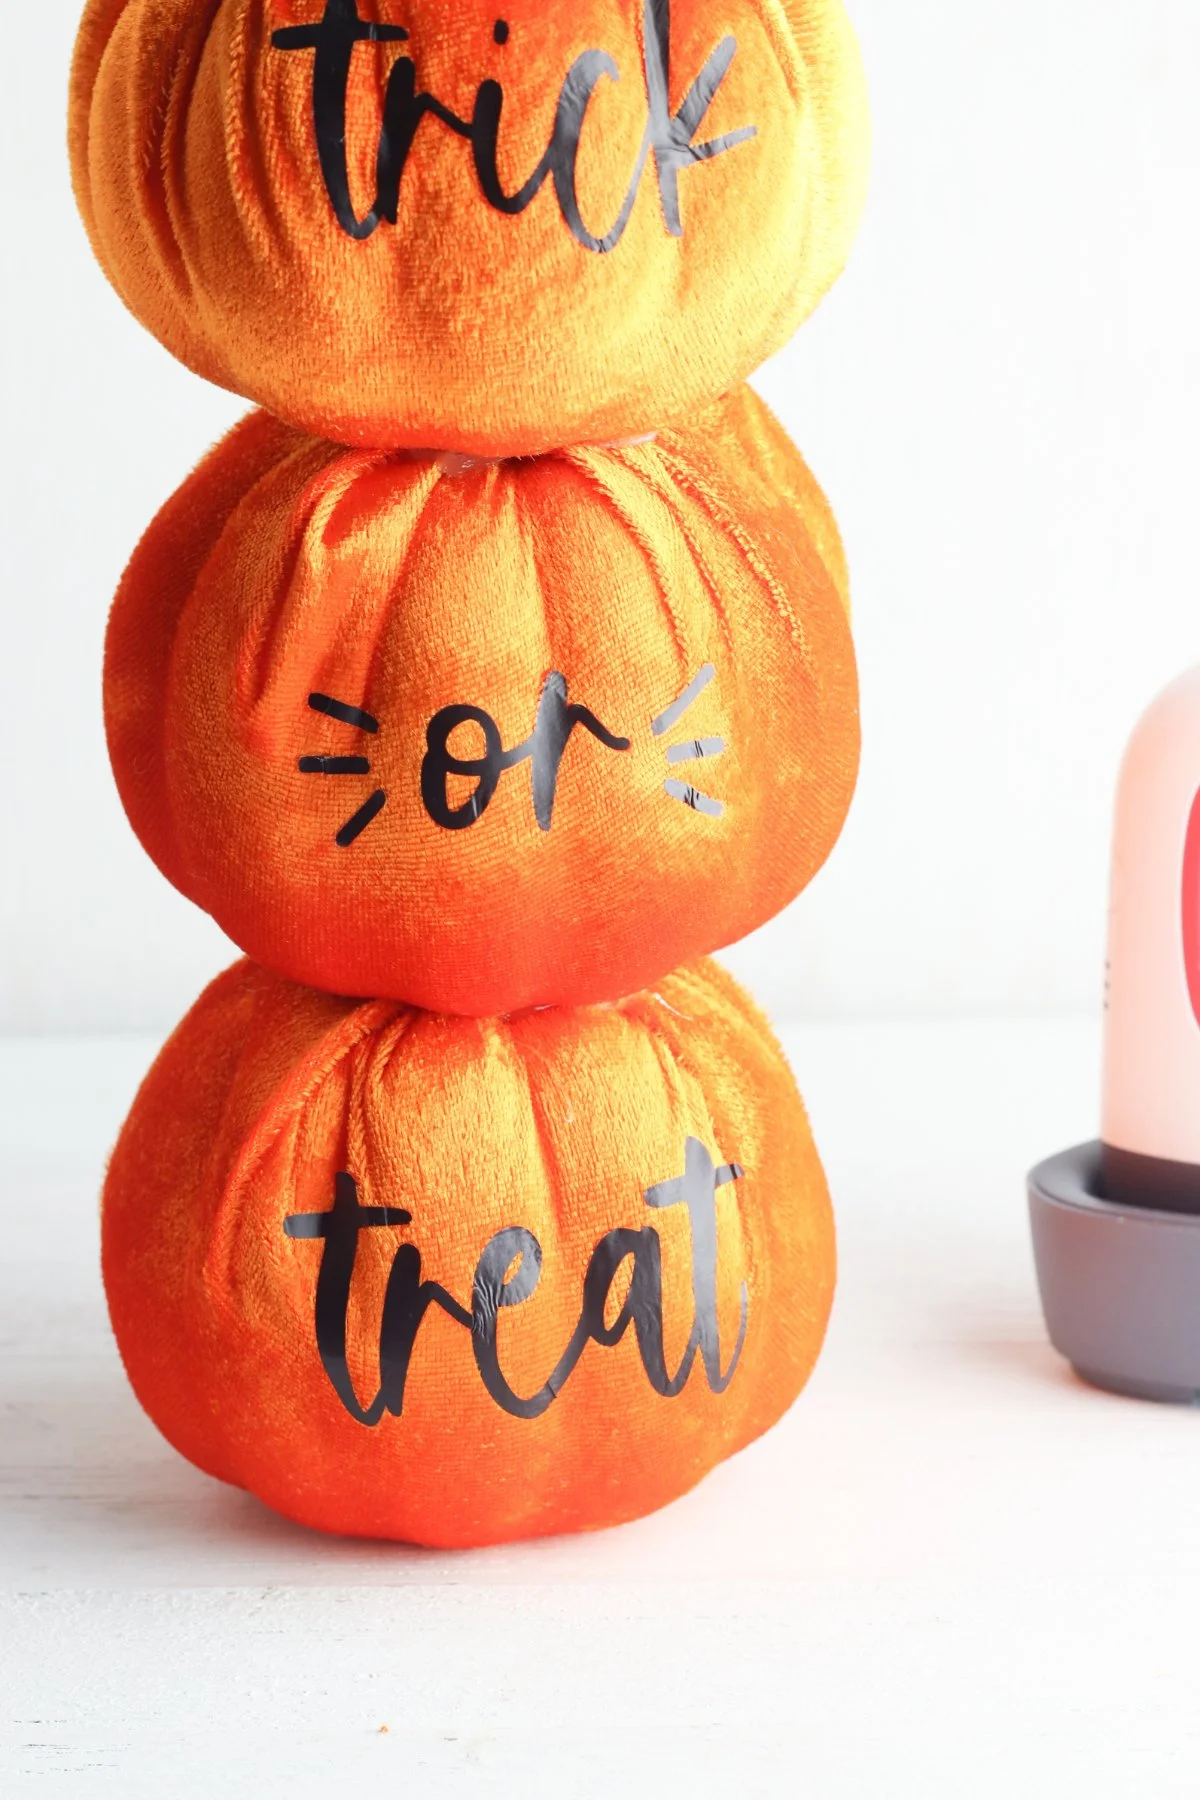
We're going to turn cheap dollar store velvet pumpkins into a cute stacked pumpkin decoration using this free 'Trick or Treat' SVG file. They're such a fun and easy way to decorate your home this Halloween and make your very own pumpkin patch.

Easy No-Carve Halloween Pumpkins.
I picked up these velvet pumpkins from the local craft store but you can find them in the Dollar store or online. I knew I wanted to make some new Halloween home decor that wasn't scary so I thought these cute pumpkins would be perfect.
I kept it simple by adding this 'Trick or Treat' handwritten font design - one word for each pumpkin. You can leave them as they are and display them in a row or remove the stems and make a cute stack of velvet pumpkins.
And the best part? This free SVG cut file isn't just for pumpkins! You can use it on so many different projects.
How about a spooky tote bag or t-shirt? You could even make some simple wood signs or use it as a stencil to carve a real pumpkin.
Supplies:
Free 'Trick or Treat' SVG Cut File (click the big pink button at the bottom of this post)
Black Heat Transfer Vinyl - If you're using fabric-covered pumpkins you’ll need to use heat transfer vinyl to attach the words to the front. If you’re not using fabric-covered pumpkins, traditional vinyl will work just fine.
Cricut Easypress Mini - Since the space on the front of your pumpkins is quite small, I suggest using a Cricut Mini Easy Press to press your HTV onto the fabric. It makes it so much easier to put the vinyl on a small space!

How to Make Vinyl Lettered 'Trick or Treat' Pumpkins.
1. Download the Trick or Treat SVG cut file and upload it into Cricut Design Space.
If you want to cut this pattern by hand we have also included a PDF so you can print the template and cut it out using a craft knife.

2. Resize the words to fit onto your pumpkins.
I recommend measuring both the width and height you want your words to be on the pumpkins to make sure they're the right size. For these pumpkins, I made the words 3 inches wide which made them around 1.5 inches tall.

3. Flip the SVG file or set the mat to mirror.
Tip: If you're using heat transfer vinyl like on these fabric pumpkins or a tote bag or t-shirt you need to make sure to mirror your image.
If you're using cutting adhesive vinyl you need to make sure the image looks how you want it to read on your finished pumpkin.
4. For the next step place your black vinyl on your lightgrip mat and place it in your Cricut machine to cut.

5. Use your weeding tool to remove the excess vinyl that you don't need, then cut each word out individually.

6. Place the words on the front of the pumpkins. Make sure to line them so that they're in the centre of each pumpkin. Press the sticky part of the vinyl down and hold it in place using one hand.
Use the other hand to press the vinyl onto the pumpkin using the Mini Press.
When applying the vinyl lettering to a curved or bumpy surface I recommend starting from the centre and working your way out to the edges.
7. Repeat with all three pumpkins and words.

8. You can either leave as they are and display or remove the stem from the top of the pumpkins that say “or” and “treat.”
This part can be a bit tricky as you may need to cut away some of the fabric. But don't worry, you won't be able to see it once you glue your pumpkins on top of each other.
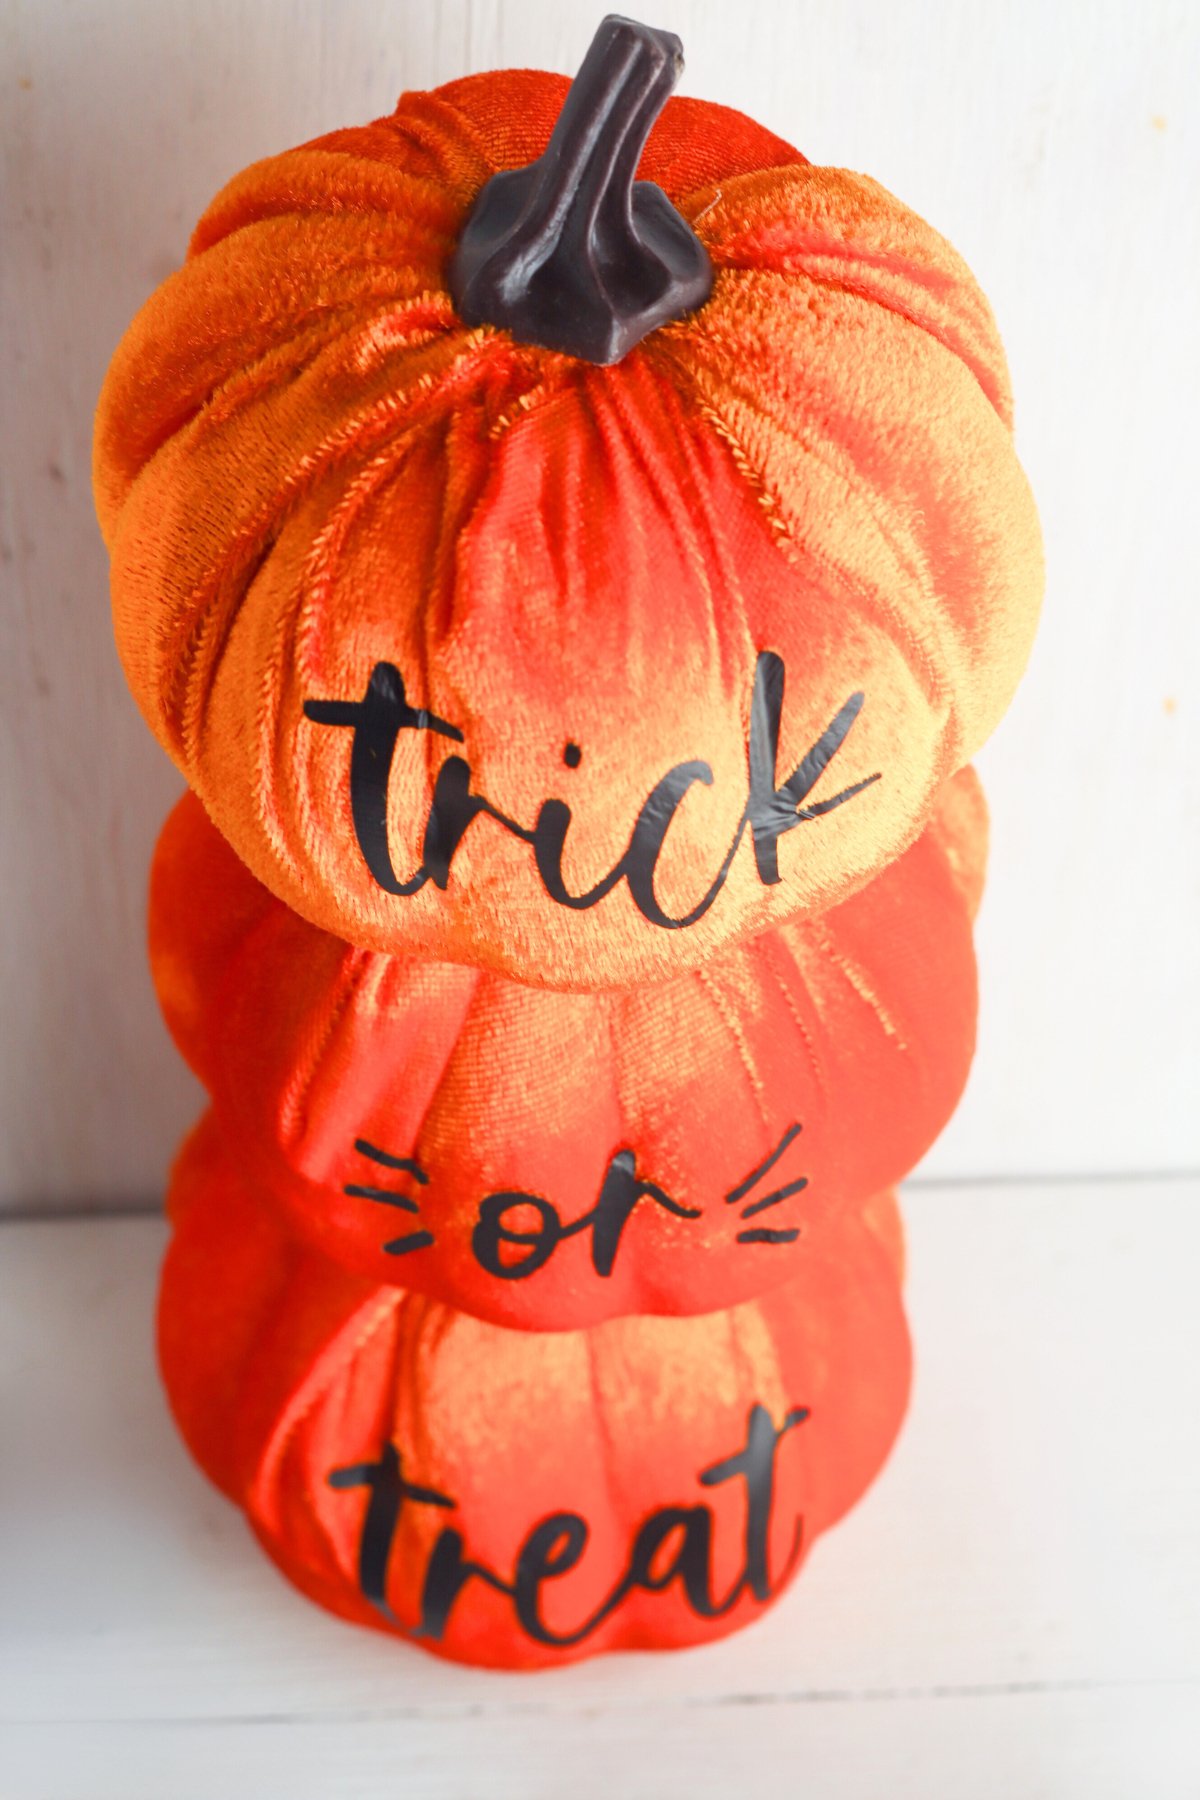
9. Use hot glue to glue the pumpkins on top of each other so that they spell out 'Trick or Treat'.
And voila! Your cute no-carve Halloween Pumpkin display is ready!

Aren't they cute? I love that this kind of pumpkin craft can be used year after year! So, what do you think? Where will you be displaying yours?

