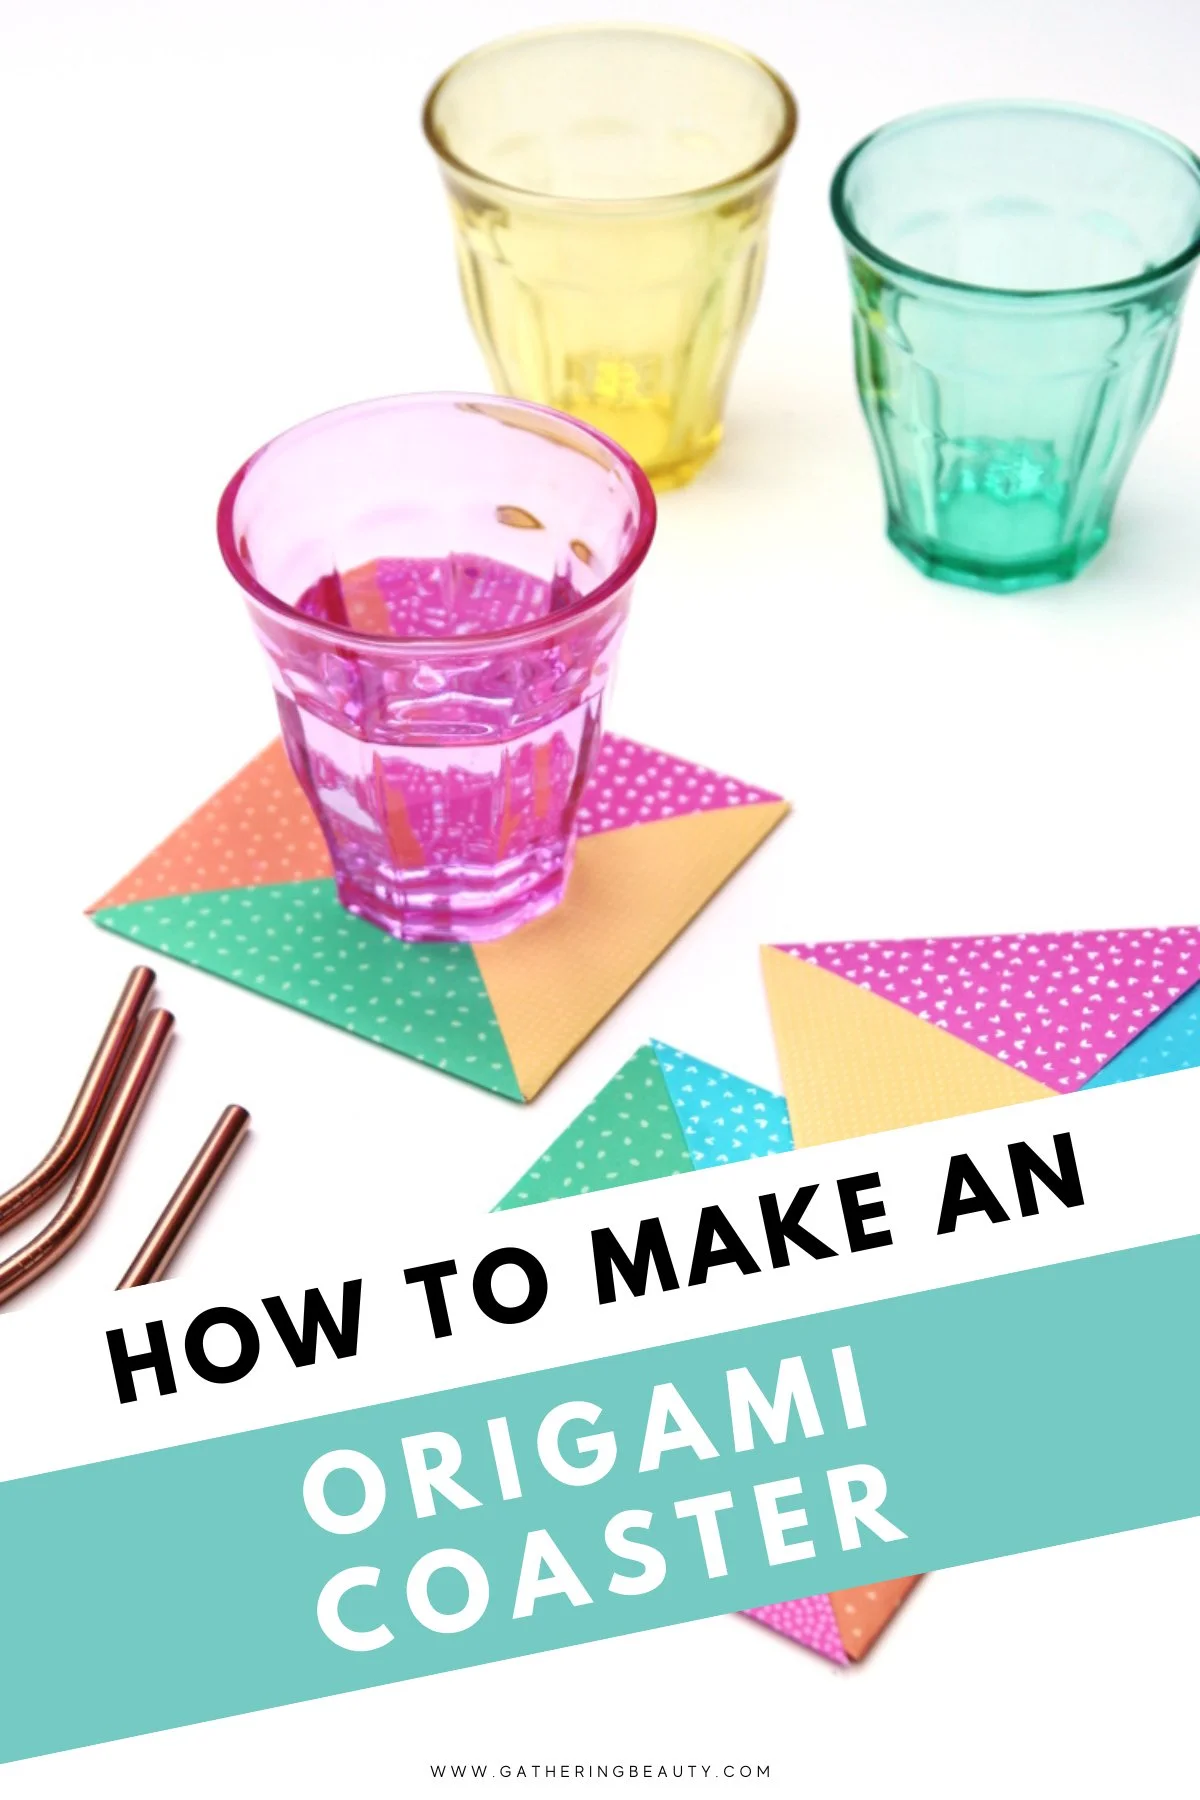
Origami Coasters
/Looking for an easy way to add a splash of colour to a picnic or outside gathering? Then you’re going to love these quick DIY paper coasters. They’re a simple origami craft you can make in minutes.
They’re great for beginners and also make fantastic gifts. All you need are 4 squares of paper and a few folds to make a beautiful set of handmade origami coasters.
This post contains some affiliate links for your convenience (which means if you make a purchase after clicking a link I will earn a small commission but it won’t cost you a penny extra)!
Easy Origami Coasters.
I’m really excited to show you how to make these DIY coasters. You know how much I love a pretty and practical origami project (I have a whole eBook about them after all) so of course, I couldn’t wait to share these with you as well.
If you’re throwing an outdoor picnic-style party this summer like I know a lot of us are then these paper drinks coasters are the perfect party accessory. They take practically no time at all to make. In fact, once you get the hang of this simple origami project, you can make up a whole batch of them in around thirty minutes.
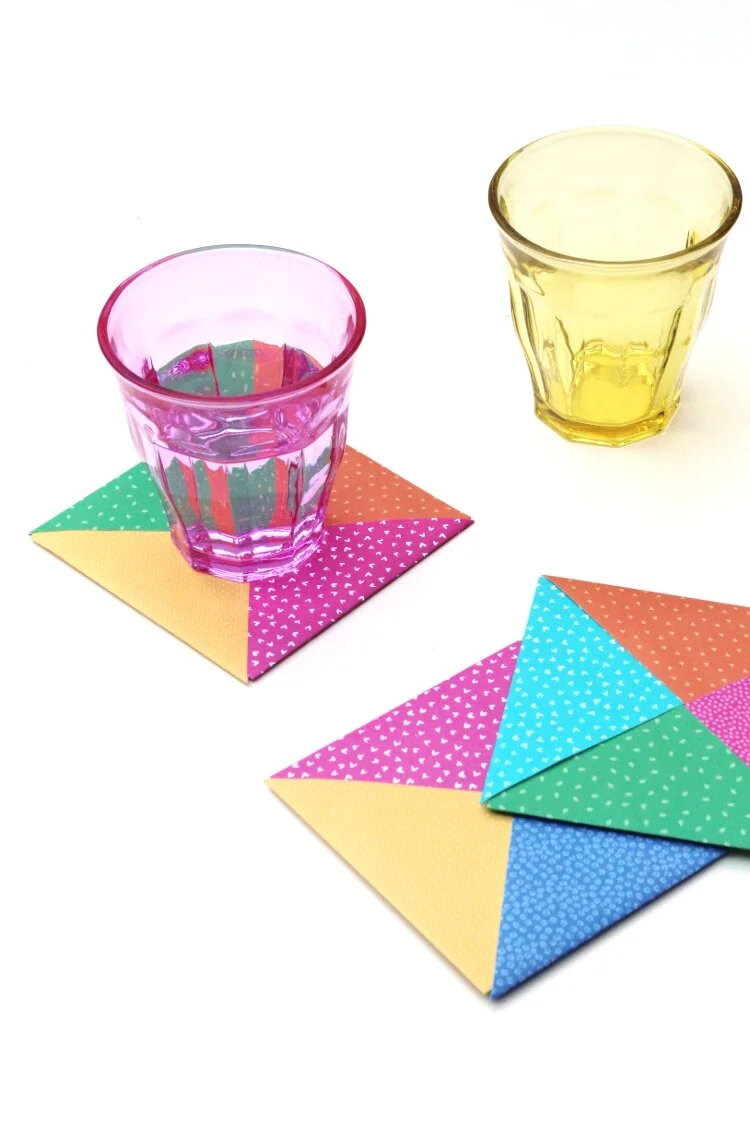
The thing I love about them the most though is that you can totally change up the look and feel of your coaster every time. You can use one colour, two different colours for a two-tone effect (how good would black and white ones look for a themed wedding?) or four different colours and create a set of bright rainbow coasters like I did.
Related: 25+ DIY Coaster Ideas To Make
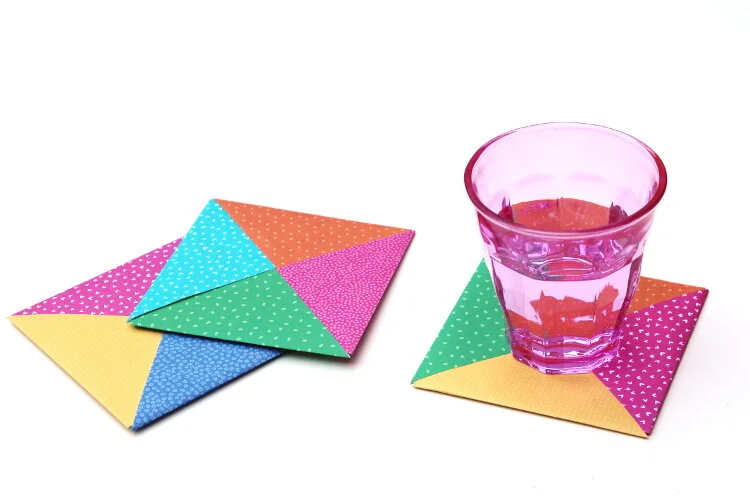
DIY Paper Coasters.
There are a few different versions of these some more complicated than others but I think these are simple enough that everyone can have a go at them. As with all origami crafts, it all comes down to the folds. Try to make your edges as straight as possible to get the best results.
You can use traditional origami paper (these patterned ones are really cute). Old magazines or finished colouring book pages make a great alternative and add a splash of colour.
I love the idea of making them for a wedding or baby shower. You can coordinate them to match the space and add a little homemade flair to your party.
Not only are they a clever homemade addition to any party but they also make cute hostess gifts. Because let’s be honest, you can never have too many coasters lying around.

How do you make paper coasters waterproof?
I know what you’re thinking? These coasters have one very big flaw. They’re not waterproof. Surely one little spill is all it takes to turn these coasters into a soggy mush. And you’d be right but don’t panic, I’ve got a few tricks up my sleeve for you to try.
Before we start I do have to say that I think the coasters look best just as they are. If they do end up soggy all you have to do is leave them to dry and pop them in with your recycling the next day that way nothing goes to waste.
These first methods aren’t going to completely waterproof your coasters but they will help the paper last longer.
Apply a couple of coats of Mod Podge.
Or clear acrylic varnish (you can buy it in a spray or liquid).
Full disclosure I haven’t tested the spray myself but I did try a liquid varnish. I brushed a very thin layer onto the paper. It did make the paper puff up and buckle slightly so it wasn’t ideal but ok in a pinch.
Seal the coaster using a laminator or self-adhesive laminating sheets.
I can imagine they’d look really nice as laminated origami coasters. I’ve laminated a thin card before and it looked good so this is a good one to try.
What do you think?

Supplies:
I recommend using origami paper for any paper folding project but any kind of thin paper will work. Here are a few alternatives that you probably already have on hand.
Regular Printer Paper,
Magazines,
Old Books,
Maps,
And Newspapers.
I even have some printable origami paper you can download and use for FREE. Simply download, print and cut into 7x7-inch squares. Click the image below to get yours.

How to make Origami Coasters.
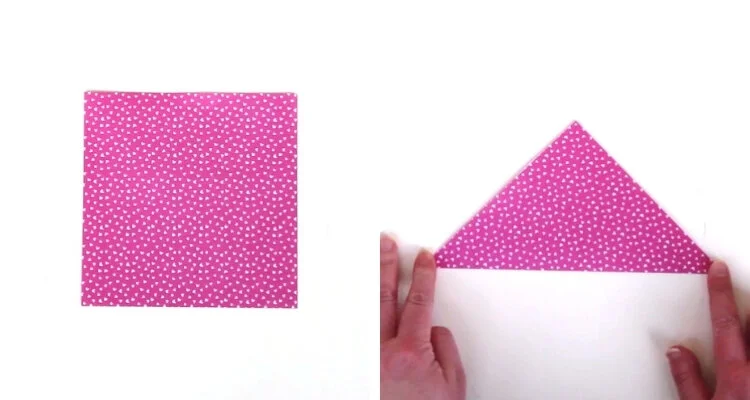
1. You need four squares of paper for each coaster.
2. Take the first square and fold it in half diagonally.
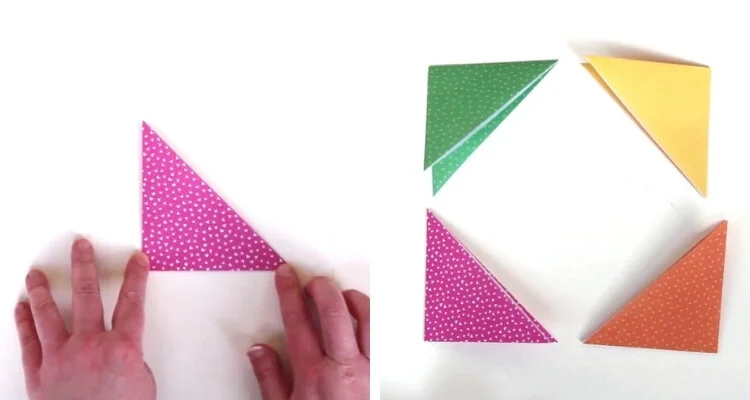
3. Fold in half again this time down the centre.
4. Repeat for your other three squares.
You want each piece to have one closed side (the folded side) and two open sides. The longest open side should have two pockets inside for you to slide the next piece into.
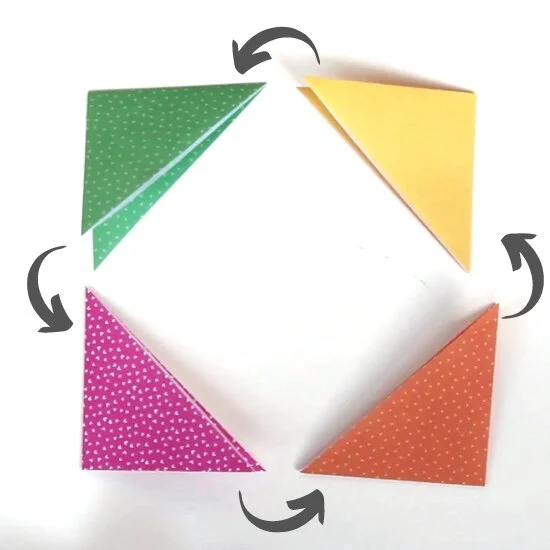
5. To fit your pieces together you need to arrange them with the open sides pointing anti-clockwise so each piece fits together securely.
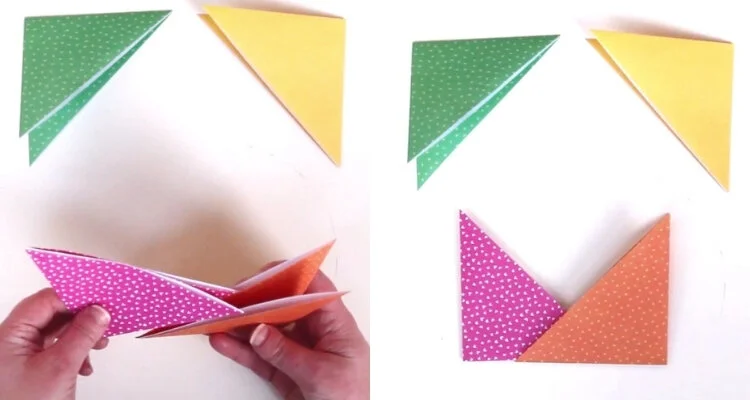
6. Take the bottom two pieces (pink and orange in the pictures) and slot them together by sliding the flaps of the left-hand piece into the pockets on the right-hand piece.
Make sure the flaps go into the layers on the right piece.
7. Take next piece and repeat sliding the flaps of the second piece (orange in the picture) and sliding it into the pockets of the third (yellow piece).
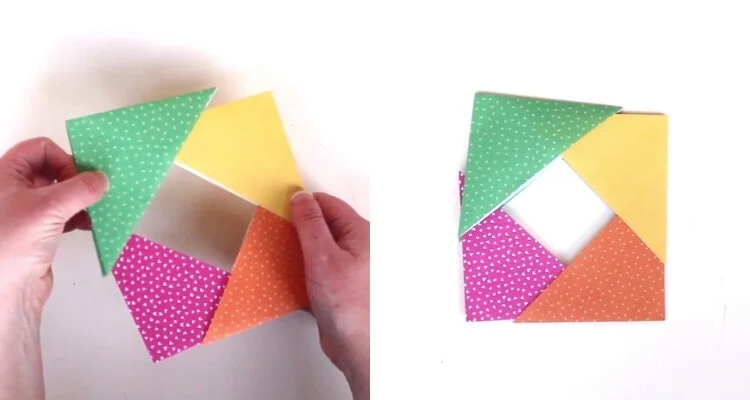
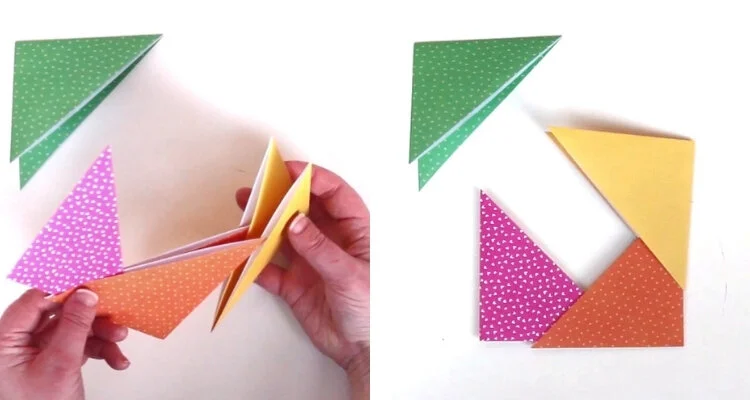
8. Slide the previous piece (yellow) into the last piece (green). The last piece is still unconnected.

9. Slide the last piece (green) into the first piece (pink).
You may need to pull the pieces open slightly to get it to fit.
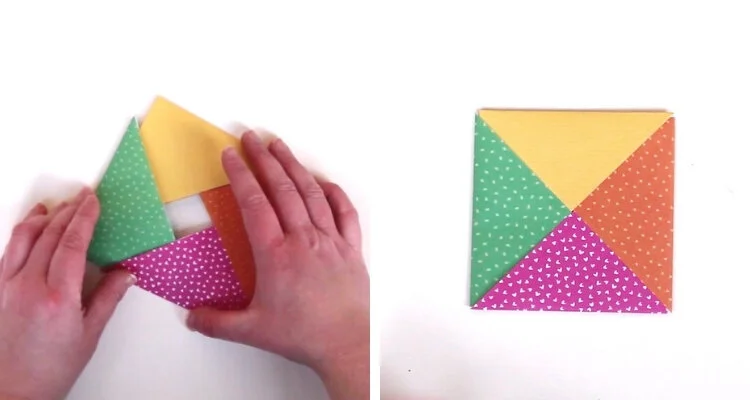
10. Push and wiggle the pieces together to form your coaster.
Need a bit more help? Check out the video below.

I really love these coasters. I think they’re a really simple and practical origami project that looks fantastic and also makes a great gift!