How To Finger Knit - Knitting The Rows
/Knitting with your fingers is easy and fast! Follow along with my finger knitting for beginners series and learn how to cast on, knit stitches and cast off with these simple step by step instructions.
This post contains some affiliate links for your convenience (which means if you make a purchase after clicking a link I will earn a small commission but it won’t cost you a penny extra)!
How To Finger Knit Rows.
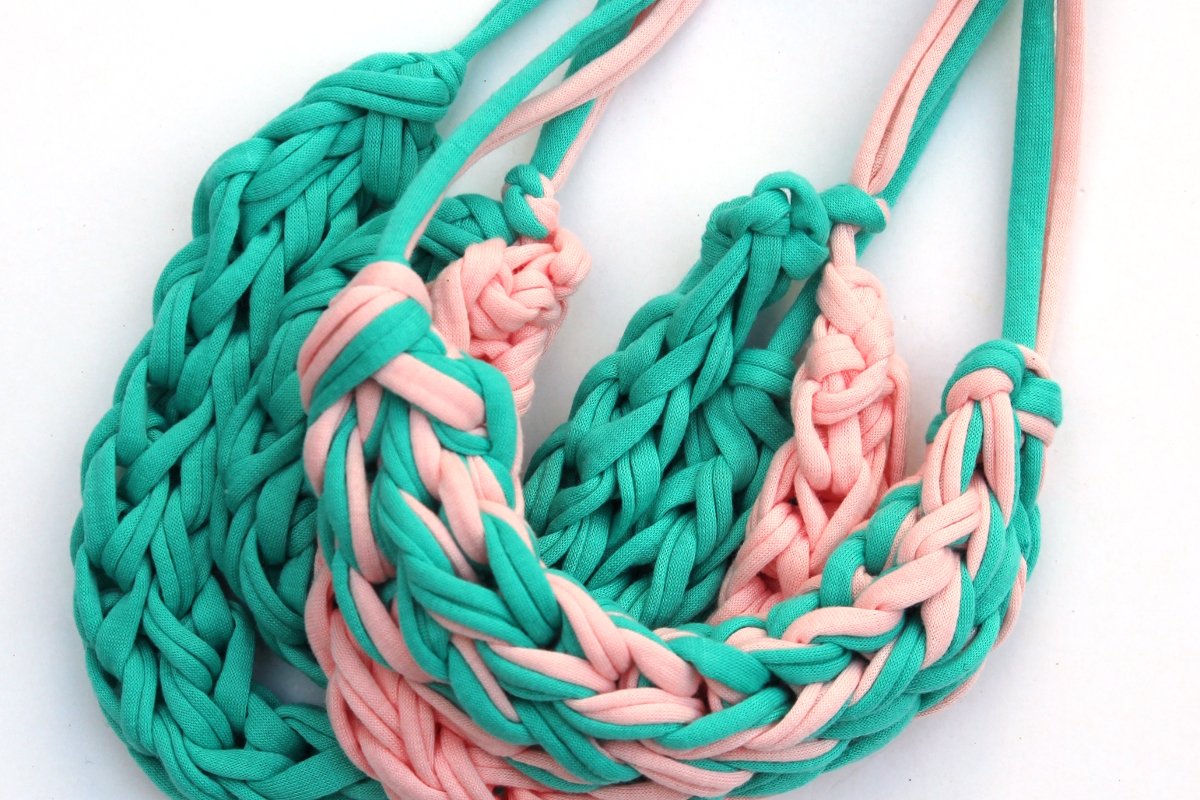
Welcome to the second part of my ‘how to finger knit’ series. By the end of this series, you’ll be able to make a simple braid that can be used as a necklace, bracelet or even a scarf.
If you’ve never picked up a crochet hook or pair of knitting needles before I know this kind of craft can seem scary but I promise finger knitting is as easy as it is fun. It’s the perfect craft to do while binge-watching your favourite show or crafting with friends.
If you haven’t already now is the time to pop on over and read the first part, how to cast on in finger knitting. It’s the first basic step you’ll need to get started.
Four Finger Knitting.
How did you get on? Have you cast on yet? Great, now that you’ve mastered the first step in any knitting project it’s time to move on to the next part, how to knit stitches and rows.
This method uses four fingers and is the most common form of finger knitting. To create the stitches you wrap the wool around your four fingers weaving over and under them and then lifting the bottom loop up and over the top loop. Don’t worry I’m going to cover it all below in more detail.

Materials:
T-Shirt Yarn or Wool,
Your Hands.
You can finger knit using whatever kind of yarn or wool you have on hand but I do recommend starting with a bulky yarn like t-shirt yarn. I find it’s easier to work with thicker materials especially when you’re just getting started.
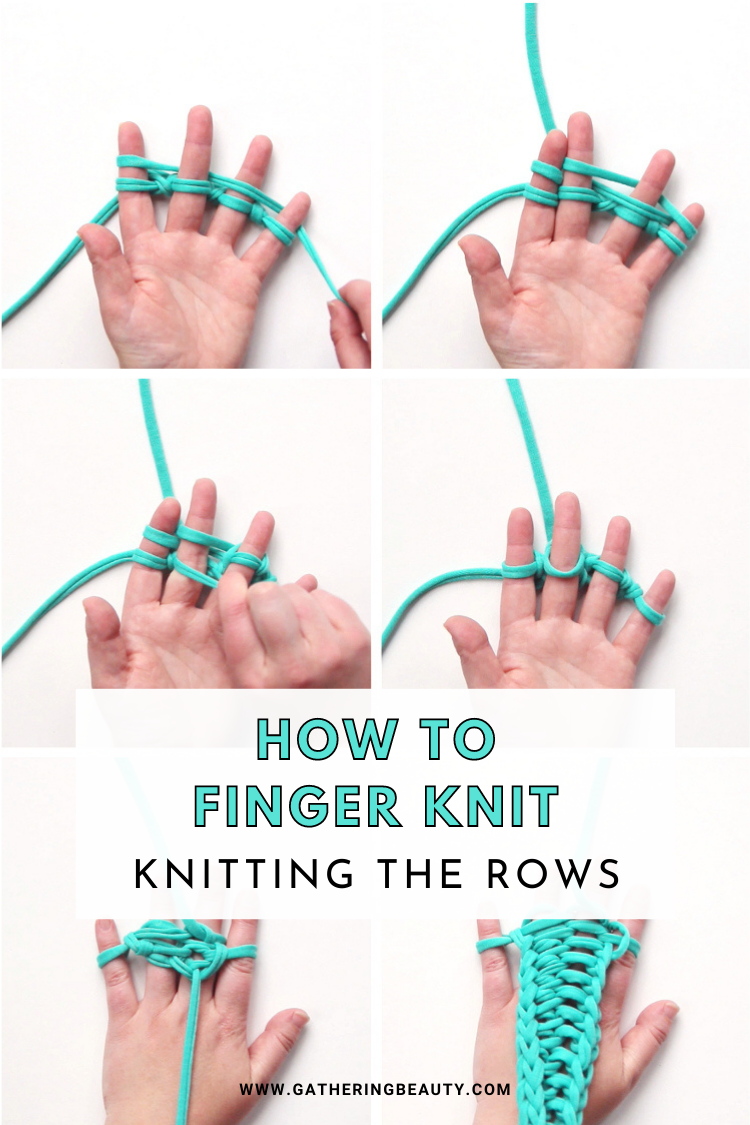
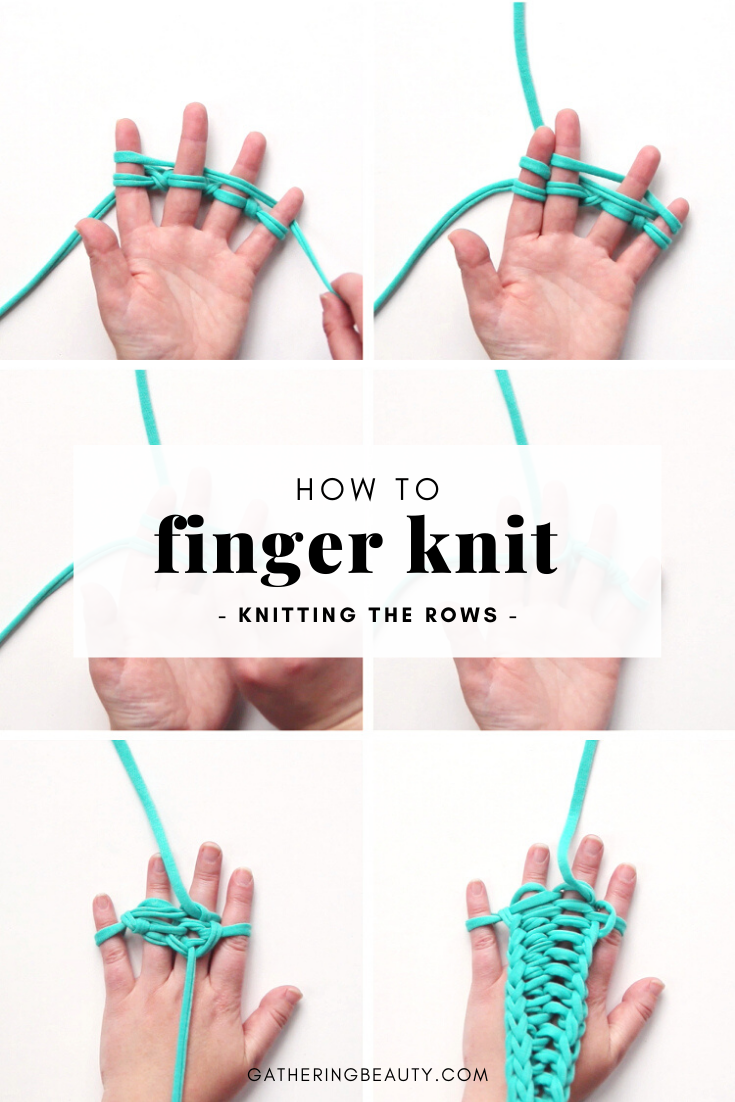
How To Start A Finger Knitting Row.
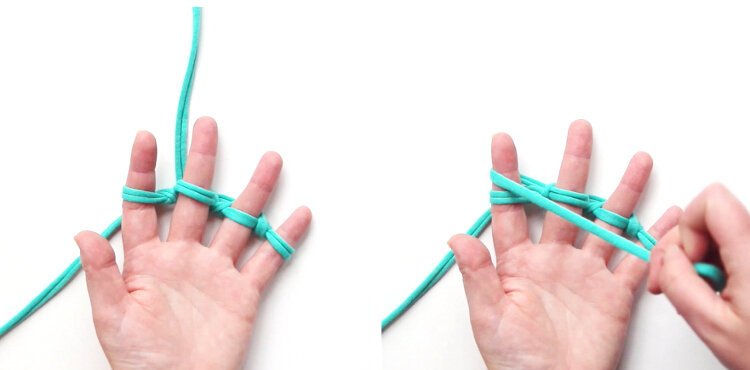
1. Take the working yarn and wrap it in front and around your index finger…

2. Wrap it behind your middle finger, over your ring finger and behind your little finger.
3. For the next row, wrap the yarn around your little finger, under the ring finger, over the middle finger and trap it between your index and middle fingers.

4. Pull the bottom row up and over your fingers just like you did when casting on. Start with your little finger and work back ending with your index finger.
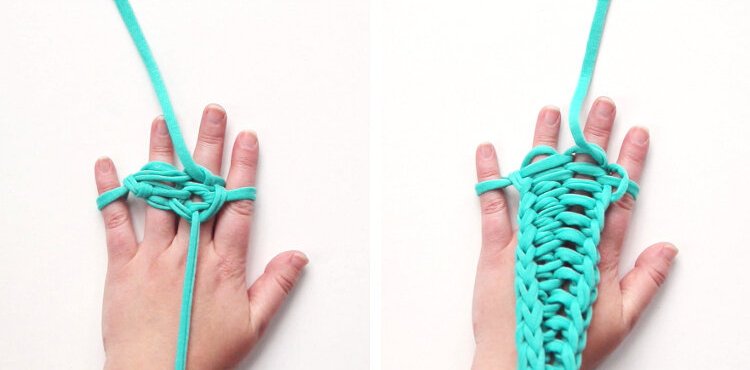
5. When you flip it over you can see the finger knitting starting to form. Gently pull the tail down at the back of your hand to tighten the knot.
6. Repeat steps 1 to 4 until you’re happy with the length.
Need a bit more help? Watch the video below to see how it’s done in real-time.
Want to know how to cast off and finish your finger knitting project? Check out Part 3 - Casting Off here.
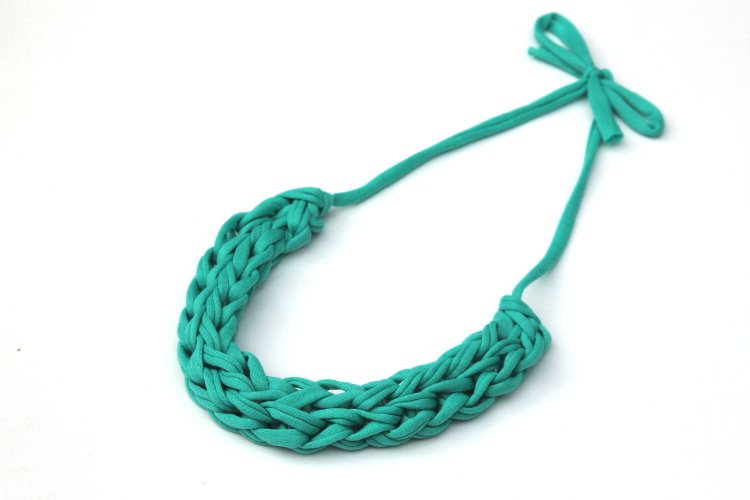
To make a simple necklace I normally knit 23 rows. T-shirt yarn does have a stretch to it so keep this in mind when deciding how long to make your braid.
To make a bracelet make your braid smaller and measure against your wrist. For a scarf, you can use chunky wool as Hello Glow did and keep going until your finger knitting is around 70 inches long and wrap it around to make an infinity-style scarf.