
How To Finger Knit - Casting Off.
/Started finger knitting but don’t know how to finish? This simple beginners guide will show you how to cast off and safely tie the end of your finger knitting.
This post contains some affiliate links for your convenience (which means if you make a purchase after clicking a link I will earn a small commission but it won’t cost you a penny extra)!
How To Finish Off Finger Knitting.
This is the third and final part in my ‘how to finger knit’ series for beginners. So far we’ve learnt how to cast on and how to knit the stitches to form the rows. If you haven’t already make sure to give them a read before moving on to this last step.
Today we’re going to learn how to bind off finger knitting. You’ve knitted up a storm and made a beautiful braid but how do you stop all of your hard work from unravelling?
How To Cast Off Finger Knitting.
There are a few different ways to end your finger knitting (also called casting off or binding). You can remove the knitting from your fingers and thread the end of the yarn through the loops before securing it with a knot. The problem with this is you can easily miss a loop or thread it through in the wrong order and your knitting can unravel.
Another way is to bring the loop from your forefinger and place it on the index finger, before bringing the lower loop over the top loop. Continue across all the fingers until you get to the last stitch. Cut the yarn and thread it through the last loop before you pull it tight to fasten. I find this way to be a little tricky and to be honest don’t always get it right the first or even second time.
The way I’m going to show you is what I consider to be the easiest and least likely to go wrong. Instead of removing the knitting from your fingers and threading the end of the yarn through the loops you thread the yarn through the loops while it’s still on your hand.
Don’t worry if it sounds complicated I’ve put together some easy to follow step-by-step instructions below and a video to go along with it.

Materials:
This page contains some affiliate links. This means that if you make a purchase after clicking a link I earn a small commission but it doesn’t cost you a penny extra!
T-Shirt Yarn or Chunky Wool,
Your Hands.
You can finger knit using whatever kind of yarn or wool you have on hand but I do recommend practising with a plain chunky yarn. It’s easier to work especially when you’re just getting started. You can always move onto some fancier wool when you’ve got a bit more practice.
How To Cast Off Finger Knitting.
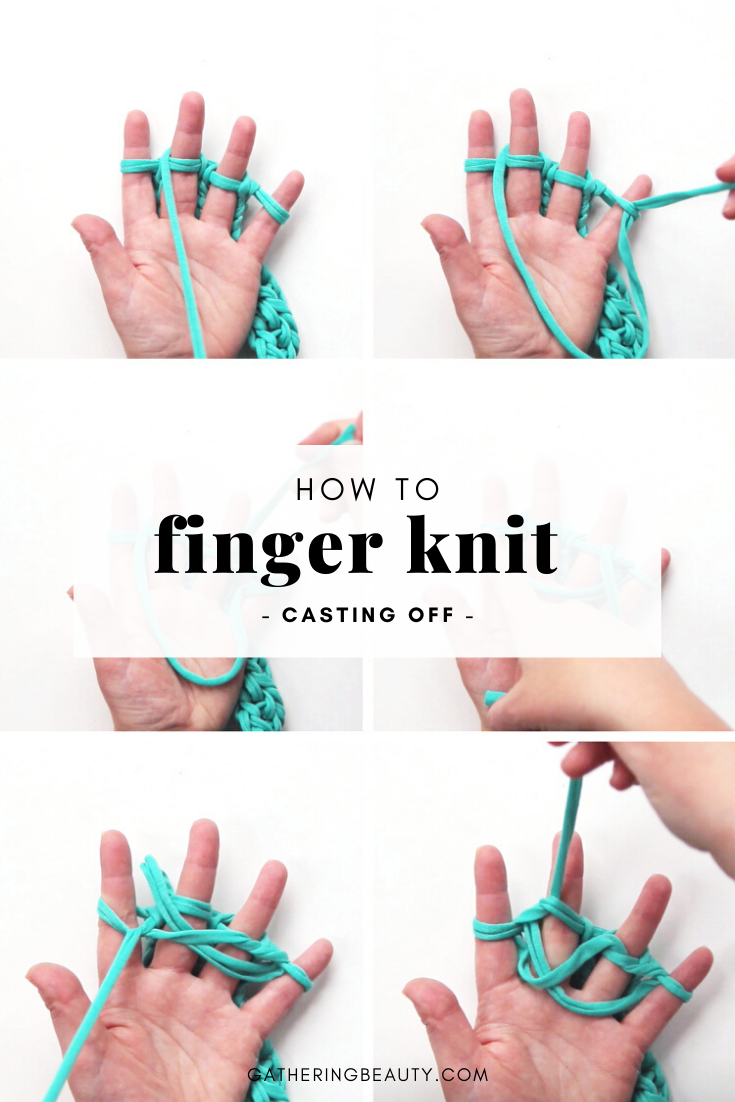
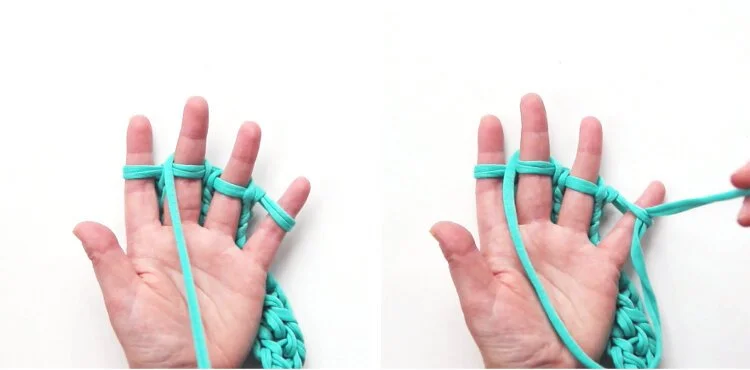
1. Take your working yarn and cut a tail about 6 inches long.
2. Thread the tail under the loop on your pinky finger…

3. And then your ring finger.
4. Skip your middle finger and thread it under your index finger …
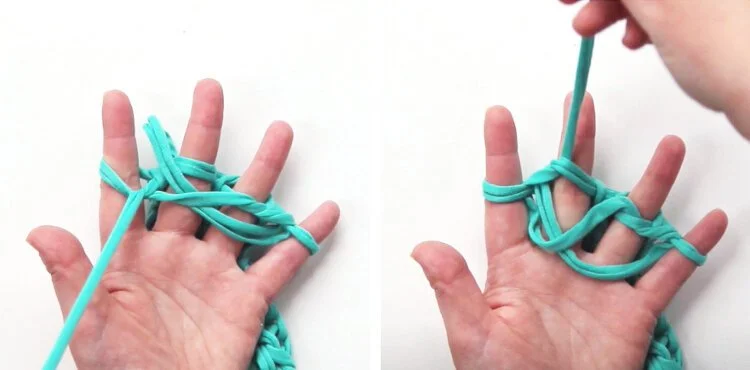
5. Before going back and threading it under the middle finger you skipped earlier.
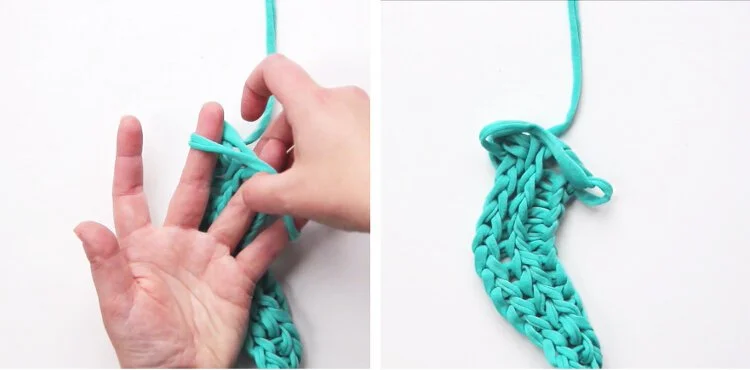
6. . Slip the loops off your fingers.
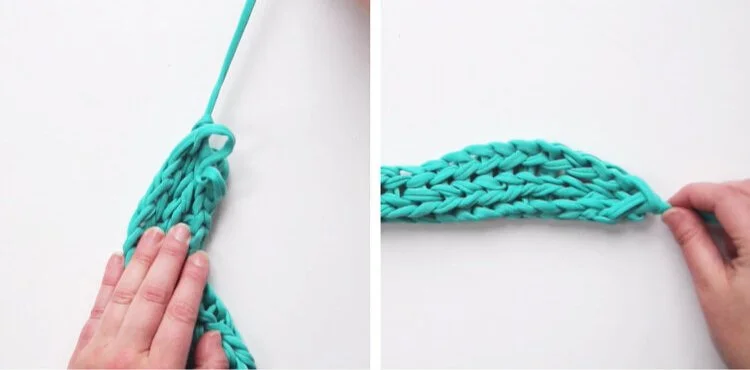
7. Pull tight to form a knot at the end.
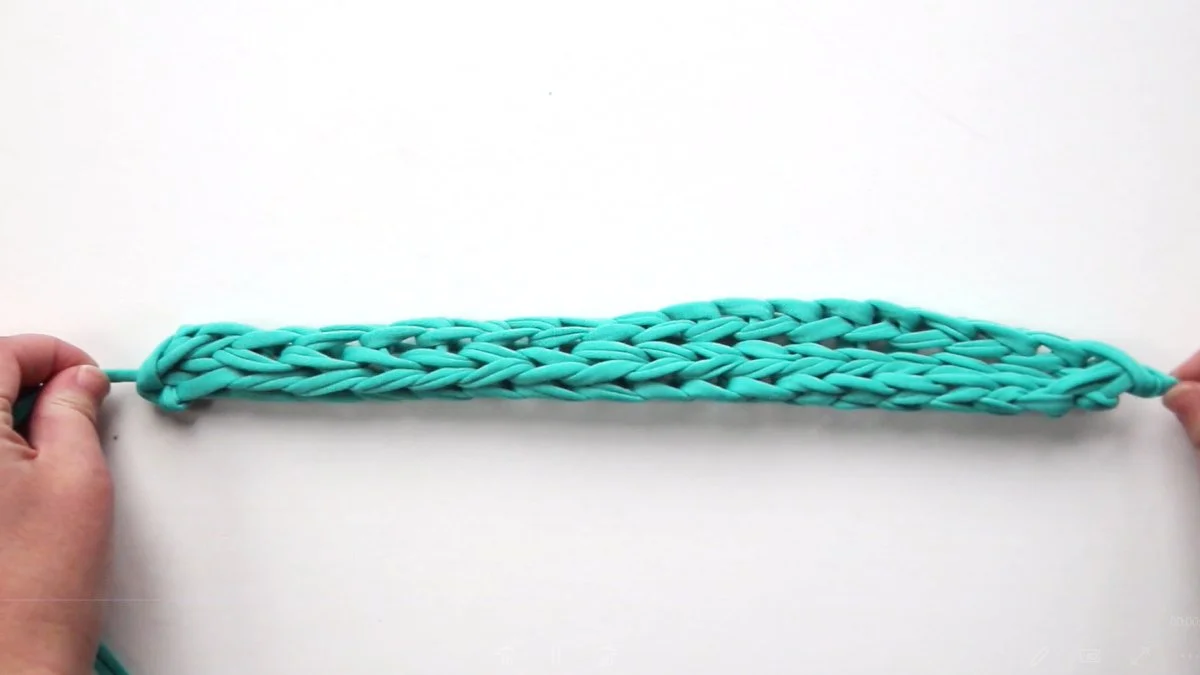
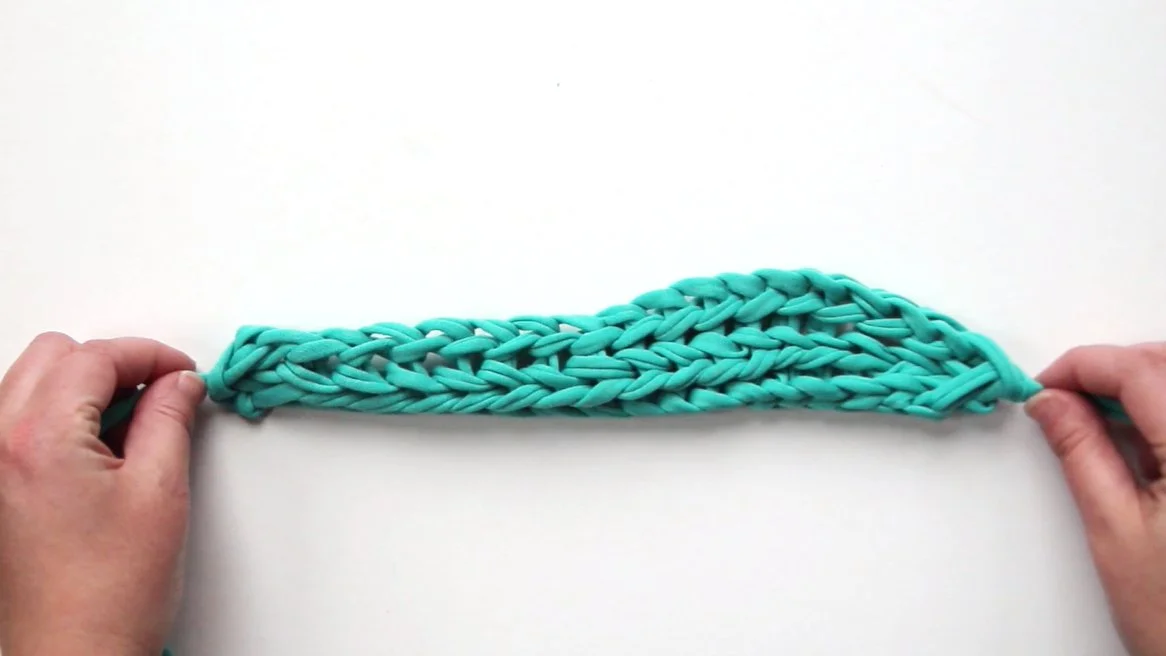
8. Take your finger knitting and hold it at each end. Pull firmly. As you pull your knitting will curl up to form a tube.
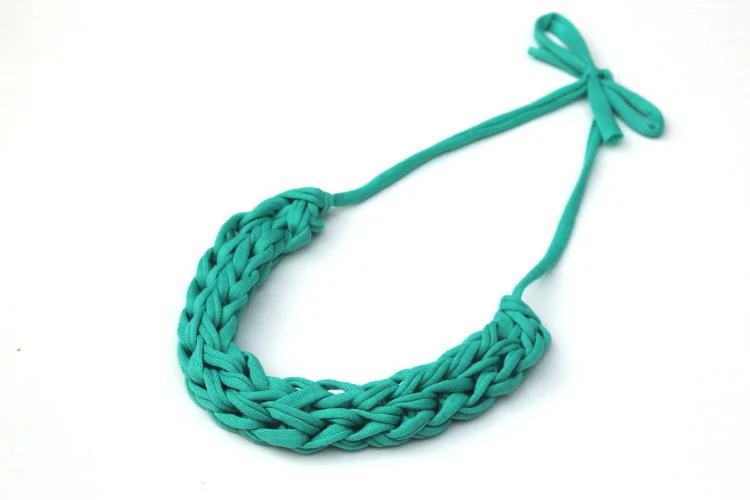
9. Take your finished cord and tie it in a bow to make a simple finger knit necklace or bracelet. And if you want to know what else you do with finger knitting check out my post showing you all the things you can make here.
Need some more help? Watch the video below to see the steps in real-time.


