Origami Easter Basket
/Need a last-minute Easter basket? Learn how to turn a simple paper square into an adorable origami basket.
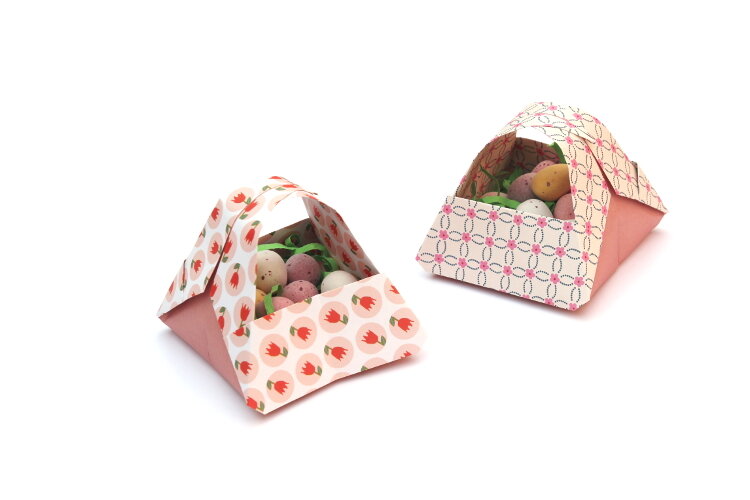
These cute little origami baskets are so easy to fold and make lovely gifts. Fill them with chocolate eggs and surprise your friends and family.

This page contains some affiliate links. This means that if you make a purchase after clicking a link I earn a small commission but it doesn’t cost you a penny extra!
Origami Easter Basket.
Easter is nearly here and that means it’s time for some more Easter Origami. One of my favourite tutorials is my origami bunny Easter baskets. I’ve made a few different versions over the years but as much as I love them I do have to admit that they’re not the easiest things to make. In fact, they can be quite tricky.
This year I thought it would be fun to try something new and show you how to make a simple origami Easter basket. These clever baskets are made using a single piece of paper including the handle. And although you don’t need any special tools or materials some double-sided tape or glue is required at the end to close the top of the handle.
While these baskets look quite complicated they’re actually very easy to make. Not just for adults, they’re a good one to get older kids and teenagers involved with. Similar to easy origami bowls they start with a simple square base that you open up at the end to form the base. The handle is made in two parts and joined at the end.
You can customise your baskets with pretty papers, drawings or decorate them with stickers. So even if the kids are too young to make them themselves they can have fun with the finishing touches.
Fill them with chocolate eggs and they make lovely place settings or Easter table decor. A lovely way to brighten up anyone’s Easter.
Read on for the step by step instructions and video tutorial.
Origami Supplies:
Origami Paper (sadly the paper I used is no longer available online but there are lots of lovely patterned origami papers available. You can find some here).
Glue or Double-sided Tape
My favourite origami paper alternatives.
I do recommend using origami paper (you can even get a cute pastel version) for any paper folding project, here are a few alternatives that you probably already have on hand.
Regular Printer Paper,
Magazines,
Maps,
Old Books,
And Newspapers.
I even have some printable origami paper you can download and use for FREE. Simply download, print and cut into 7x7-inch squares.


How to make an Origami Easter Basket.
1. Start with a square piece of origami paper and lay it down pattern side up.
2. Fold in half, open back out.
3. Fold in half again, this time in the opposite direction and open back out.

4. Flip your paper over so the pattern side is facing down. This time fold in half across both diagonals before opening your paper back out.

5. Collapse your paper down using the folds you’ve just made to make a square base. You want the pattern to be on the inside.
6. Rotate 180 degrees so the open part points up.

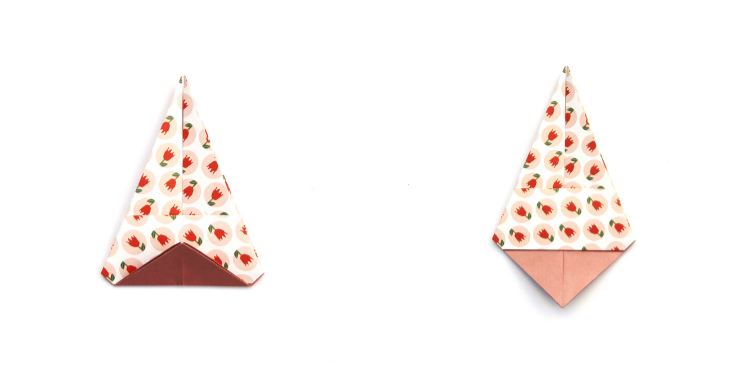
7. Take the top point and fold it down to meet the bottom point.
8. Open back out and fold the top point down this time to the middle crease you’ve just formed.

9. Fold down along the middle crease.
10. Flip your origami over and repeat on the other side.
11. Take hold of the left flap and fold it over to the right.

12. Flip your paper over and repeat 7-9. Next, fold the left flap over to the right.

13. Take the top layer on the left-hand side and fold the top edge in to meet the center.

14. Open back out and fold the bottom edge in to meet the crease you made in the last step.
15. Fold in to meet the centre crease.

16. Repeat steps 13-15 on the right-hand side.
17. Flip it over and repeat on the other side.

18. Take the top layer of the left side and fold it over to the right.

19. Flip it over and repeat taking the left flap and folding it over to the right again.
20. Fold the bottom point up using the bottom of the patterned paper as a guide.
21. Unfold.
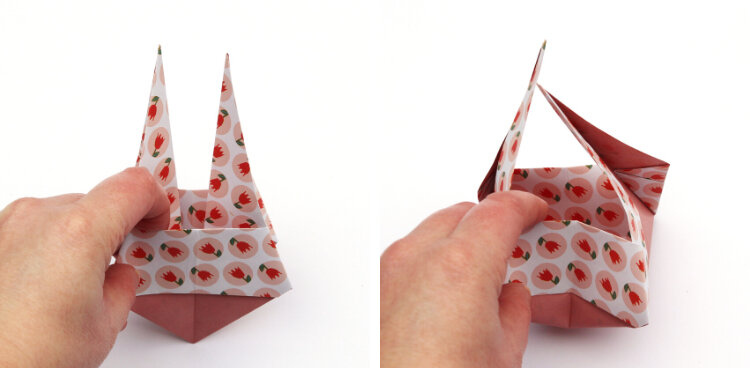
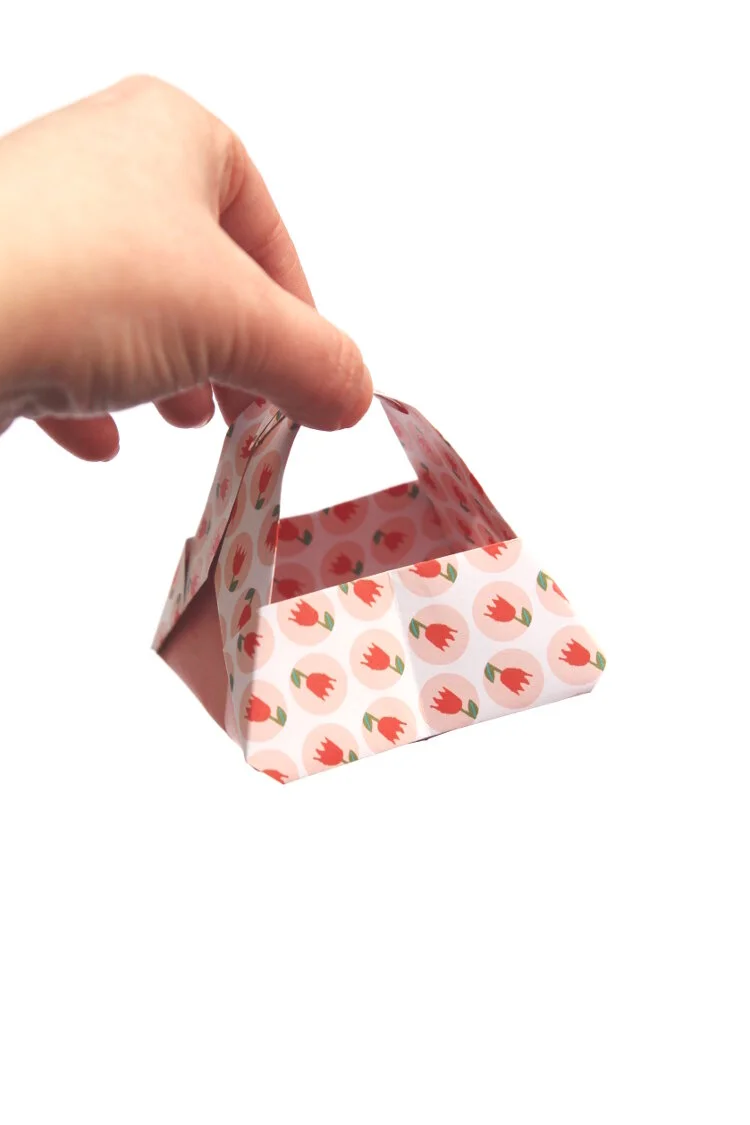
22. Open the basket out and push the bottom down to form the base.

23. Use a glue stick or double-sided tape to stick the two sides of the handle together.

25. Fill with shredded paper and chocolate eggs.