
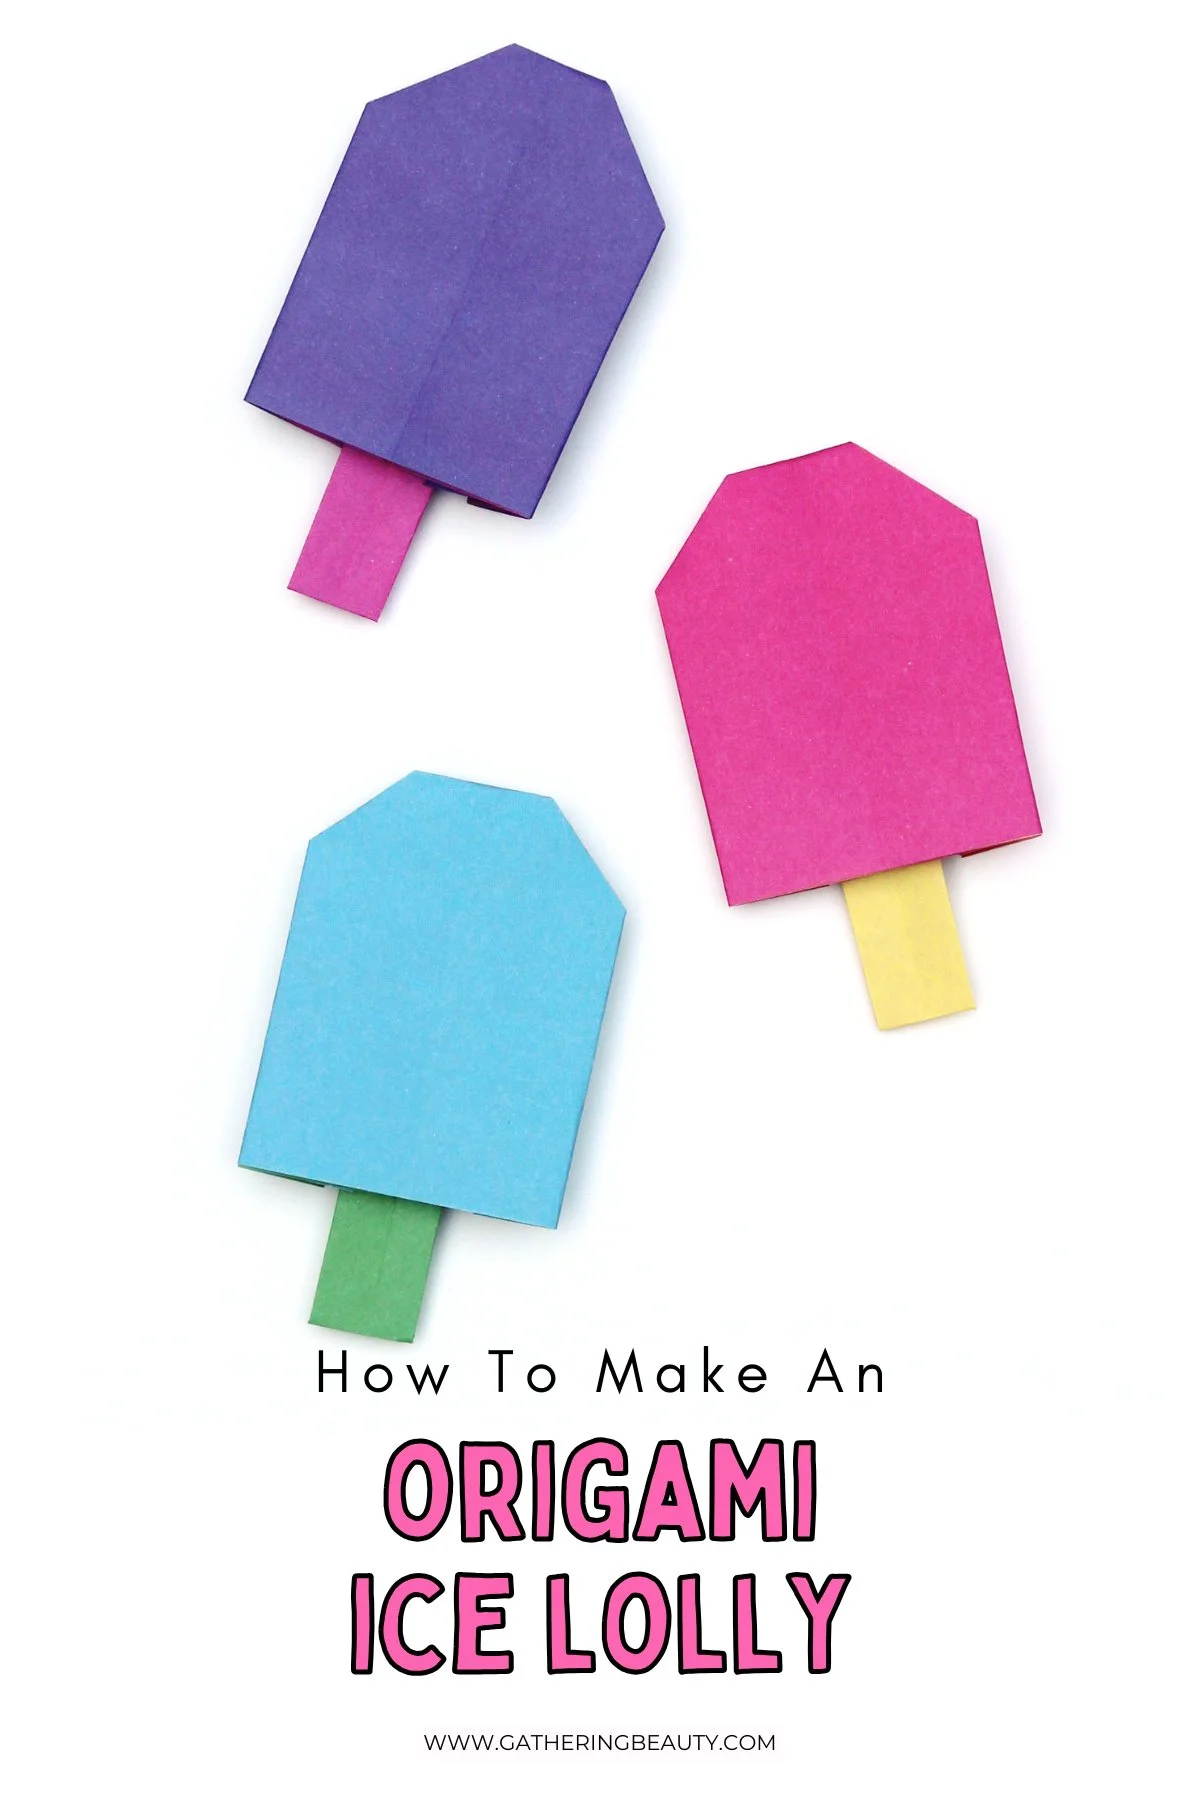
Origami Popsicles
/These Easy Origami Popsicles are super easy to fold, totally beginner-friendly and perfect for a fun summer paper craft with the kids. Ideal for summer party decorations, garlands, gift toppers and more.
This page contains affiliate links. This means that if you make a purchase after clicking a link I earn a small commission but it doesn't cost you a penny extra!
Origami Paper Popsicles.
If you've been following along with my summer origami series, you'll know I've been on a bit of a colourful, sunny kick lately. First came the Origami Ice Creams, then the Origami Shells, and now… popsicles!
You only need one square of double-sided paper and a little patience. No scissors, no glue, just folding!
They're brilliant for kids, great for beginners, and honestly just really fun to make.

I am absolutely obsessed with how these origami popsicles (or ice lollies as we call them here in the UK) turned out. I love the two-tone design with the contrasting colour paper stick, which gives them such a fun, retro feel.
There are so many fun ways to use your finished origami popsicles! Stand a bunch of them upright in a jar for an instant and colourful piece of summer party décor, or string several together to make a cheerful garland to hang across a window or wall.
They also make the sweetest handmade cards or gift toppers; tuck one on top of a wrapped present or blank greetings card for a really cute finishing touch.

Supplies:
Double-Sided Contrasting Origami Paper (I used this set of origami paper)

How To Make An Origami Popsicle.
1. Start with a square sheet of double-sided origami paper.
Lay it flat with the coloured side you want the stick to be, face up, and the coloured side you want the popsicle to be, face down.
2. Fold it in half diagonally in both directions.

3. Unfold and open back out.
4. Flip it over so the side you want the stick to be is now facing down.
5. Fold the paper in half vertically and unfold, then fold in half horizontally and unfold.

6. Open back out.
7. Collapse the paper along the folds (popsicle colour on the outside) and fold it down to make a triangle.

8. Take the top triangle on right-hand side and fold the side of the triangle in to meet the centre crease.

9. Open the triangle flap back out and press flat to make an upside-down kite shape.
10. Fold the sides (points) of the kite shape in to meet the centre crease.
You should be able to see two small coloured triangles of the contrasting colour. This is the beginning of the stick.

11. Repeat and fold the same flaps in half to the centre crease again.
12. Fold the bottom point up to make the bottom of your stick flat.

13. Fold both the sides in so the points meet the edge of the stick.
14. Repeat and fold the sides in half to meet the sides of the stick.
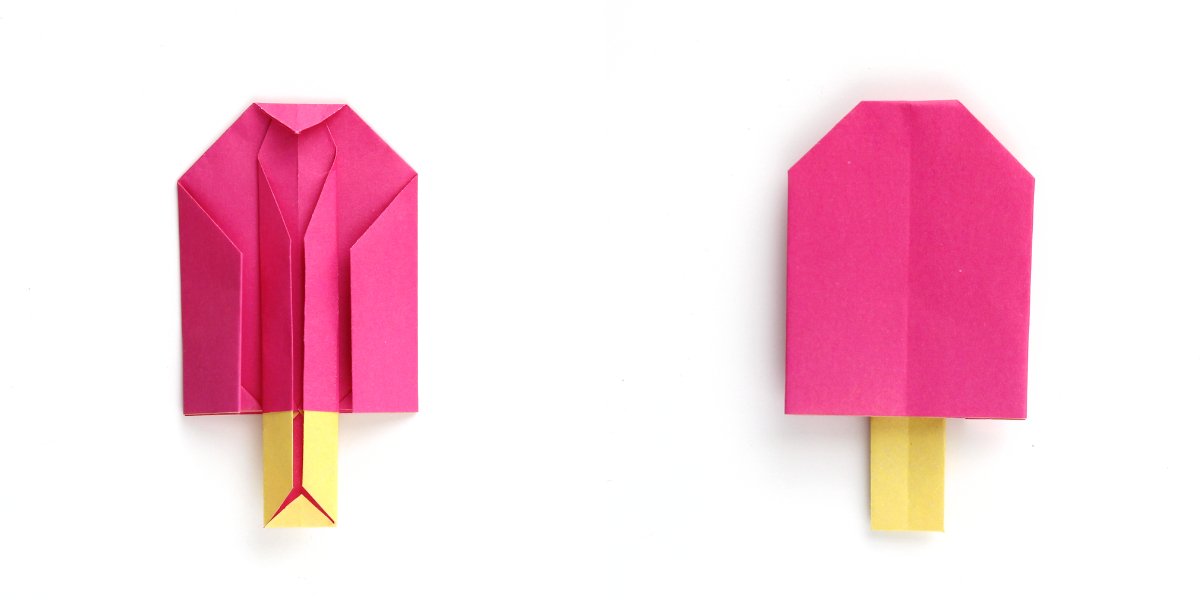
15. Fold the top point down to make a popsicle shape.
16. Flip over to reveal the finished origami popsicle.
Top Tip: If you'd like your finished popsicles to lie flat, simply pop them inside a heavy book overnight.


