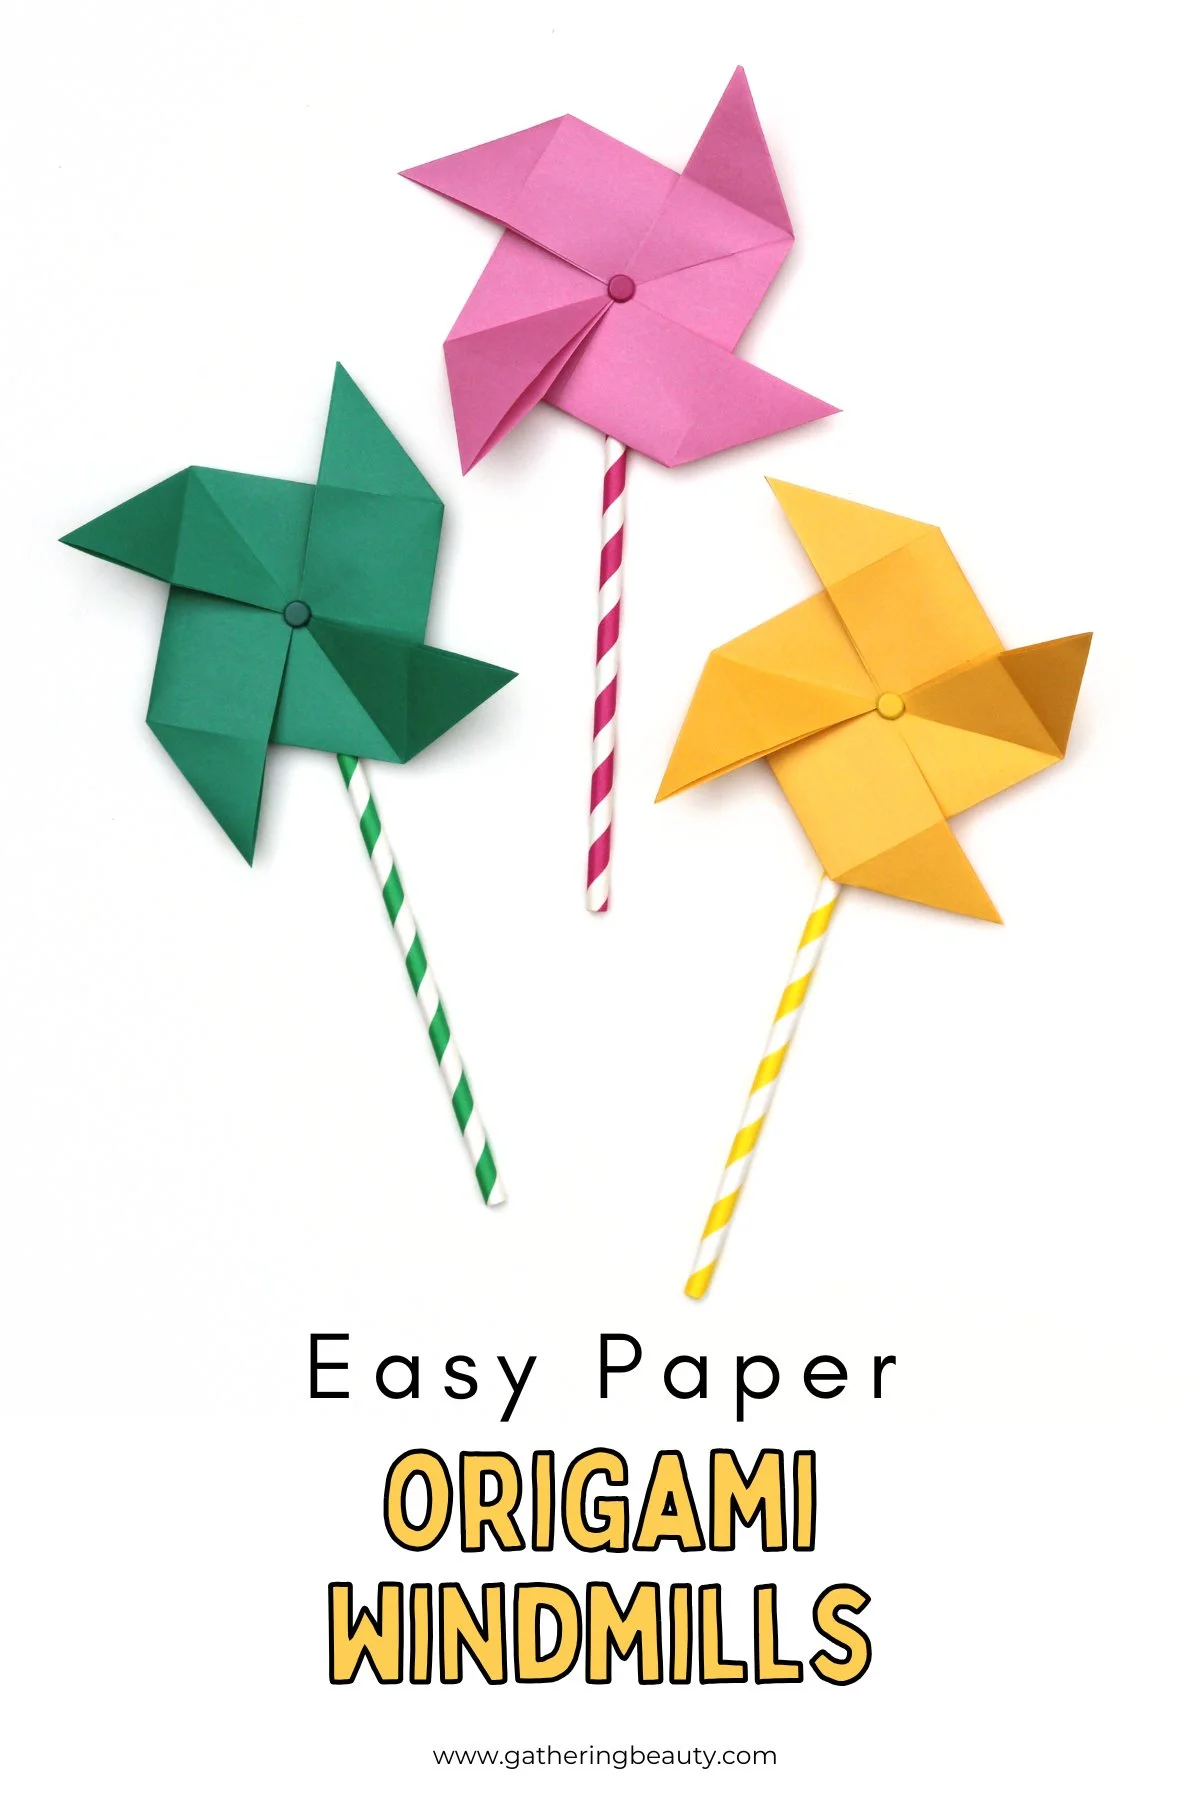
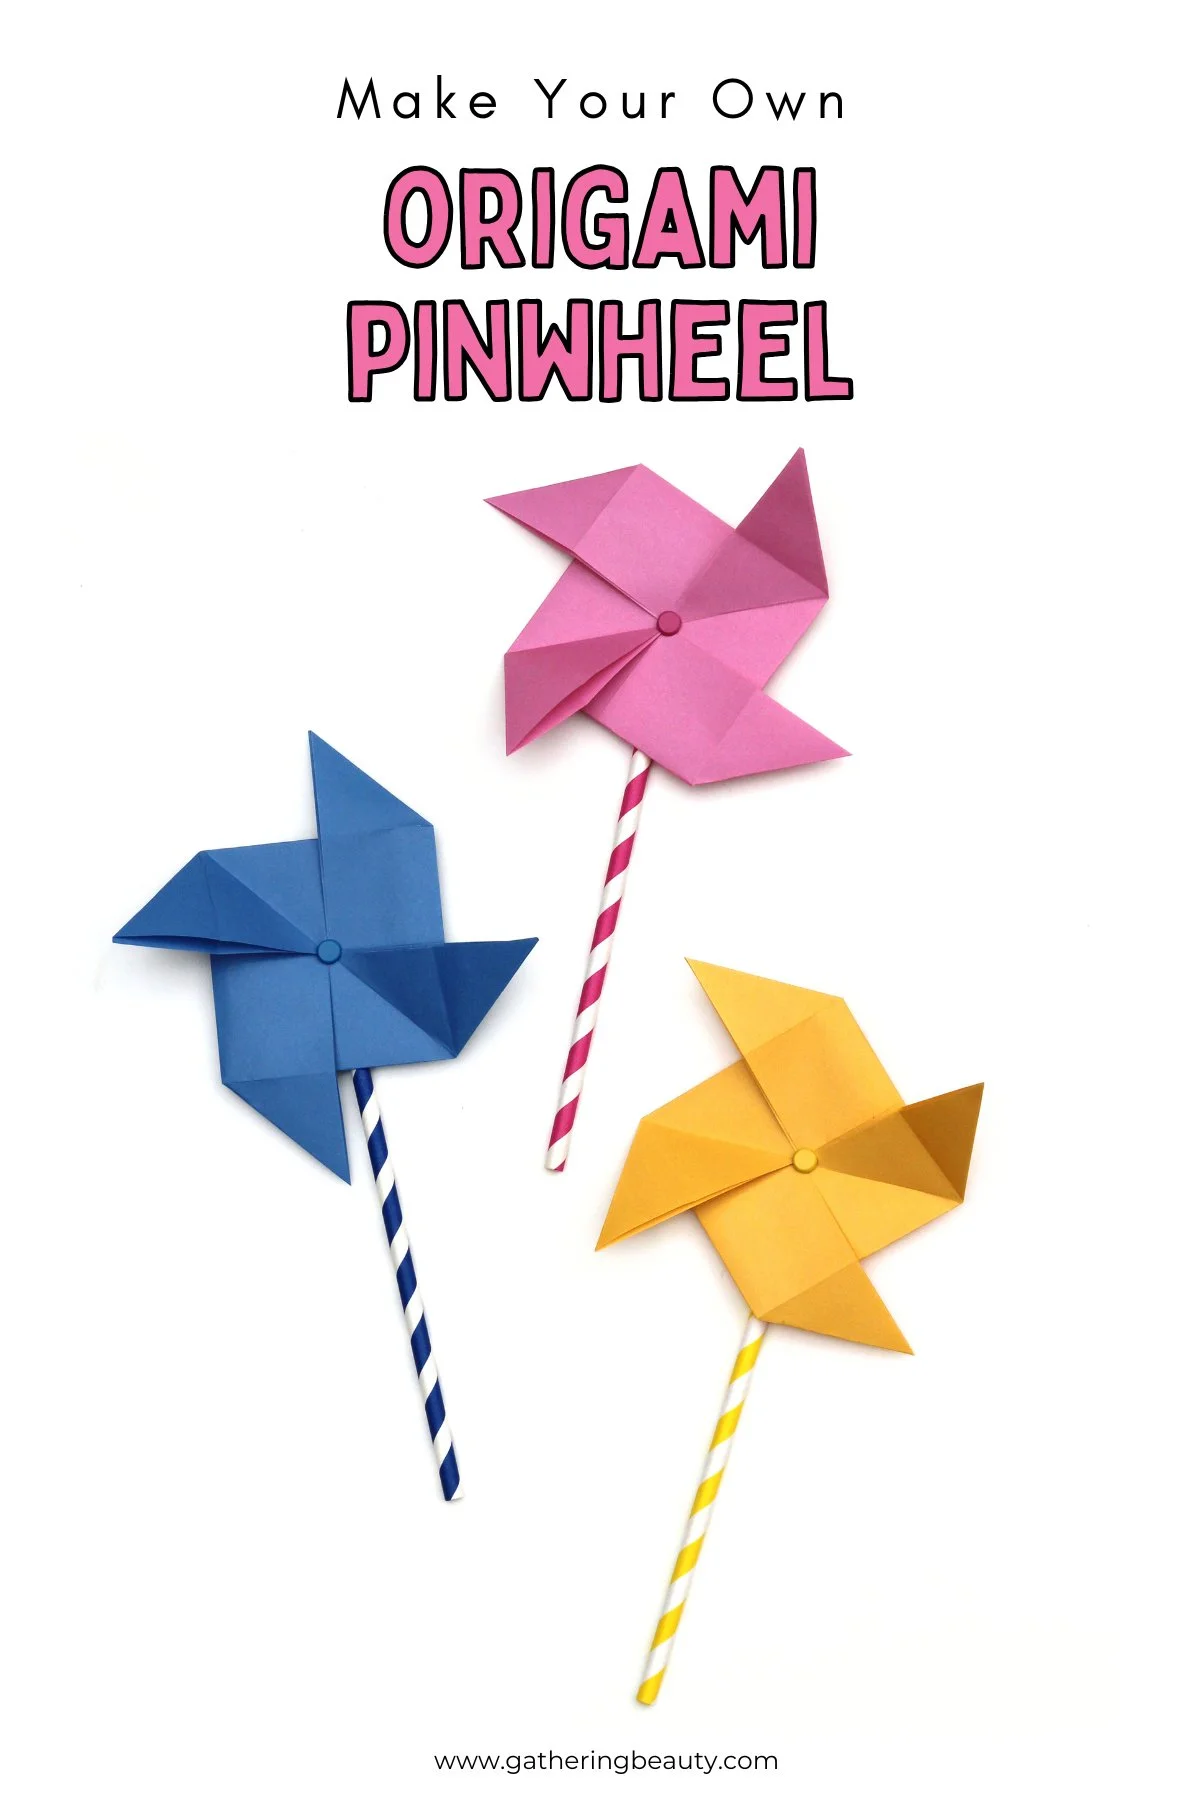
How To Make Origami Pinwheels
/Create cheerful Origami Paper Pinwheels in just minutes! Great for kids’ crafts, party decorations or summer fun.
This page contains affiliate links. This means that if you make a purchase after clicking a link I earn a small commission but it doesn’t cost you a penny extra!
Easy Origami Pinwheels.
Looking for a fun, colourful paper craft that also doubles as cheerful spring decor? Origami pinwheels, also known as origami windmills, are the perfect project!
They’re simple enough for beginners, fun for kids and a great way to repurpose leftover scrapbook paper.
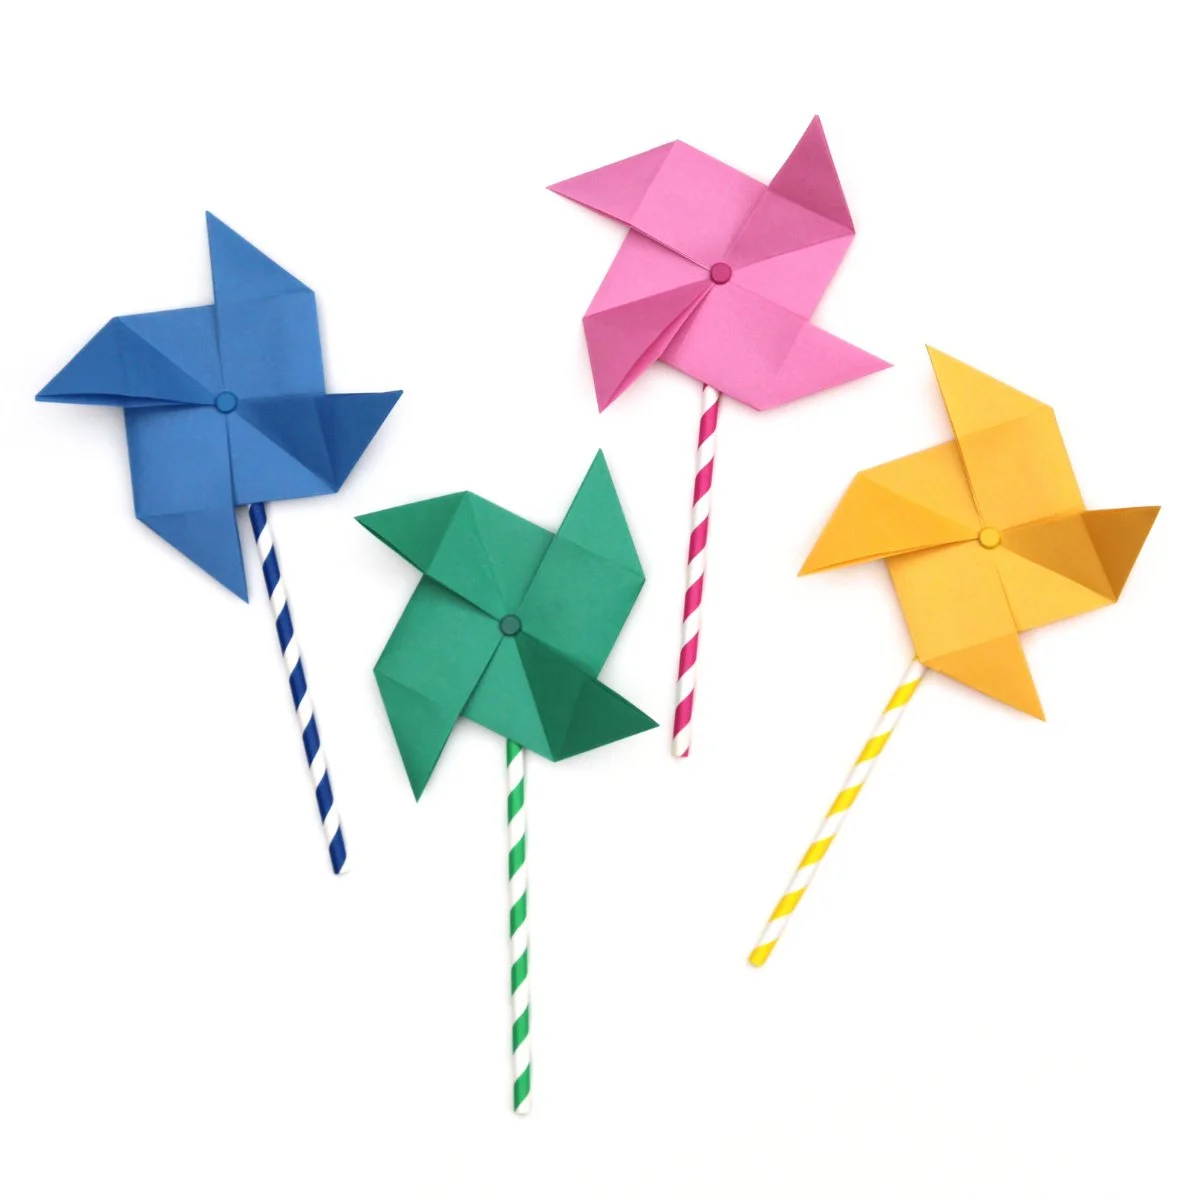
DIY Paper Pinwheels.
Origami pinwheels are perfect for decorating spring parties and kids' rooms. You can use them as cheerful party favours, string them into garlands or attach them to gifts for a playful handmade touch.
So grab your favorite paper scraps and let’s get folding!

Supplies:
Square Origami Paper (scrapbook, gift wrap or even magazine pages)
Awl or Sharp Tool
Tip: Avoid thick cardstock. Thin paper folds more easily and spins more freely!
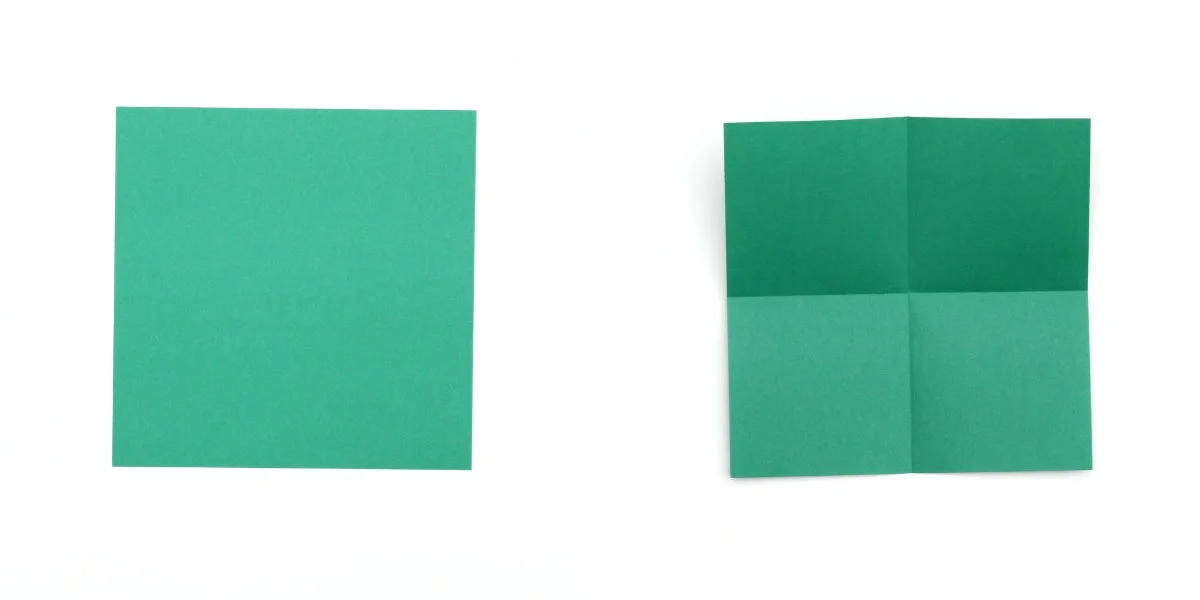
1. If you’re using standard A4 or letter-size paper, trim it into a square. Any size works, but 6x6 inches is a great starting point.
2. Fold the square in half horizontally and vertically. Unfold completely.
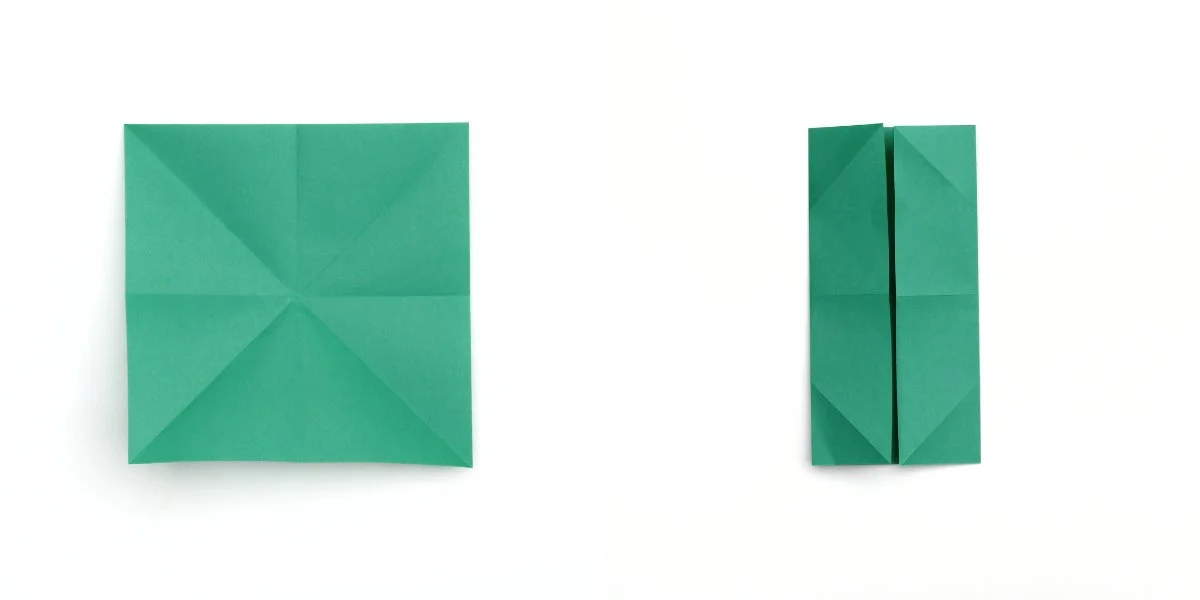
3. Fold the square diagonally in both directions to create an X crease.
4. Fold the left and right sides in to meet at the centre.
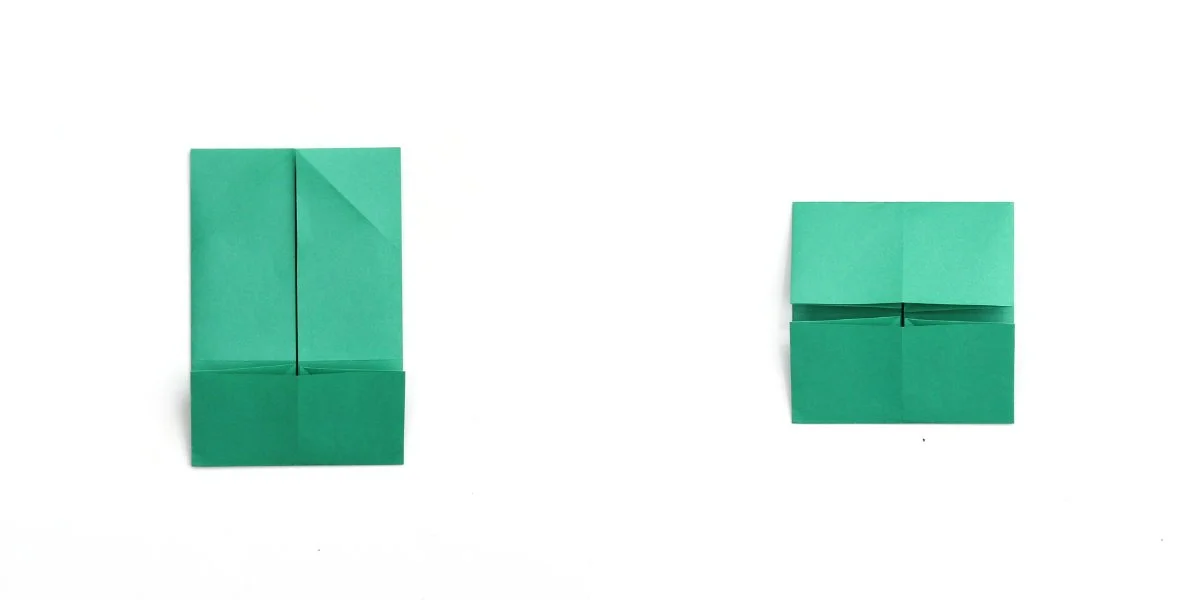
5. Fold the bottom up to meet the centre crease.
6. Fold the top down to meet the centre crease.

7. Open the top fold back out.
6. Pull open the left section and bring the right edge diagonally outwards to meet the central horizontal crease.
7. Repeat on the right-hand side.
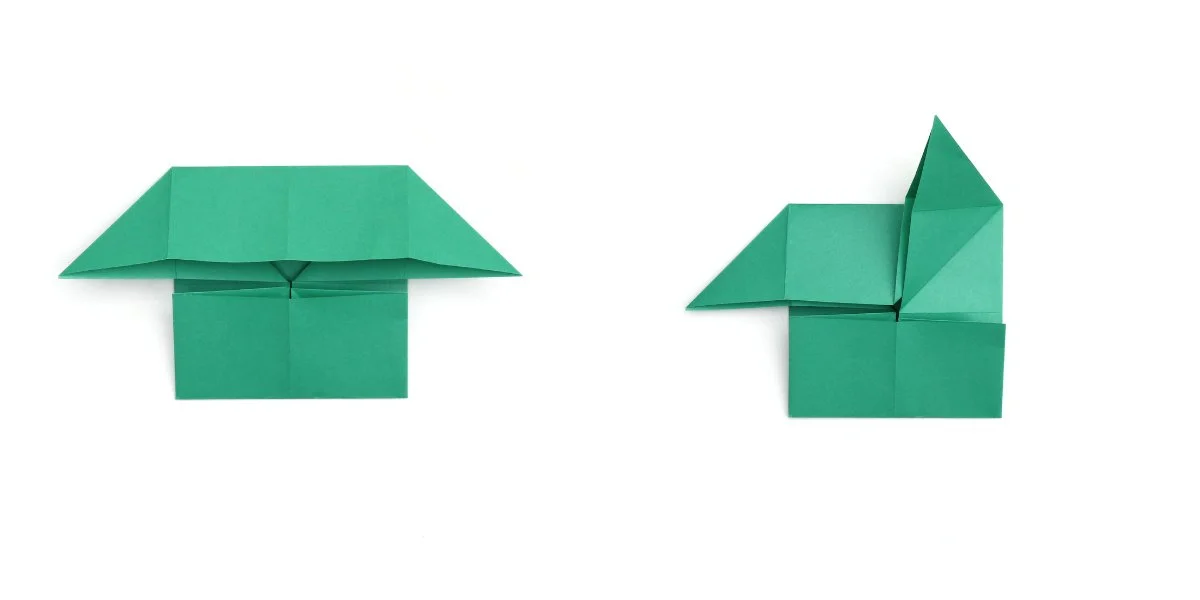
8. Flatten the top section down completely.
9. Fold the right section upwards.

10. Rotate the folded paper and repeat the previous steps.

11. Flatten down the top and fold the right section up to finish the pinwheel.

12. Push a paper fastener or brad through the centre to hold the folds in place. Then attach it to your straw or stick.
I used an embossing tool to make the hole in the paper straw first.
13. And there you have a finished simple origami pinwheel.

The steps are simple enough for most kids to follow with just a little help. They’re ideal for rainy day crafts, spring-themed classroom projects, birthday party activities and even summer camp sessions.