NEW PROFILE PHOTOS, SPRUCING UP MY ABOUT PAGE, A FEATURED POST SLIDESHOW AND SETTING UP A NEWSLETTER.

New profile photos, sprucing up my about page, a featured post slideshow and setting up a newsletter.

Phew! I can't tell you how excited (and relieved) I am to finally be crossing these four things off my blog to-do list.

Last month I signed up for the Creative Live Build a Successful Creative Blog class with April Bowles-Olin of Blacksberg Belle and it was definitely one of the best things I could've done to help me stop putting things off and figure out what I need to do to make this blog better.

If you're interested in April's Creative Live class you can watch a free 30 minute preview all about setting your blog goals or buy the whole class at the reduced price of $59 for the next 34 days. I highly recommend it.

First up, my about page. This is something I've been meaning to do for what seems like forever. It's finally got some shiny new photos, a few of my favourite projects and links to some of the lovely people who have shared the things I've made.

Next, new headshots. I have the ever patient other half and his fancy pants camera to thank for the lovely new profile photos now gracing this blog. It's not easy to take a picture of someone who a) can't seem to keep their face still and b) is probably going to hate every single picture you take because of this but somehow he managed it.

A featured posts slideshow. I've been searching and searching for a simple slideshow gadget for blogger that is just that, no checkerboard fades here please, so this truly simple slideshow gadget from Code It Pretty is exactly what I've been looking for. If you have a blogger blog you might want to check it out as well as everything else on that blog. It's all gold, I promise.

And lastly but definitely not least, this blog now has it's own newsletter. It's going to be filled with even more of the things I love and hope you will too, exclusive diy's only available to subscribers and sneak peeks into upcoming projects. 

You can sign up the Gathering Beauty Newsletter here as well as email updates of the latest blog posts.

Comment

Emma

Hi, I'm Emma.

I'm a crafter, blogger and paper enthusiast living in the North West of England.

Gathering Beauty is the place where I share craft tutorials and diy inspiration. I started this blog back in 2013 as a way of sharing all the things I love and make. I share paper crafts, clay crafts, origami, printables and desktop wallpapers as well as the odd crochet and weaving project. I hope you find something here that inspires you.

AROUND HERE.

Pretty white blossom and blue skies.

Chocolate eggs for dinner.

Tulips and april showers.

Summary Block
This block has no content yet. Items you add to the page connected to this block will display here.
Comment

Emma

Hi, I'm Emma.

I'm a crafter, blogger and paper enthusiast living in the North West of England.

Gathering Beauty is the place where I share craft tutorials and diy inspiration. I started this blog back in 2013 as a way of sharing all the things I love and make. I share paper crafts, clay crafts, origami, printables and desktop wallpapers as well as the odd crochet and weaving project. I hope you find something here that inspires you.

THREE THINGS I LOVE - EASTER EDITION.

Three Things I Love - Easter Edition

Here's the three things I love, Easter edition.

1. Personalised photo print eggs from A Subtle Revelry. A clever alternative to the traditional place card.

2. Cute sock bunnies complete with mini pom poms and rosy cheeks over on The Red Thread.

3. And origami bunny baskets from Studio Diy complete with free printable patterned paper. I made some of these for Easter last year, find them here, fill them with chocolate mini eggs for a great last minute gift.

Summary Block
This block has no content yet. Items you add to the page connected to this block will display here.
Comment

Emma

Hi, I'm Emma.

I'm a crafter, blogger and paper enthusiast living in the North West of England.

Gathering Beauty is the place where I share craft tutorials and diy inspiration. I started this blog back in 2013 as a way of sharing all the things I love and make. I share paper crafts, clay crafts, origami, printables and desktop wallpapers as well as the odd crochet and weaving project. I hope you find something here that inspires you.

DIY CLOCK MAKEOVER.

Diy Clock Makeover

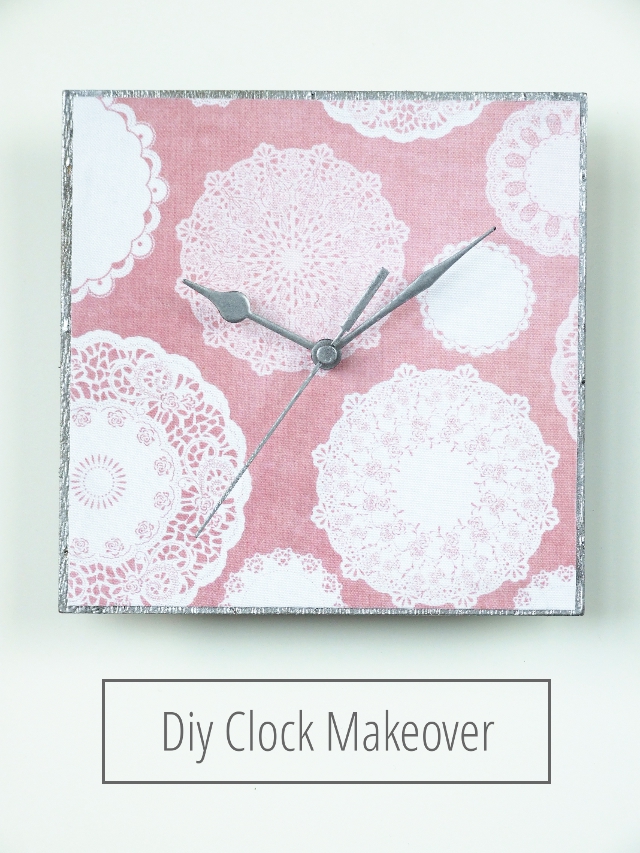
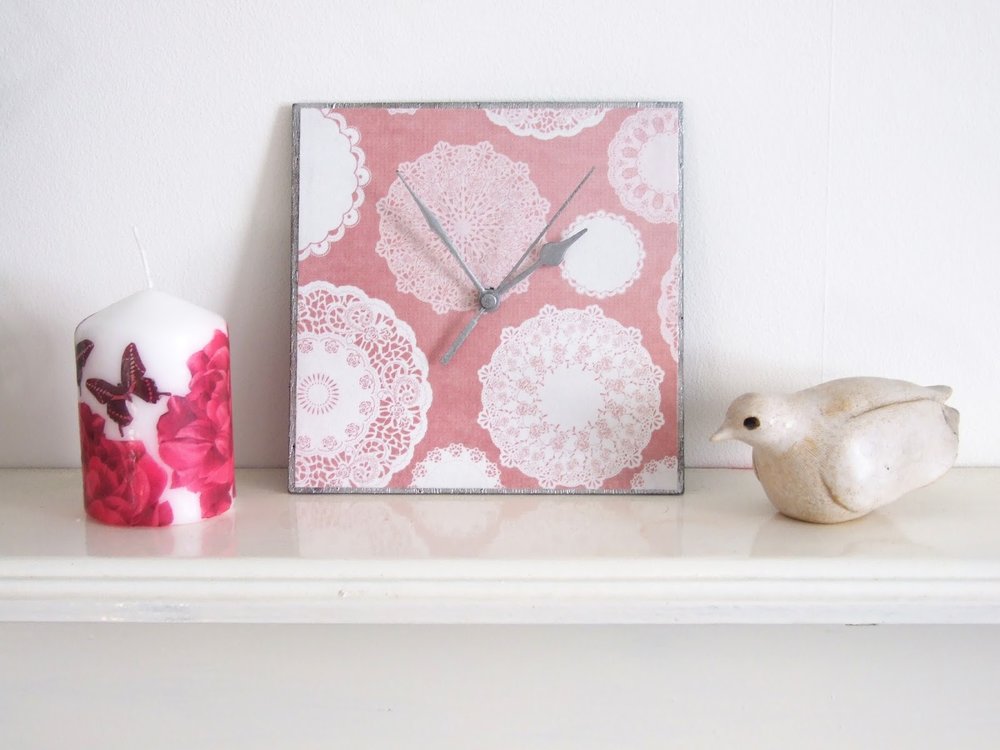
Here's the latest craft project I've been working. A pretty diy silver and pink clock makeover.

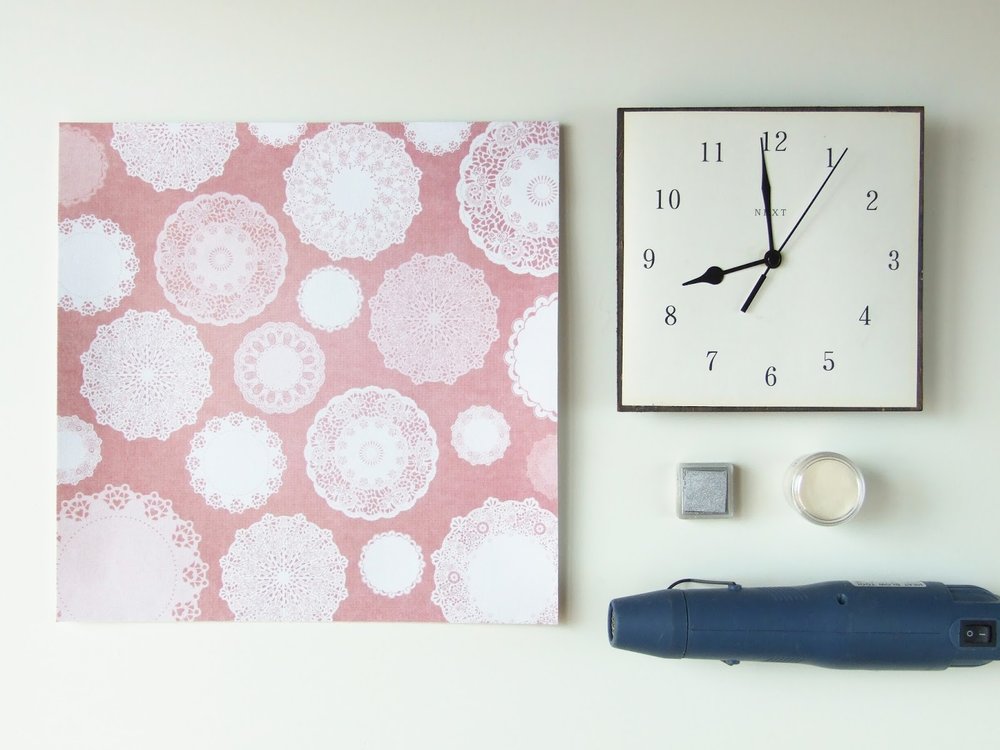
When we moved in this boring, old clock had been left behind by the previous owners. I didn't really like it but it worked so it didn't seem right to throw it away, especially as all it needed was a quick facelift. It got shoved to the bottom my craft box and I'd forgotten all about it until the other day when I found it along with this pretty, pink self adhesive fabric paper. I grabbed a silver ink pad and some embossing powder and before I knew it I had this fantastic upcycled clock.

Diy Clock Makeover

Things you'll need:

An old, boring clock,

Self adhesive fabric paper,

A piece of scrap paper,

A silver ink pad,

Clear embossing powder,

An embossing heat gun,

A pair of scissors,

And a nail file or some sandpaper.

How to upcycle a clock

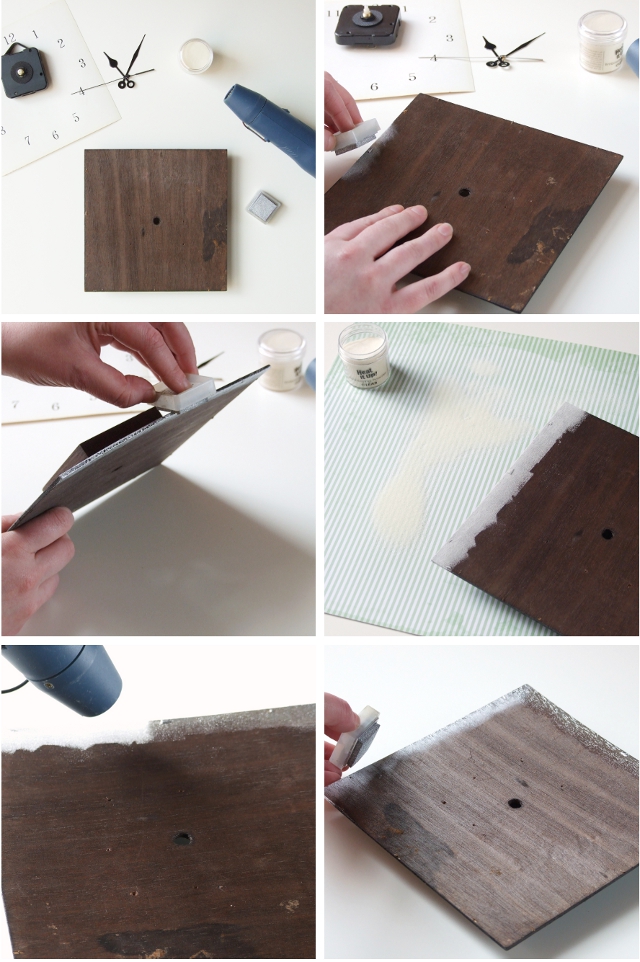
1. Start by removing the clock mechanism and the existing clock face and set them aside for later.

2. Take the ink pad and stamp a silver border to the outside of your clock base. Do this one side at a time to make sure your ink doesn't dry out before you have a chance to apply the embossing powder. Don't forget to stamp the outside edge as well.

3.Place a piece of scrap paper under your wooden base before shaking a layer of clear embossing powder onto the ink. Tap off any excess powder onto your scrap paper and pour back into the tub.

4.Use a heat gun to melt the powder until it becomes shiny. I like the way the clear embossing powder gives a raised enamel effect on top of the silver ink but you could also try using a silver or gold embossing powder instead.

5. Do this on all four sides.

Diy Clock Makeover Project

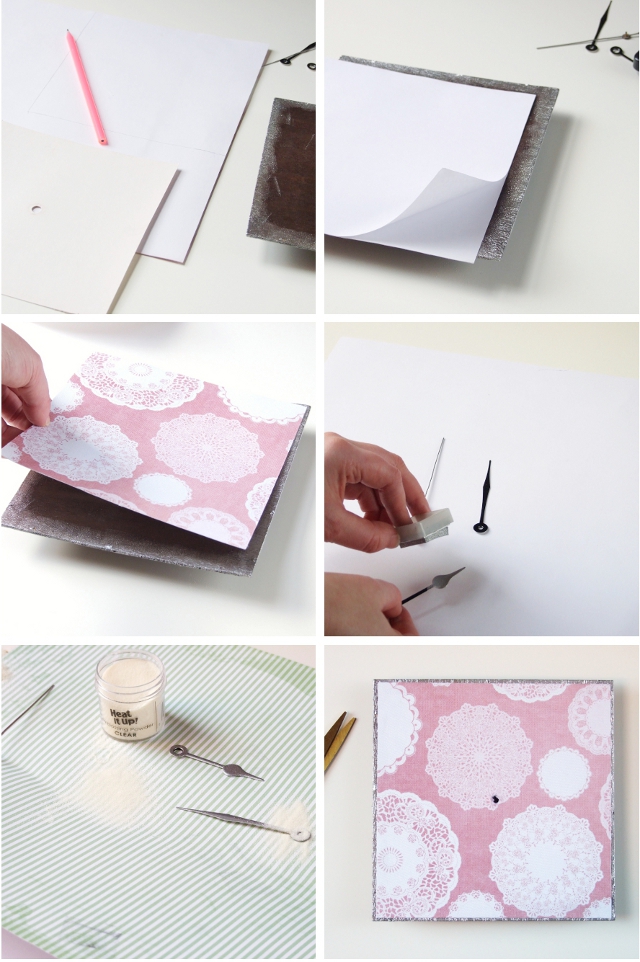
6. Use the previous clock face as a template and trace around it onto the back of your self adhesive fabric paper. Cut out your new clock face, remove the shiny backing paper and position onto the wooden base. Press down firmly.

7. Next take your clock hands and lightly file them to give the ink and embossing powder something to stick to. Stamp on your ink, cover in embossing powder and melt with the heat gun.

8. Using the scissors poke a hole through the fabric paper making sure it's big enough for the clock mechanism to fit through easily. You don't want the hands to snag.

9. Finally reassemble your clock and you're all done.

Diy Fabric Covered Clock

I love it when you can breath fresh life into something you'd otherwise have thrown away. This clock is now sitting proudly on top of the fireplace instead of being shoved in the bottom of a box and I love it.

You can find more diy/craft ideas over on my Pinterest board Things to Make and Do (885 so far and counting, I'm a bit obsessed) or you can check out the archives for more of the things I've made.

Comment

Emma

Hi, I'm Emma.

I'm a crafter, blogger and paper enthusiast living in the North West of England.

Gathering Beauty is the place where I share craft tutorials and diy inspiration. I started this blog back in 2013 as a way of sharing all the things I love and make. I share paper crafts, clay crafts, origami, printables and desktop wallpapers as well as the odd crochet and weaving project. I hope you find something here that inspires you.

AROUND HERE.

Typical crazy English weather. Sunny one minute and torrential downpour the next.

Evening light and reflections.

Hot tea and magazines on a gloomy afternoon.

An evening stroll around the marine lake.

Happy to finally have my Ikea picture ledge up.

Pretty magnolia on my walk this morning.

Summary Block
This block has no content yet. Items you add to the page connected to this block will display here.
Comment

Emma

Hi, I'm Emma.

I'm a crafter, blogger and paper enthusiast living in the North West of England.

Gathering Beauty is the place where I share craft tutorials and diy inspiration. I started this blog back in 2013 as a way of sharing all the things I love and make. I share paper crafts, clay crafts, origami, printables and desktop wallpapers as well as the odd crochet and weaving project. I hope you find something here that inspires you.