
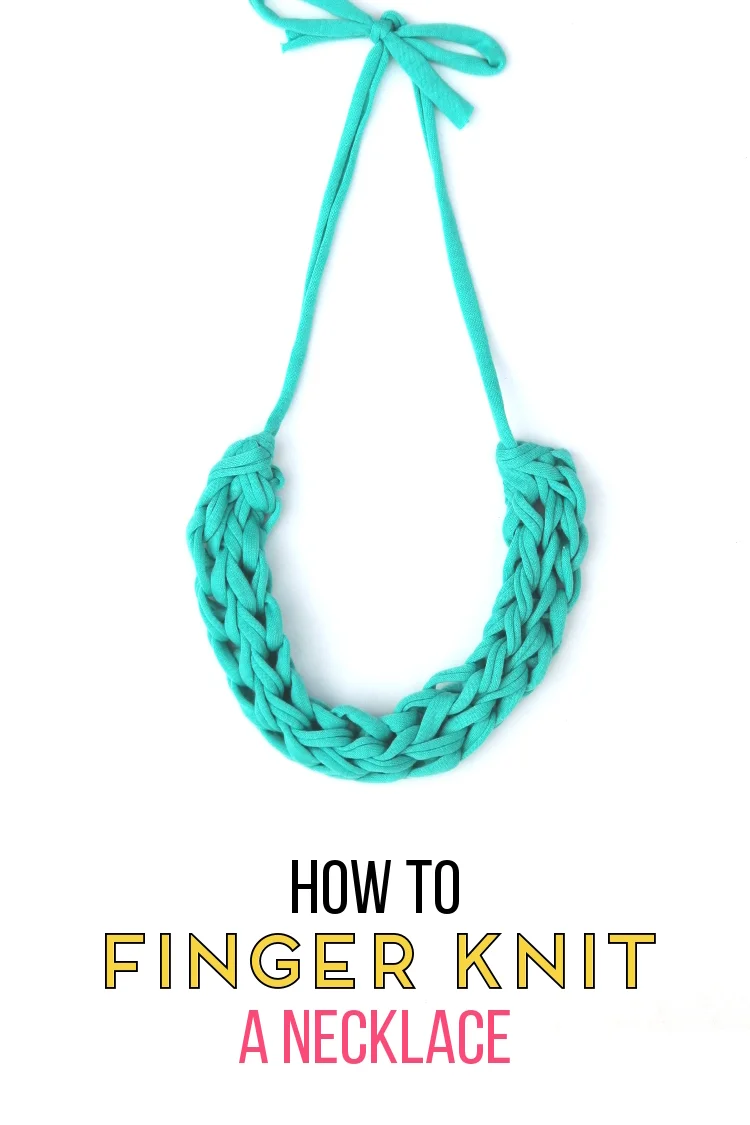
HOW TO FINGER KNIT A NECKLACE.
/Not all knitting requires needles. Learn how to knit using only your fingers. It’s a quick and easy way to make a statement necklace. So grab some t-shirt yarn and learn how to finger knit using this easy step by step tutorial.
This page contains some affiliate links. This means that if you make a purchase after clicking a link I earn a small commission but it doesn’t cost you a penny extra!
My knitting skills are pretty basic. I’ve made quite a few failed attempts at scarves over the years and one knitted mug cosy that definitely pushed my skills to their limits. Finger knitting is much more my speed.
Did you ever learn to finger knit when you were younger? I know traditionally it’s seen as a kids craft but I think it’s great for teenagers and adults as well. I’d forgotten how quick and easy it really is. If you’ve never tried before, don’t panic, it’s not as complicated as it first looks. No previous knitting experience or expertise needed.
Finger knitting (sometimes called finger weaving) is a quick and easy way to make a simple braid. It’s similar to french knitting but much quicker. You don’t need any special equipment, only some t-shirt or fabric yarn, a pair of scissors and your hands. Even if you’re a complete beginner you’ll be knitting up a necklace just like mine in no time.
To show you exactly how to do it I’ve made both a step by step photo tutorial and a video tutorial. I think once you get going you’ll be surprised how quickly they come together.
If this all seems a bit daunting don’t worry, I’ve put together a ‘how-to finger knit’ series where the steps below are broken down into three easy to digest parts. It’s a good place to start if you’re struggling with how to begin.
FINGER KNITTING SUPPLIES:
scissors
your hands
You can finger knit using whatever kind of yarn or wool you have on hand but I do recommend practising with a plain chunky yarn. It’s easier to work with especially when you’re a beginner. You can always move onto some fancier wool when you’ve had a bit more practice.
How To Finger Knit.
Casting on.
1. Lay your palm flat and facing towards you. Hold the yarn between your thumb and your index finger. The tail end (loose end) of your yarn to the left. The working yarn (still attached to the ball) to the right.

2. Weave the working yarn (going from left to right) over your index finger, under your middle finger, over your ring finger and behind your pinky finger.
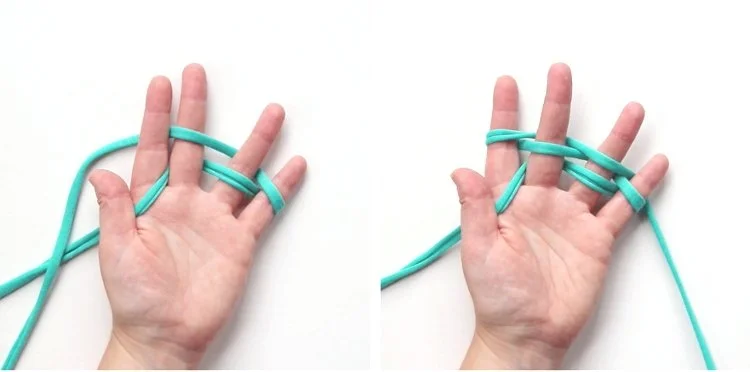
3. For the next row, take the working yarn over your pinky finger, under your ring finger, over your middle finger and behind your index finger.

4. Repeat and bring the working yarn around and over your index finger, under your middle finger, over your ring finger and behind your pinky.

5. For the final row, bring your working yarn around and over your pinky finger, under your ring finger and over your middle finger. Trap the working yarn between your index finger and your middle finger.

6. Keep the tail end trapped between your thumb and index finger to stop it from flying away. With your other hand, pull the bottom row on your pinky finger over the top of your finger. Move to your ring finger and pull the bottom row up over your finger. Repeat on your middle finger. You may need to bend your fingers down a bit as you pull the rows up and over.

7. To finish casting on take the tail (loose) end of the yarn from between your thumb and index finger and bring it forward. Lift it up and over the yarn between your thumb and index finger. Bring the tail end behind your hand to keep it out of the way.

Knitting the rows.
Take the working yarn and wrap it around your index finger, behind your middle finger, over your ring finger and behind your pinky finger.

2. For the next row, wrap the yarn around the pinky finger, under the ring finger, over the middle finger and trap it between your index and middle fingers.

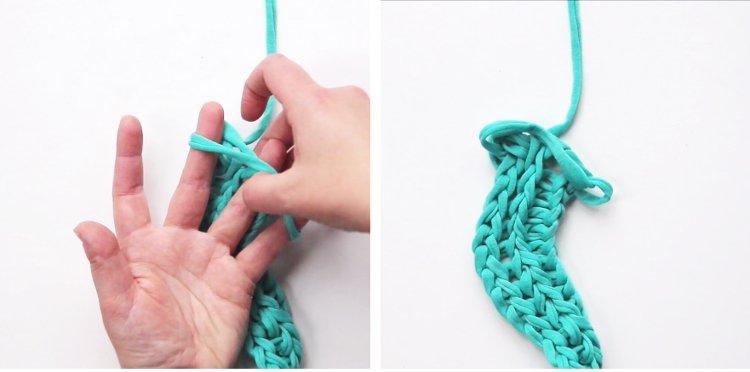
3. Pull the bottom row up and over your fingers like in step 6 starting with your pinky finger and ending with your index finger..

4. If you flip it over you can see the finger knitting starting to form. Pull the tail down at the back of your hand to tighten the knot.

5. Repeat steps 1 to 3 until you’re happy with the length. For mine I did 23 rows. T-short yarn does have a stretch to it so keep this in mind when deciding how long to make your necklace.

Casting Off.
1. Take your working yarn and cut a tail about 6 inches long.
2. Thread the tail under the loop on your pinky finger and then your ring finger. Skip your middle finger and thread it under your index finger before going back and threading it under the middle finger you skipped earlier.

3. Slip the loops off your fingers and pull tight to form a knot at the end.

4. Take your finger knitting and hold it at each end. Pull firmly. As you pull your knitting will curl up to form a tube.

5. To finish trim your loose ends so that they’re even before tying together in a loose knot or bow.
Need a little help? Check out the video below to see exactly how to do it.

I’ve made six of these necklaces now and can whip one in under fifteen minutes. I made the one below using two different colours of t-shirt yarn and just adore it. It’s a bit more of a challenge as the yarn is tougher to loop over your fingers but well worth the extra effort. So make sure to experiment with different yarns. colours and textures.
Want to know what else you can make with finger knitting?
I’ve got just the thing, 20 FANTASTIC FINGER KNITTING PROJECTS. Bracelets, butterflies, hats, scarves, wreaths and more. You’re bound to find something you love.
Want the How To Finger Knit pdf ebook?
You can buy the ‘How to finger knit - for beginners’ ebook for only £3!
This 7 page PDF walks you through EVERYTHING you need to know in order to learn how to finger knit a simple braid.


