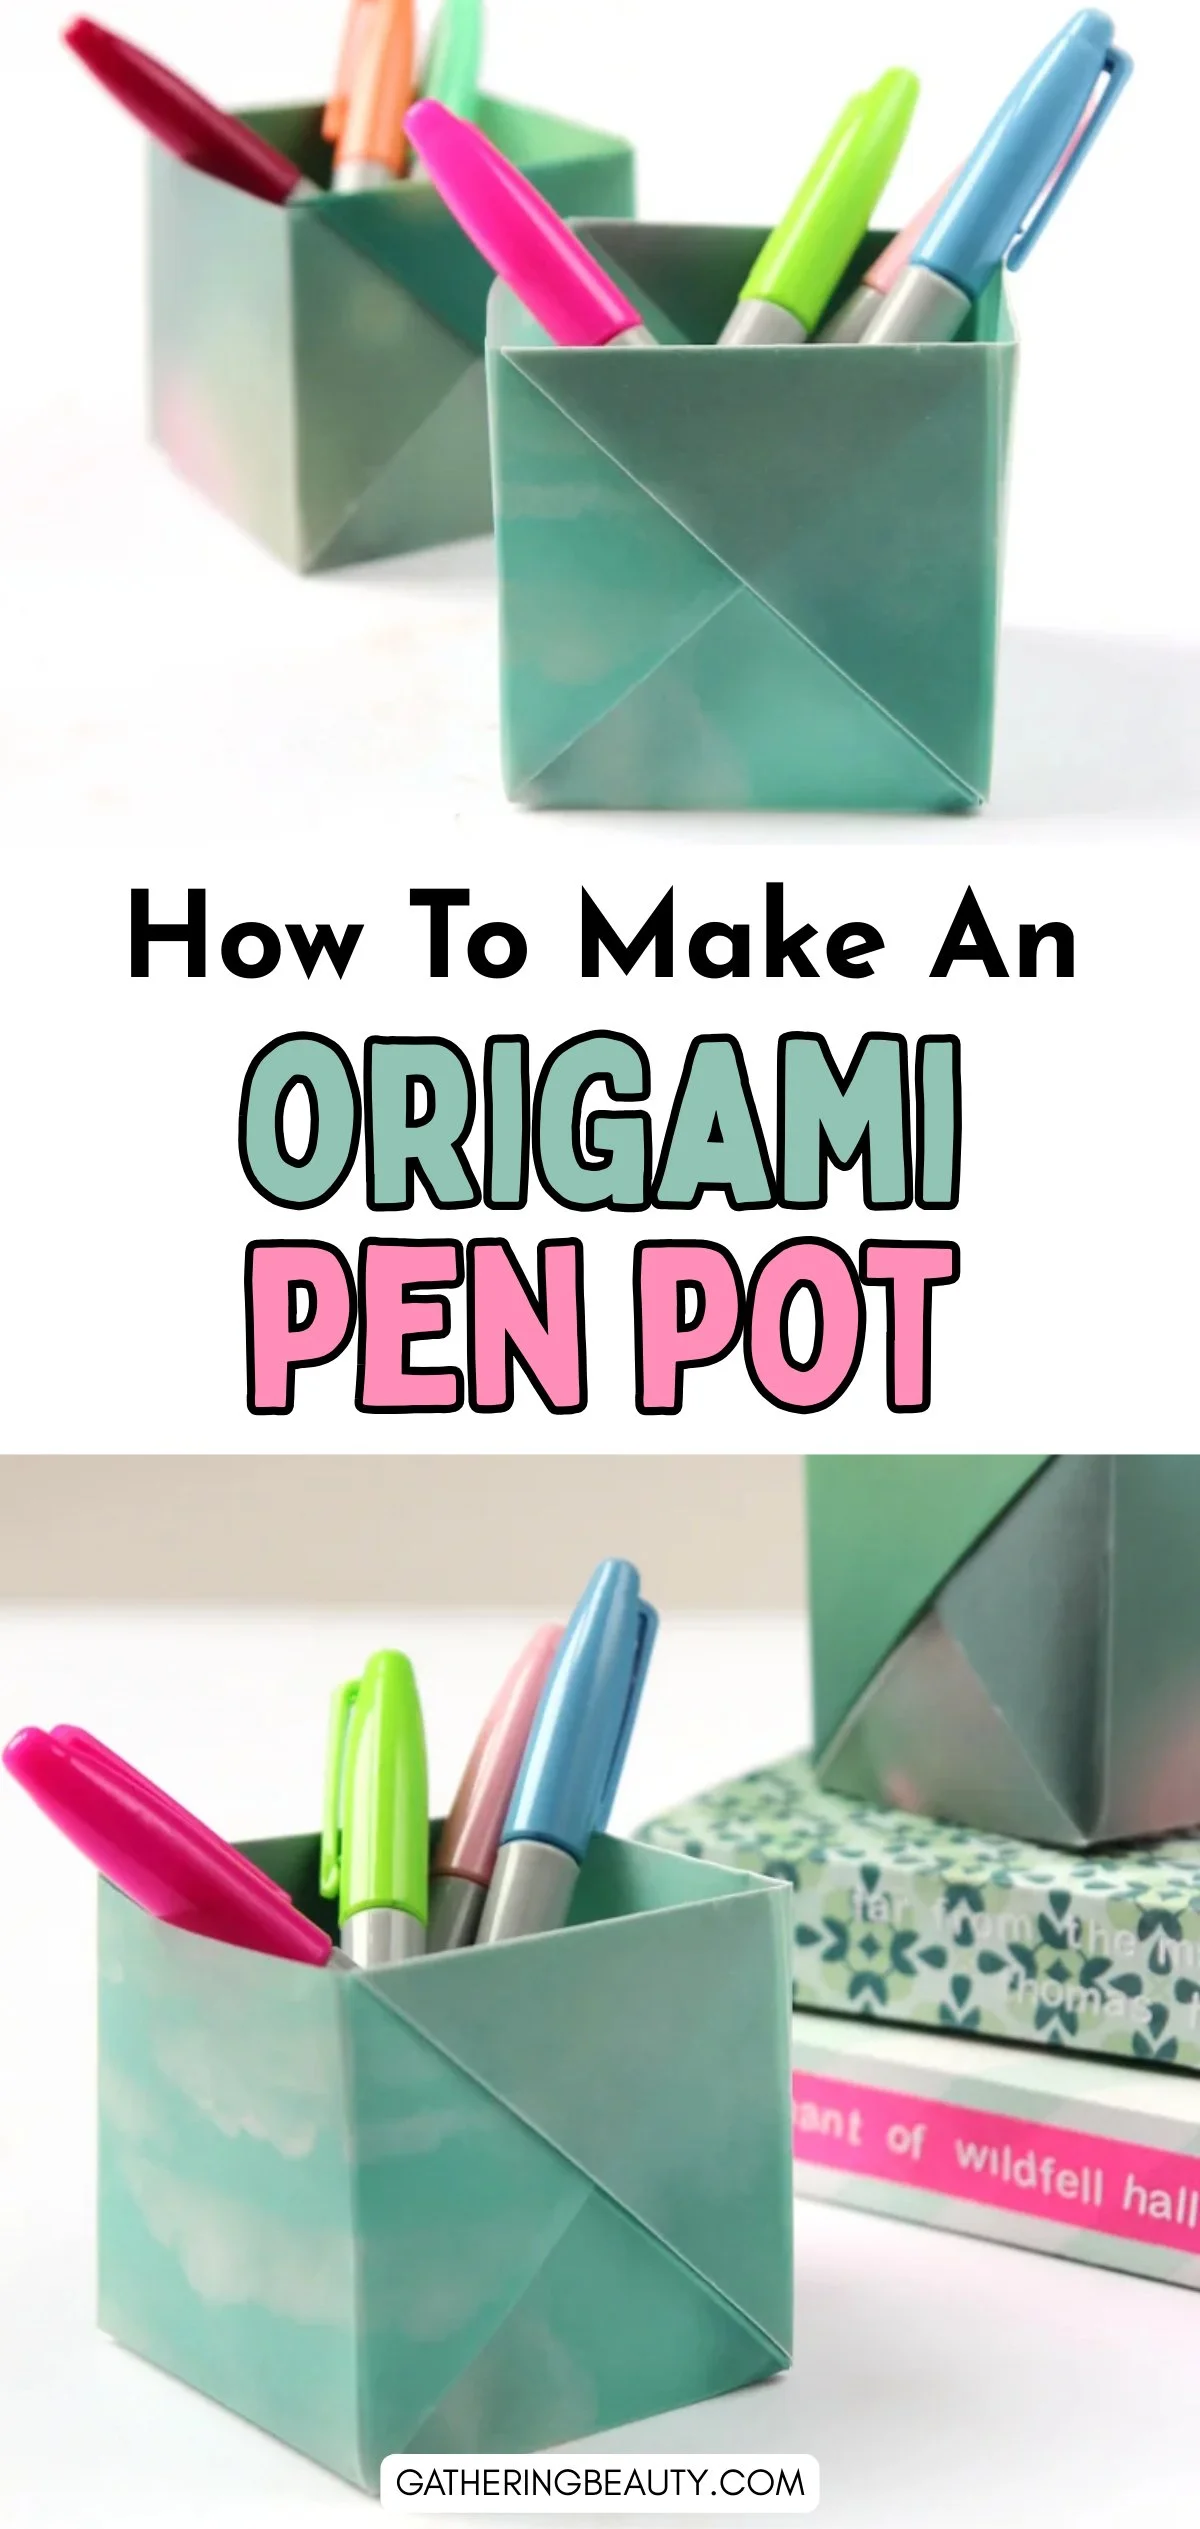
DIY Origami Pen Holder
/Need a stylish way to keep your pens organized? Try making these adorable origami pen holders out of origami boxes! They're not only practical but also make your workspace look super cute.

Origami Pen Holder.
I love coming up with new ways to add a handmade touch to my desk. Lately, it's been starting to look a little neglected and cluttered, so I decided to make these Origami Box Pen Holders to help keep it neat and tidy.
They’re a bit more complicated than my usual easy origami projects but don’t let that put you off. I promise you they’re worth the effort. They make such handy little boxes for storing all sorts of things but I think they make particularly good desk tidies.
I made my pen holders using some vellum from the Maggie Holmes range for American Crafts.
They don't even make this range anymore but you can find a huge range of 12 x 12 vellum paper at Scrapbook.com. The vellum paper gives it a lovely translucent quality.

Materials:
Paper Trimmer or a pair of scissors and a ruler
This page contains some affiliate links. This means that if you make a purchase after clicking a link I earn a small commission but it doesn’t cost you a penny extra!


How to Make Origami Pencil Holders.
1. Start with letter size (11 inches x 8.5 inches) piece of vellum or paper.
2. Fold in half and open back out.

3. Fold the 2 sides in to meet at the center fold.
4. Open back out and fold back in half along that center fold.

5. With the center fold on the right hand side, fold the bottom right corner up to meet the center crease. Repeat and do the same with the top right corner.
6. On the left hand side fold the top layer of the bottom left corner to the center. Do the same for the top left corner.

7. Fold the bottom edge up along the top of the triangles. Open back out and do the same on the opposite side.

8. Open out and lay flat with the triangles at the top. Your paper should look like a house.
9. Take the bottom layer with the triangle corners and fold up. Press this flat.

10. Lift this layer up to reveal a pocket. Lift and pull back to make the back and 2 sides of your box. You may need to refold along the side creases to help form your box.
11. Rotate your box to the side and bring the 2 points marked in the bottom right photo together. You can see more in the next photo below.

12. As you bring the 2 corners together a triangle wing will form. Press this flat and crease.

13. Stand your box up and wrap the wing around to the side. Tuck the wing into the triangle pocket.
14. Lay your box on its side and repeat the steps above. Bring the 2 corners together and press the wing flat.
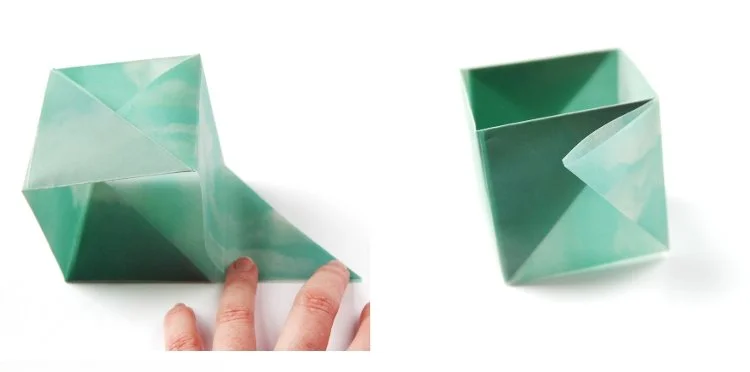
15. To finish wrap around and tuck under the triangle pocket.
And there you have it, a lovely origami pen pot holder to keep your desk organized and stylish.

I love how they turned out. I got these fantastic neon Sharpies for Christmas and I hate having them hidden away in a drawer so I'm glad they've got a home now out on my desk.