
DIY Geometric Paper Bowls
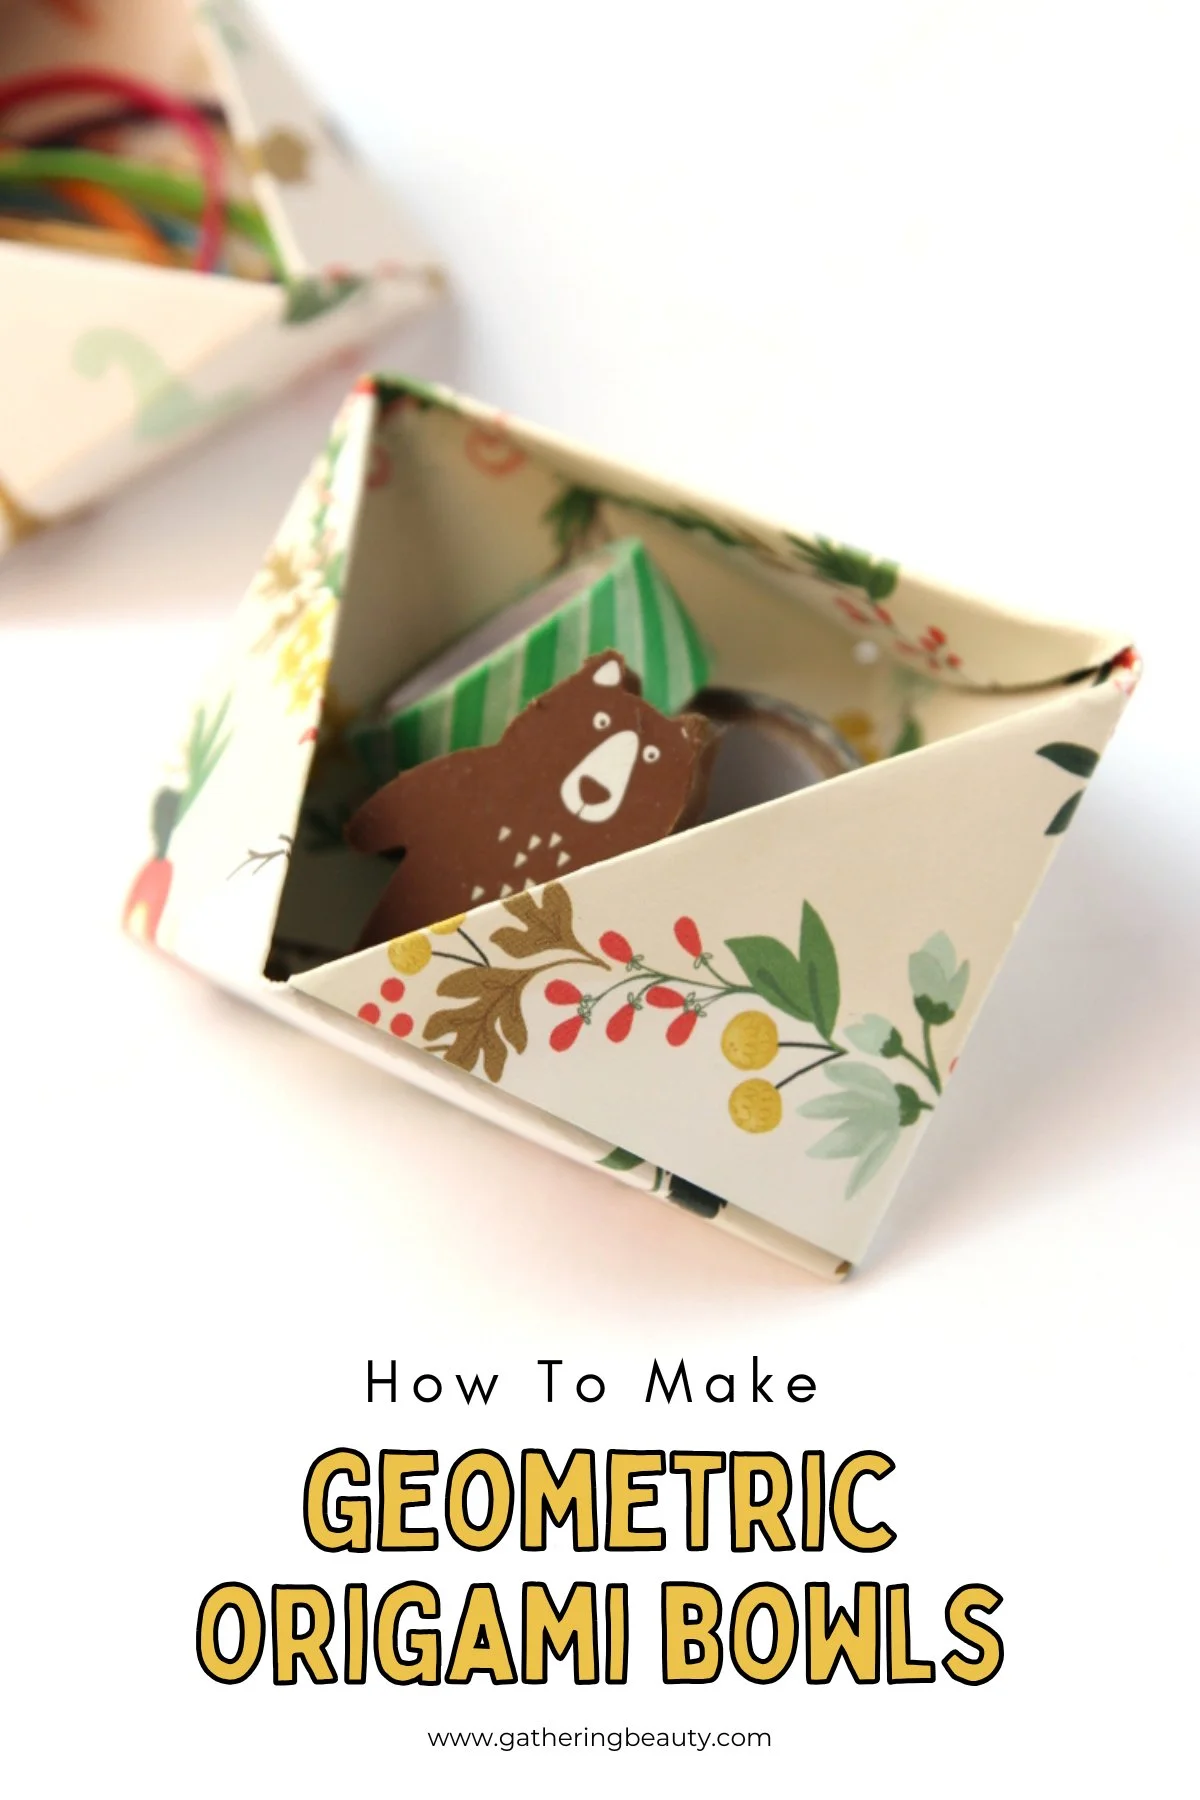
/These Geometric Paper Bowls are super simple to create and make useful desk storage. Perfect for holding washi tape, paperclips or any of those loose bits and bobs that are lying around.
All you need is your favourite scrapbook paper and with a couple of folds and a spot of glue you’ll have a stylish DIY paper bowl. Make them any size or colour for a stylish desk organiser.
This post contains some affiliate links for your convenience (which means if you make a purchase after clicking a link I will earn a small commission but it won’t cost you a penny extra)!
Geometric Paper Bowls.
It’s been a long time since I’ve done any scrapbooking but I still love to collect the pretty papers. I can’t help myself. They’re just so cute! I’ve used them to make notebooks, gift boxes, bookmarks and now these DIY Geometric bowls.
I’m always on the lookout for new ways to store my craft supplies (you can find my favourite DIY craft room organisation ideas here) and this project is the perfect solution.
If you’ve got a couple of minutes to spare and some leftover scrapbook paper, then you’re in luck because you’re about to learn how to make the cutest little origami storage bowls.

Origami Geometric Bowl.
They’re are a couple of reasons I love these bowls so much (apart from the fact I love a good origami paper craft) and that’s how quickly you can take three squares of paper and turn them into a clever geometric-shaped bowl.
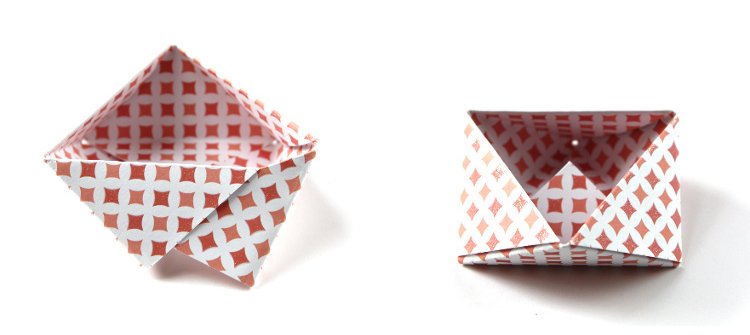
From the side side you can see the triangle shapes that make up the bowl but when you look at them from above, you can see it’s actually a hexagon shape with a triangle for the opening. How clever is that?
They’re such a versatile little storage dish. I’ve used them on my desk to organise stationery supplies and as a catch-all dish on my bedside table.

Supplies:
Scrapbook Paper or Lightweight Cardstock
You can use origami paper to make these boxes but I found that cardstock created a sturdier box. It’s slightly harder to fold but worth the extra effort.
** This origami craft is part of my Easy Origami Projects PDF eBook. You can find more about here**
I even have some printable origami paper you can download and use for FREE. Simply download, print and cut into 7x7-inch squares.

How to Make Geometric Paper Bowls.
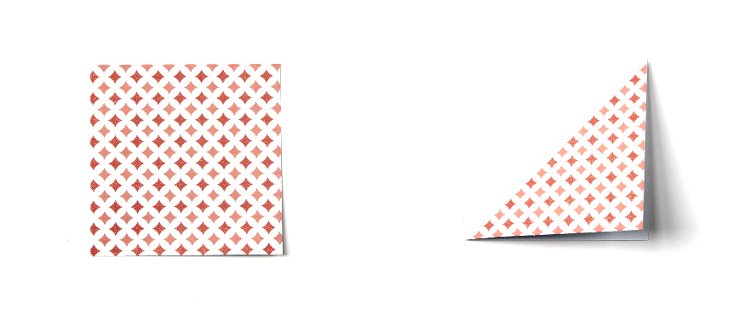
1. To start, you need 3 squares of paper or cardstock, mine measured 5x5 inches.
2. Fold the 1st square in half across the diagonal and crease.
3. Use a bone folder to burnish the folds and make them sharp and crisp.
Top Tip: Try to be as precise as possible when making the folds, as this will help later on when you put your bowl together.
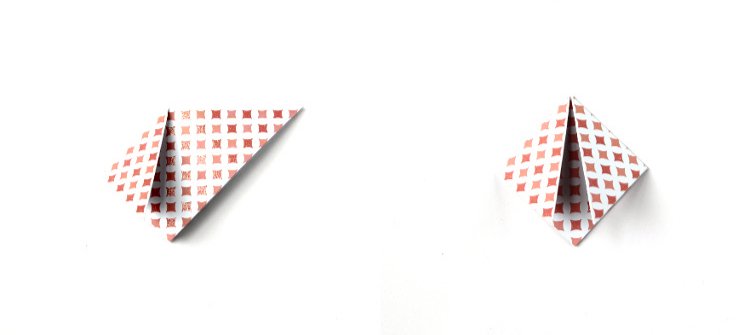
4. Fold the top corners down to meet the center point. Crease well.
5. Open back out.
6. Take the bottom corner and fold it up to meet the center.
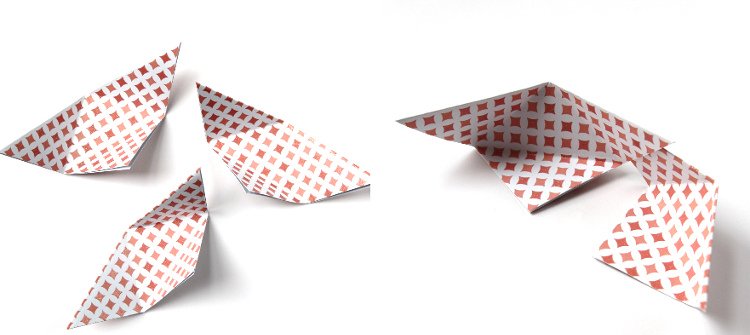
7. Repeat on the other 2 squares. You need 3 folded paper triangles for each bowl.
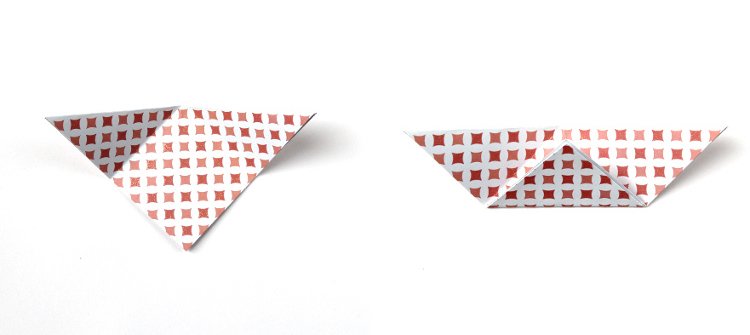
8. Take 2 of your folded triangles and tuck one inside of the other.

9. Slide the triangles fully together.
10. Add the 3rd triangle and tuck it into the 2nd.
11. Fold around and connect the 2 ends together in the same way by tucking one into the other.
12. Depending on the paper you’ve used you may need to use a little glue or double-sided tape to secure the bottom flaps in place.

13. Your bowl is now finished.
From above you can see the cool geometric shape of the origami bowl. The outside edge of the bowl is a hexagon shape but the inside opening of the bowl is a triangle.

14. Fill with trinkets, stationery or sweets and display.


