3 BASIC ORIGAMI FOLDS FOR BEGINNERS.
/Ever wanted to know how to get started with origami? These three basics folds are all you need to be able to fold simple, origami models.

Beginners Origami Folds.
You all know how much I love origami. It's such a fun no mess hobby, no glue, no sticky tape or scissors, just a couple of squares of pretty paper and you're ready to go.
When you’re just getting started all the different folds and terminology can be a little confusing so to help you out I’ve got the 3 basic folds all beginners need to know.
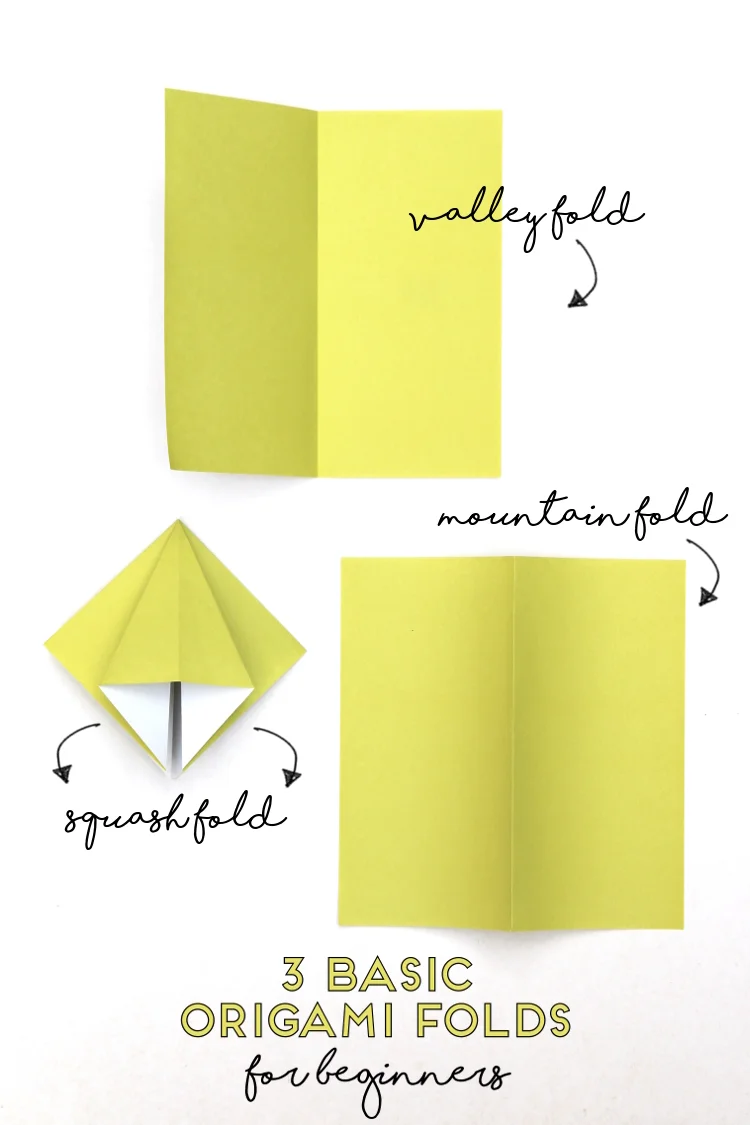
The two most important folds and the simplest are the valley fold and the mountain fold. They form the foundation of all origami models. Once you know these two folds, you’ll be to fold almost all simple origami models.
The next fold is the squash fold. A handy fold to know and one that I use in a lot of the origami projects on this blog.
These three simple folds form the foundation of many of the origami crafts I’ve shared here. Once you’ve mastered these you’ll be well on your way to folding simple origami projects like these origami gift boxes.
Origami Tips.
Before you start take a quick look at these origami tips and tricks.
Ensure all folds are as accurate as possible.
Press down all folds firmly.
Run a fingernail, bone folder or butter knife along all the folds to make a sharp crease.
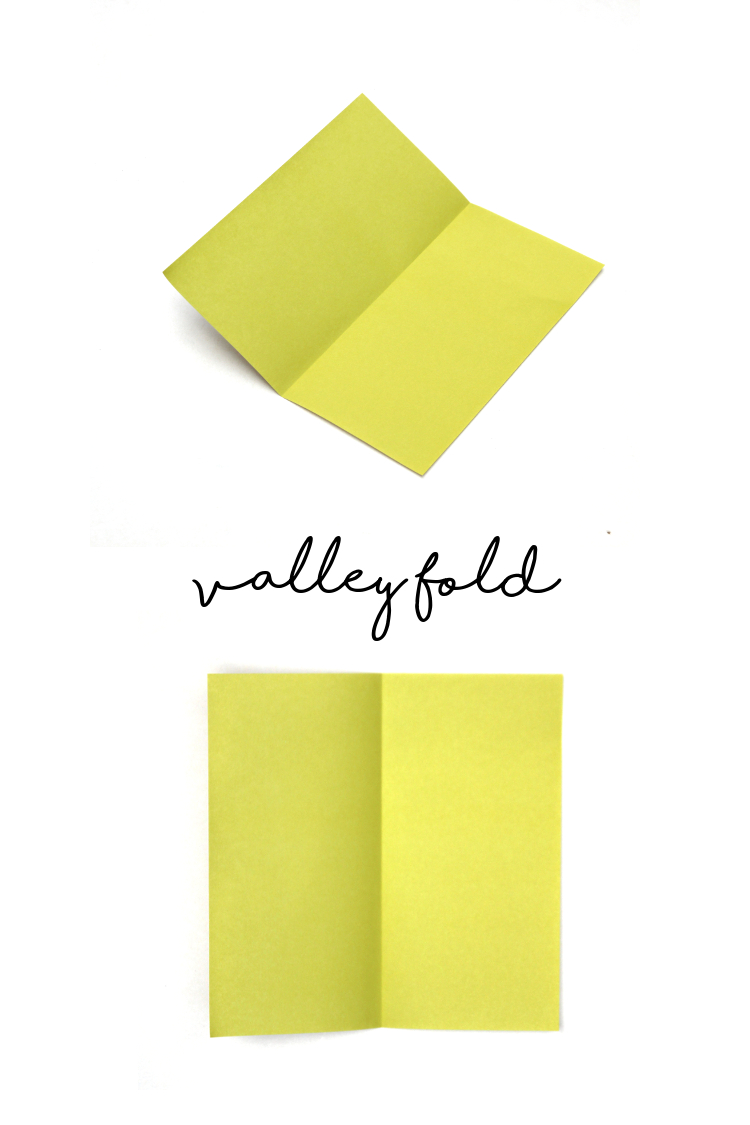
How To Fold A Valley Fold.
The valley fold is one of the most basic folds If you’ve ever done any origami then you will have made a valley fold whether you know it or not. In a traditional origami diagram, you may find a valley fold is indicated with dashed lines.
To make a valley fold, simply fold the paper towards you.
In the example above you can see the paper is folded in half with the coloured side facing up. The crease bends the paper up and forms a valley hence the name.

How To Fold A Mountain Fold.
A mountain fold is basically a valley fold but in reverse. The paper bends down on the crease to form a mountain. In traditional origami, a mountain fold is shown by a line of dots and dashes,
To make a mountain fold, fold part of the paper away from you and then crease along the line.
The easiest way to do this is by turning the paper over (colour side down) and folding it towards you like in a valley fold before flipping it back over to form the mountain shape.

How To Fold A Squash Fold.
A squash fold is essentially taking a flap of paper, opening it out and squashing it flat.
The example above is using a square base that you use to make these easy origami bowls.
To make a squash fold lift the flap towards you and open it out.
Gently push down on the crease to flatten the flap.
Align the top crease line to the middle of the paper below. You want both sides to be symmetrical. so it doesn’t throw off the other steps further down the line.
Once you’ve mastered the folds above you’ll be able to create a whole range of things like this easy origami wall art and these origami envelopes that use a squash fold as a closure.
No time to try these basic origami folds now? Save the image below to Pinterest so you can come back to it later.
You can also find these basic folds in my 20 Easy Origami Projects eBook.