THE CLASSIC BUTTERFLY CAKE.

THE CLASSIC BUTTERFLY CAKE RECIPE.

I was baking at the weekend and made these sweet butterfly cakes or fairy cakes as they're sometimes known. I love these simple, classic cakes. They're filled with a dollop of strawberry jam and a spoonful of buttercream and are the perfect Summertime treat.

There's something about a simple butterfly cake that always makes me smile and it's not just the hidden jam surprise center although that's always been my favourite part. Butterfly cakes take me right back to childhood. Growing up they were a birthday party staple but lately they seem to have fallen out of favour and been replaced with giant cupcakes or muffins instead. Bring back the humble butterfly cake, I say. Let's grab out mixing bowls and get started.

THE CLASSIC BUTTERFLY CAKE RECIPE.

Ingredients (makes up to 12 cakes).

recipe adapted from The Hummingbird Bakery Cookbook.

For the cakes.

120g plain flour

140g caster sugar

1½ teaspoons baking powder

40g unsalted butter

120 ml whole milk

1 egg

¼ teaspoon vanilla extract

For the filling.

125g icing sugar

40g unsalted butter (room temperature)

25 ml whole milk

A couple of drops of vanilla extract

Strawberry jam

Icing sugar to decorate.

Instructions.

Preheat the oven to 170°C (325°F) Gas mark 3.

Sift the flour. sugar and baking powder into a bowl. Add the butter and beat using an electric whisk or mixer until you have a sand like mixture. Make sure to use the slowest speed as this can get messy. When everything is fully combined gradually add in half the milk and mix togther.

Whisk the egg, vanilla extract the last of the milk together in a separate bowl. Pour into the flour mixture and mix for a couple of minutes or until the mixture is smooth and fully combined.

Spoon the mixture into the cupcake cases and bake in the preheated oven for 20-25 minutes or until the sponge turns a light golden colour.

Leave the cake to cool on a wire cooling rack.

While they are cooling you can make your buttercream filling.

Beat the icing sugar and butter together. In a separate bowl combine the milk and vanilla extract. Add to the butter mixture a couple of tablespoons at a time.

Once all the milk has been added continue to beat until the buttercream becomes light and fluffy. This normally takes around 5-7 minutes using my electric hand mixer. If you find the buttercream is still too thick you can add more milk a teaspoon at a time or icing sugar if your mixture is too runny.

Take your fully cooled cakes and cut a circle out of the top of each one. I recommend using a sharp knife for this part so if you're baking with kids you might want to do this step yourself. Cut each disc in half and set aside.

Carefully spoon in some strawberry jam and top with some buttercream. Place the cut disc pieces on top to make butterfly wings and dust with icing sugar.

I think these cakes are best eaten within 3 days but they can be kept in an airtight container for up to 5.

THE CLASSIC BUTTERFLY CAKE RECIPE.

P.S. Don't forget to follow along over on Pinterest. It's the best place to find recipes and craft ideas.

Comment

Emma

Hi, I'm Emma.

I'm a crafter, blogger and paper enthusiast living in the North West of England.

Gathering Beauty is the place where I share craft tutorials and diy inspiration. I started this blog back in 2013 as a way of sharing all the things I love and make. I share paper crafts, clay crafts, origami, printables and desktop wallpapers as well as the odd crochet and weaving project. I hope you find something here that inspires you.

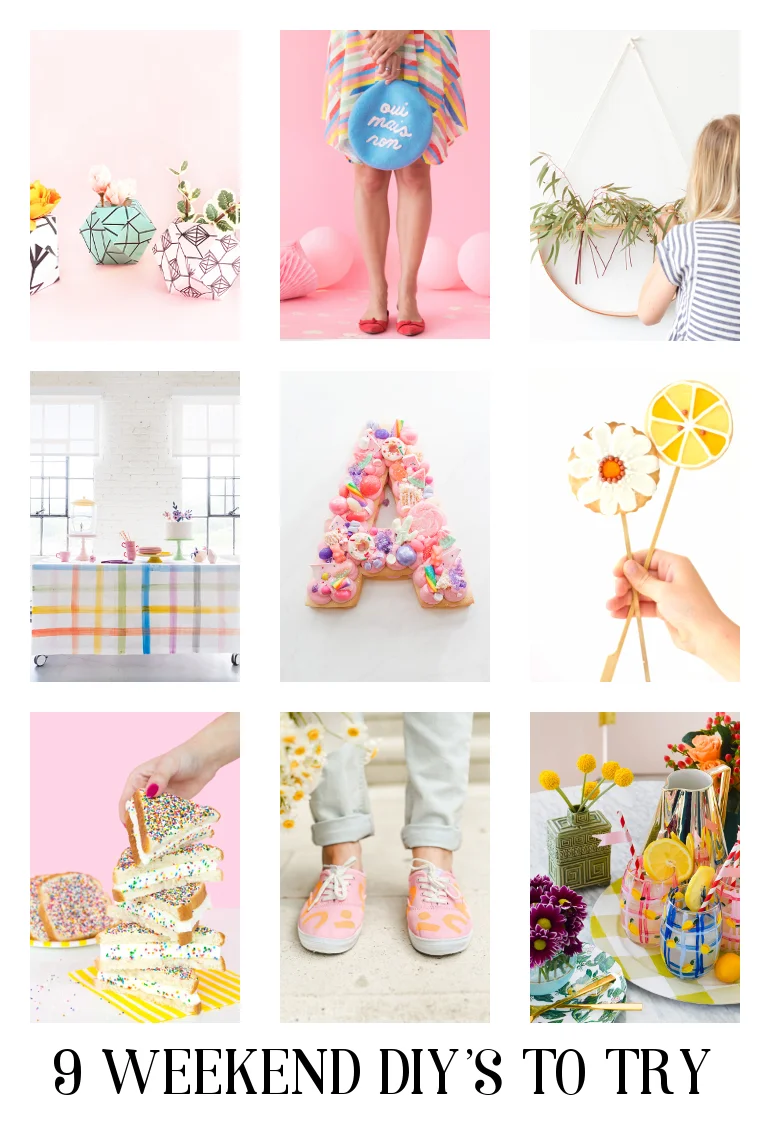
9 DIY'S TO TRY THIS WEEKEND.

9 DIY'S TO TRY THIS WEEKEND

I love each and everyone of these. I think this might be my favourite round-up yet. Have a great weekend everyone.

Geometric Glass Terrarium DIY

They make great air plant displays, or mini planters for succulents (just check to make sure they’re properly sealed).

DIY triangle leather pouch

A little fun fact, you can usually tell how easy and satisfying a DIY I’ve made is by how many I’ve made. so the fact that I made four of these means it’s like a good DIY ok?

DIY Stained Glass Unicorn

I came up with this ‘stained glass’ version of a Unicorn which would make an eye-popping installation for a Unicorn themed party- or even just some cute decor to hang at your window and make you smile!

DIY Indoor Water Garden

I decided I needed to make a simple indoor water garden so I could take some home with me.

DIY Painted Donut Collar

This shirt cost less than $20 to buy AND make and I am soooooo in love with how it turned out!

DIY Easy Wall Hanging

You can display any size fabric this way so whether it’s a postcard sized sample or a real statement sized piece then you have the perfect way to show it off!

DIY Splatter Paint Jeans

I’ve taken my denim to the highest heights of stylish and crafty with a really simple DIY that you are going to flip over!

DIY Colour Splatter Earring Holder

In order to jump on the train and experience what colour splattering would look like, I mimicked the idea with a brush to make this DIY colour splattered earring holder for my vanity.

Wooden Mid Century Plant Stand DIY

I thought making a midcentury inspired wooden stand for the simple square planter would make it more interesting than if it was simply sitting on the floor.

Comment

Emma

Hi, I'm Emma.

I'm a crafter, blogger and paper enthusiast living in the North West of England.

Gathering Beauty is the place where I share craft tutorials and diy inspiration. I started this blog back in 2013 as a way of sharing all the things I love and make. I share paper crafts, clay crafts, origami, printables and desktop wallpapers as well as the odd crochet and weaving project. I hope you find something here that inspires you.

DIY CHIPBOARD BUTTON MAGNETS.

DIY CHIPBOARD BUTTON MAGNETS

Here's a super quick way to dress up your fridge or noticeboard. These diy chipboard button magnets can be made in next to no time plus they're as pretty as they are practical.

These chipboard buttons are another of my crafting supplies I've been holding onto instead of using. So in an effort not to let my supplies go to waste I decided to turn them into these cute magnets instead. After all, it's much more fun to be able to look at these buttons on the noticeboard above my desk rather than let them sit in a drawer unused.

DIY CHIPBOARD BUTTON MAGNETS

Supplies:

The above links are affiliate links. This means that if you purchase through them I receive a small commission.

DIY CHIPBOARD BUTTON MAGNETS

1. Cut the edges off your magnetic frames and remove the clear plastic front.

DIY CHIPBOARD BUTTON MAGNETS

2. Pop out your chosen chipboard shapes (I used these) and peel the backing off.

3. Stick them down onto the front of your magnetic strip.

DIY CHIPBOARD BUTTON MAGNETS

4. Use a craft knife to cut out your chipboard shapes. I found it easier to cut out the buttons by making lots of smaller cuts rather than trying to cut them out all at once.

DIY CHIPBOARD BUTTON MAGNETS

The magnets are strong enough to hold a photo or postcard but if want to hold anything more I'd suggest using some extra strong magnets like these instead. Stick the chipboard down onto some paper, cut out and then glue a couple of the super strong mini magnets to the back.

DIY CHIPBOARD BUTTON MAGNETS

And there you are, adorable diy button magnets to add a little fun to your fridge or noticeboard.

P.S. If you fancy having a go at making your own origami bows like in the photo above you can find that tutorial here

Comment

Emma

Hi, I'm Emma.

I'm a crafter, blogger and paper enthusiast living in the North West of England.

Gathering Beauty is the place where I share craft tutorials and diy inspiration. I started this blog back in 2013 as a way of sharing all the things I love and make. I share paper crafts, clay crafts, origami, printables and desktop wallpapers as well as the odd crochet and weaving project. I hope you find something here that inspires you.

FRIDAY FINDS 03.

Friday Finds

Happy Friday. I hope you've all had a lovely week. I can't believe it's the weekend already. This weeks seems to have flown by. Let's jump right in with this weeks Friday finds, shall we? I'm excited to share them with you.

I love this paint effect embroidered cushion from Anthropologie.

A delicious looking gummy bear printable from Oh Happy Day.

The perfect Summer ice cream bar from Posh Little Designs.

I'd love to go here.

50, yes that's right, 50! Must Do diy's over on Fall For Diy.

The prettiest little geometric glass terrarium.

Jumbo confetti balloons.

These shrimp rolls look delicious.

Amazing surreal landscapes.

A diy typography light box from Oh Joy.

Cake batter ice cream anyone?

And finally the most gorgeous rainbow vases.

Have a wonderful weekend everybody :)

Comment

Emma

Hi, I'm Emma.

I'm a crafter, blogger and paper enthusiast living in the North West of England.

Gathering Beauty is the place where I share craft tutorials and diy inspiration. I started this blog back in 2013 as a way of sharing all the things I love and make. I share paper crafts, clay crafts, origami, printables and desktop wallpapers as well as the odd crochet and weaving project. I hope you find something here that inspires you.