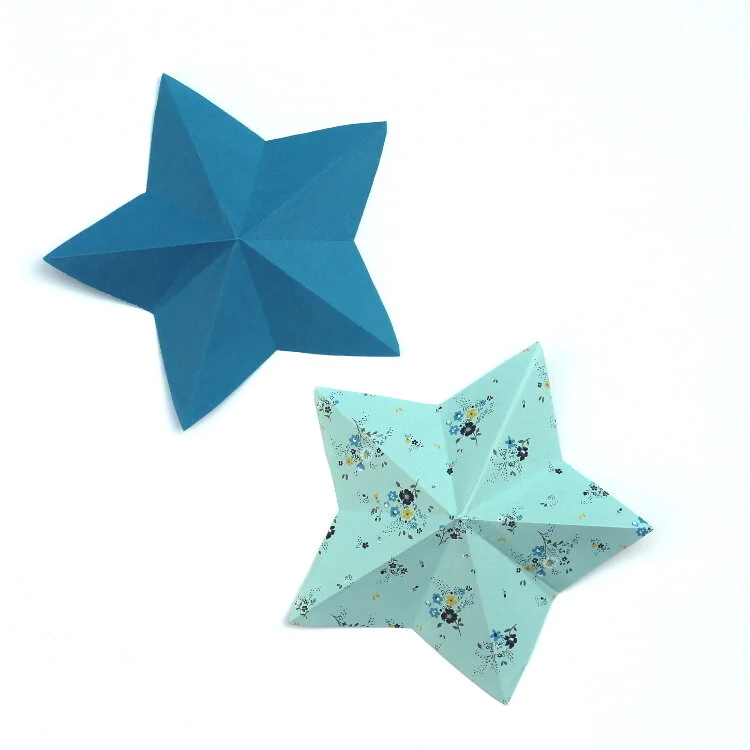
Easy Origami Star
/Learn how to fold a quick and simple Origami Paper Star. These 5 pointed origami stars are easy to fold and make the perfect Christmas decoration.
Make them using origami paper, scrapbook paper, old magazines or whatever paper you have lying around.
If you’re looking for an easy, inexpensive paper star decoration for a Christmas or New Year’s Eve party, then this is the craft for you.

This page contains some affiliate links. This means that if you make a purchase after clicking a link I earn a small commission but it doesn’t cost you a penny extra!
Easy Origami Star.
Today I have a lovely little papercraft to share with you, Easy Origami Stars. I love origami and I love Christmas Origami. I also love a quick and easy Christmas project which means these simple DIY Christmas Stars are my new favourite thing to make!
They’re seriously easy to fold and make beautiful decorations. You can make them from origami paper, old magazines, scrapbook paper, gift wrap or whatever you happen to have lying around. Any thin paper that allows for accurate creases will work which makes them super cheap to make as well.
By changing up the paper size, colour and pattern you can create a truly unique decoration. A quick and fun holiday project that you can use to hang on a tree, string into a garland or adorn your presents.

Materials:
Paper (Origami Paper, Scrapbook Paper or Gift Wrap all work well),
Scissors
No fancy materials here. All you need is some paper and a pair of scissors to get started.
I even have some printable origami paper you can download and use for FREE. Simply download, print and cut into 7x7-inch squares.


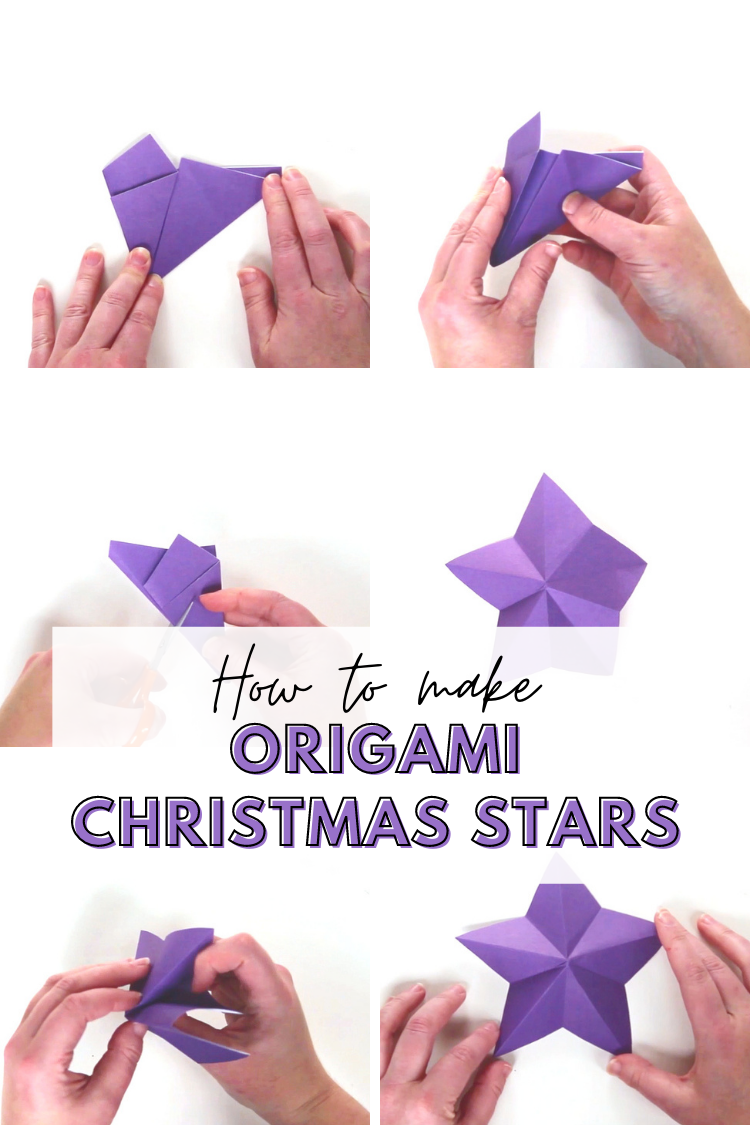
How to make Easy Origami Paper Stars.
Fold your paper in half with the coloured side on the outside.

2. Lay your paper flat with the folded side at the bottom.
3. Fold the bottom right corner up to the middle of the paper.
4. Unfold and fold the top right corner down to the bottom middle of the paper.
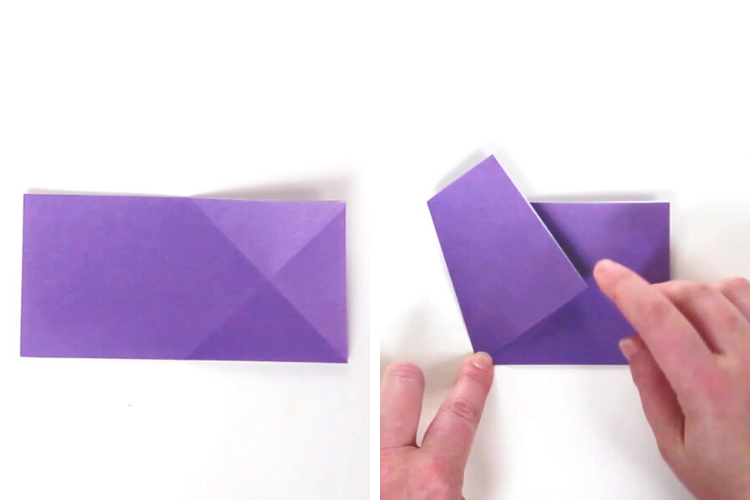
5. Open back out to reveal a cross on one half of your folded paper.
6. Take the bottom left corner and fold it in to meet the centre of the cross.

7. Take the same corner and fold it back on itself to meet the new outside edge from the previous step.
8. Fold the bottom right edge up to meet the inside edge of the crease you made in the previous step.

9. Fold backwards in half.
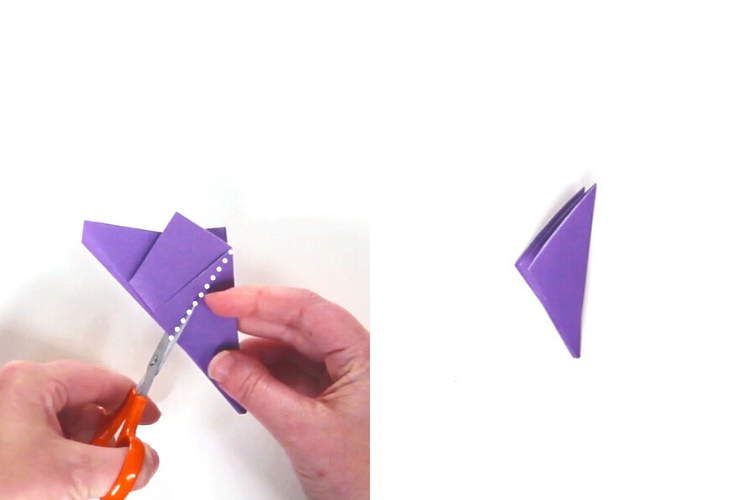
10. With the crease on the left-hand side, use a pair of scissors and cut across at an angle from just below the bottom crease on the right-hand side to the top of the left-hand crease (marked by the white dotted line above).
You’ll be left with a small folded paper triangle.
11. Open back out to reveal your paper star.
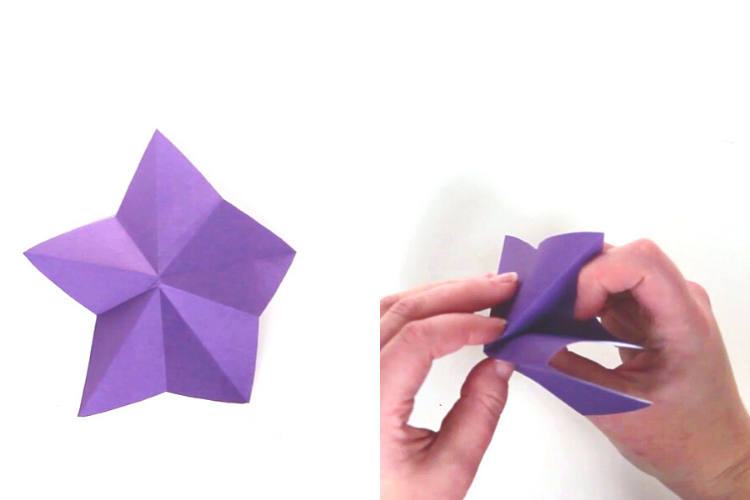
13. To make your star 3D make mountain folds along the points and valley folds in between each of the points.
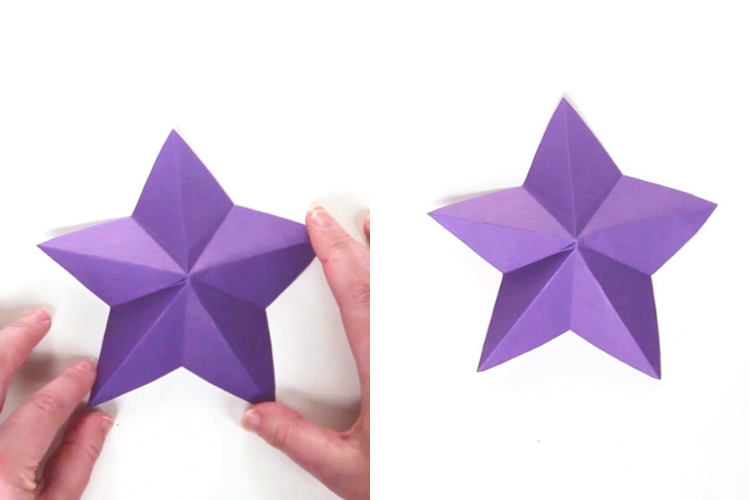
14. Open back out to finish.
Top Tip:
To make your star more pointy, refold and cut at a sharper angle.
Check out the video below to watch exactly how to make them:
How cute are these DIY Paper Stars? If you love these I think you’re really going to love my double-sided 3D Paper Stars.