
Origami Paper Vase
/Turn scrapbook paper into stunning geometric Origami Vases. Perfect for holding flowers or as stylish home decor.

This page contains affiliate links. This means that if you make a purchase after clicking a link I earn a small commission but it doesn’t cost you a penny extra!
DIY Origami Vases.
Are you ready to make some origami paper vase covers? They’re such a cute way to jazz up an old chipped vase or empty jar.
By slipping on one of these paper sleeves anything can be turned into a vase (mason jar, wineglass, empty tin can). They’re perfect for making both a quick centrepiece for an impromptu dinner party and a table setting for a wedding.
These ones are perfect for spring with their warm pinks and yellows. But change up the colours with some red and gold and you’ve got yourself a super cute Christmas table decoration.

Geometric Origami Vase Sleeves.
Origami accordion folding can be tricky but is also great fun when it all comes together to make these fantastic geometric shapes.
This technique can also be used to make paper decorations, lamp shades or tealight covers.
You can use copier paper, scrapbook paper, gift wrap or even wallpaper. I made these using a single sheet of 12x12 scrapbook paper.
If you want to make anything bigger you can easily glue two pieces together for a larger vase.

Supplies:
Scrapbook Paper,
A Bone Bolder or Ruler
Some glue,
Double Sided Tape or Fabric Tape,
And a jar or glass.

If you’re new to origami make sure to check out these 3 Basic Origami Folds For Beginners.
How to make Origami Vase Covers.
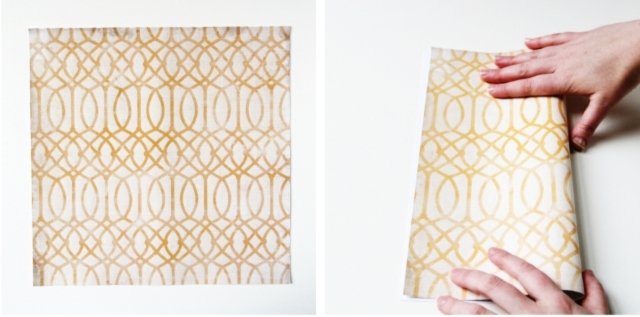
1. Take your paper and fold it in half. Press down and crease with your bone folder or ruler.
Make sure to flip your paper over and repeat with the ruler on the other side to give yourself a crisp, sharp fold.

2. Open your paper up and this time fold the edge of your paper into the middle to meet the new crease you just formed.

3. Repeat on the other side. When flat your paper should now be divided up into four even sections.

4. Now we're going to begin folding our paper into eight sections.
Lay your paper flat and fold the first of your four sections in half again by taking the edge of the paper and folding it to meet the first fold.
Don't forget to make sure you're still creasing both sides of each fold with your bone folder or ruler.

5. Open your paper out again.
Take the edge of your paper and fold it so the edge meets the last fold.
Your paper should now be folded in thirds.
When you open it out it should now have four sections on one side and two on the other.
6. Rotate your paper and repeat on the other side. Your paper should now be made up of eight sections.

7. We're now going to start making the diagonal folds. Take your first corner and fold it so the edge of the paper meets your first fold and forms a right-angled triangle.
8. Open your paper back out. This time take the same corner, miss out the second vertical fold and fold it to meet the third fold from the right.

Repeat missing out the fourth vertical fold and meeting the fifth, missing out the sixth and meeting the seventh.

9. You need to repeat this for all four corners of your square.

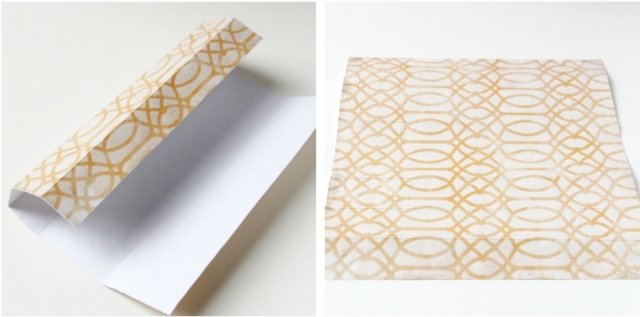
10. When you've done this the paper should look like the top right image.

11. Pick up your paper and gently curl it. The shape of your paper vase should start to form.
You may need to gently press in a few places as scrapbook paper is usually slightly thicker than normal paper and can be harder to fold.

12. I tried a few different ways to finish them off. You can see in the image above that on one I used fabric tape to stick the two edges together to form a spine.
On the pink one, I used double-sided sticky tape and overlapped the paper until the origami shape matched up. This made a thinner, more sturdier tube.
On the medium-sized vase pictured below, I used a few dots of glue and held it together with paperclips overnight until it had dried.

12. Slide your finished origami tube over a jar or glass and you're all done.
Once you've got the basic idea down you can try experimenting with the amount of folds to form different sizes.
I made the floral one above by making only four sections instead of eight.
Just remember when folding your triangles that you want them to be at right angles and you should be fine.


