Origami Paper Bow
/Learn how to make a cute Origami Bow with this step by step tutorial. No glue needed. A simple and easy way to decorate your gifts or cards.
This page contains some affiliate links. This means that if you make a purchase after clicking a link I earn a small commission but it doesn’t cost you a penny extra!
Origami Bow.
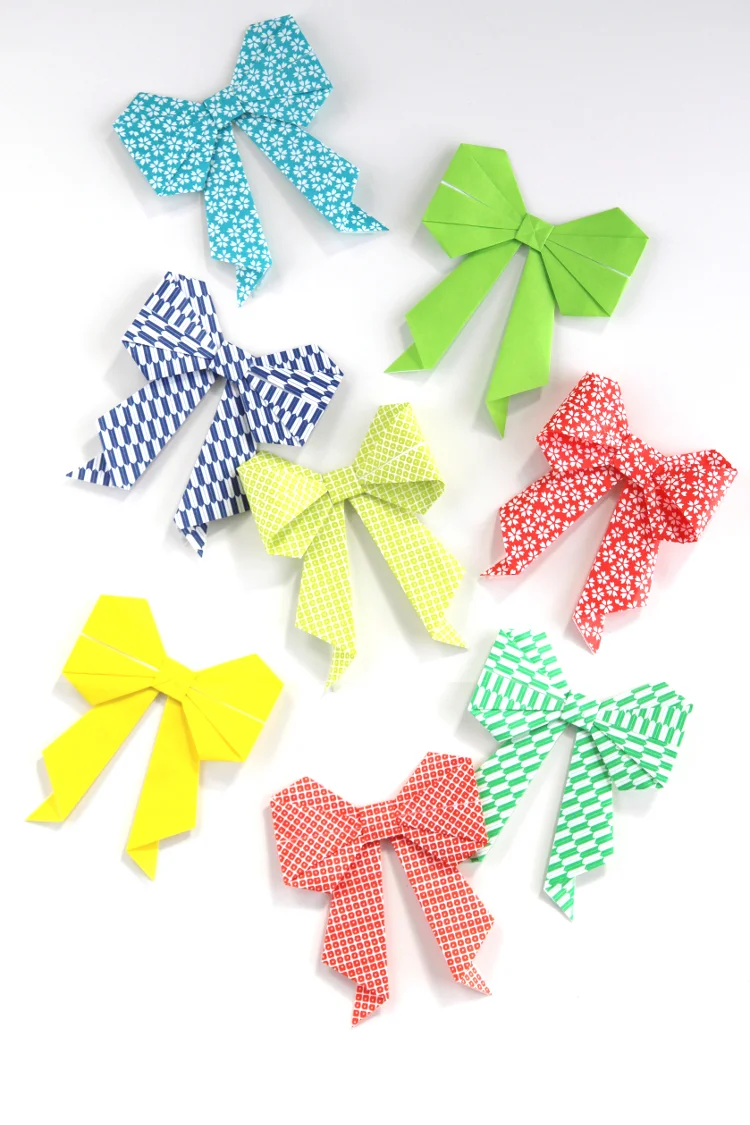
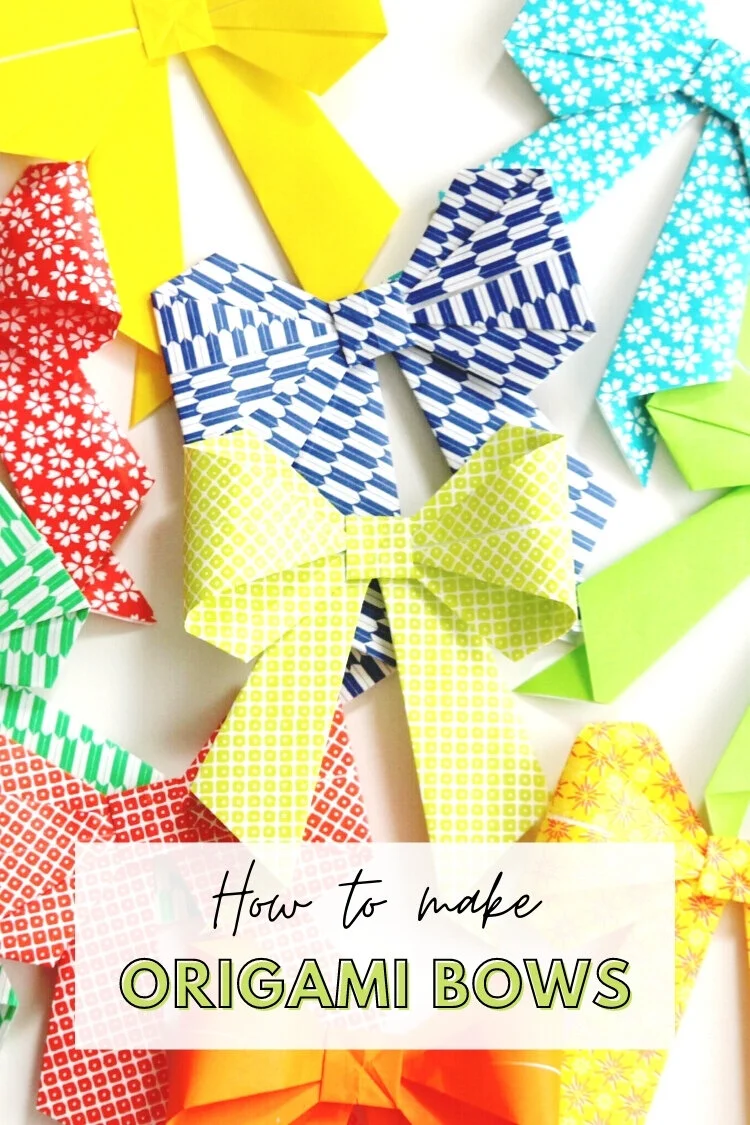
Want to know how to make a simple paper bow? Then these DIY origami bows are the answer. They’re a really cute little bow that you can use to decorate your DIY gift boxes. They make the perfect gift topper or garland.
There's no glue needed although you do need to make a couple of cuts with a pair of scissors. As they involve a couple of cuts this makes them technically kirigami, not origami, but don’t let that put you off. They’re not hard to make, I promise.
If you’re looking for an easier origami bow? Make sure to check out my Easy Origami Bow Ties.
There are so many different ways you could use these cute origami bows. Pop them on a card or gift box. They look fantastic against plain brown paper wrapping. Hang them on the tree as Christmas decorations or string them up as a garland. Whatever you decide to do with them I’m sure you’re going to love them.

Supplies:
Origami paper (I used the papers out of this book and paper set. This pack of 200 papers is also a good alternative if you’re just getting started),
And a pair of scissors.
*** Want to download and keep this tutorial? You can purchase a PDF of this tutorial here. This tutorial is also available in the Easy Origami Projects eBook which includes 20 beautiful origami crafts ***
Here are a few of my favourite origami papers:

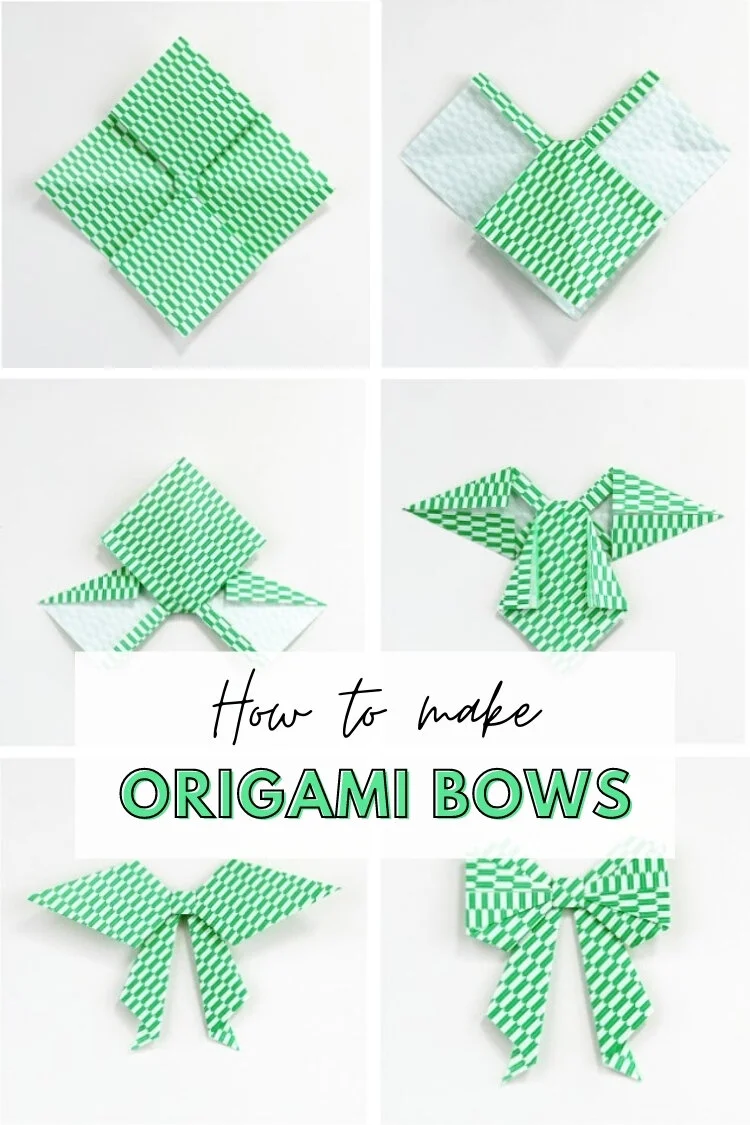
How to make Origami Paper Bows/Ribbon.
1. Start with your paper pattern side down.
Fold in half and crease well.
The pattern should be on the inside.

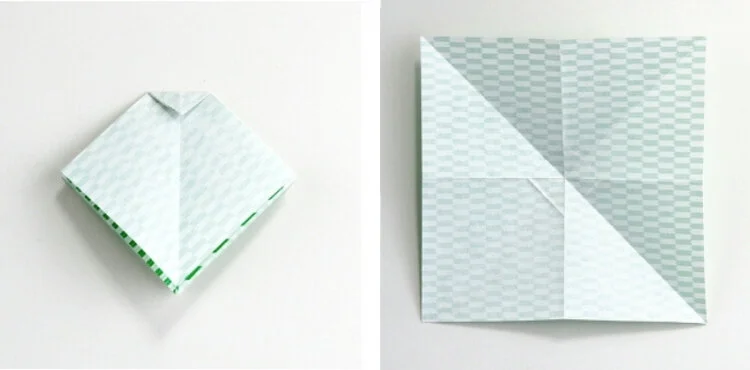
2. Fold in half again and crease.
3. Open your paper out and flip it over.
Fold it in half this time diagonally with the pattern on the outside.
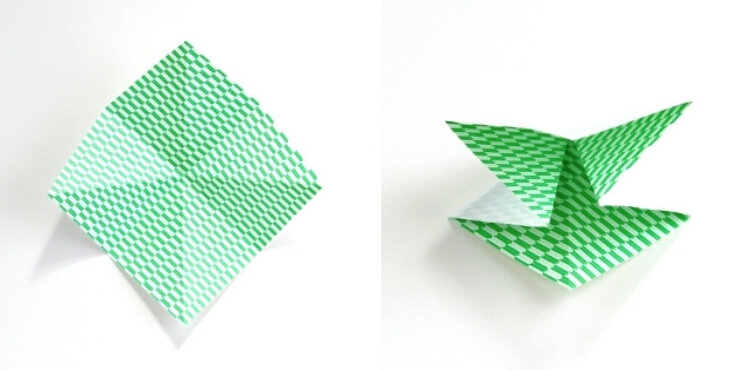
4. Open it out, turn it 90 degrees and fold in half again diagonally.
5. Open back out.
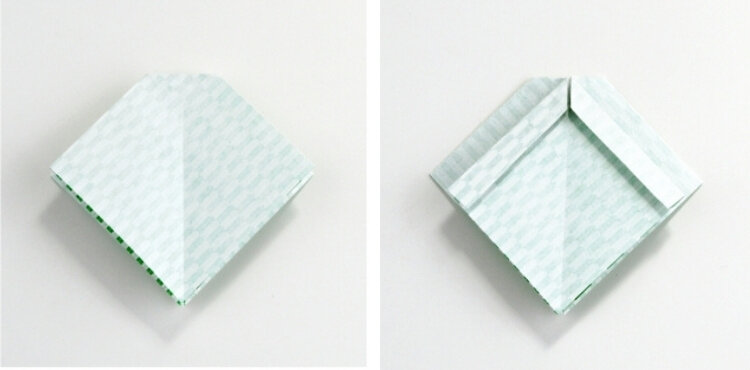
6. Collapse your paper along the folded lines pattern side in.
7. Press flat and fold the tip down 1 to 2 cm. Crease well.
8. Open your paper out. You should now have a small square in the centre of your paper.

9. Re-crease along the sides of the square to make mountain folds.

10. Fold the paper back in on itself, the square should collapse in as you fold.
11. Fold the top layer down to meet in the middle.
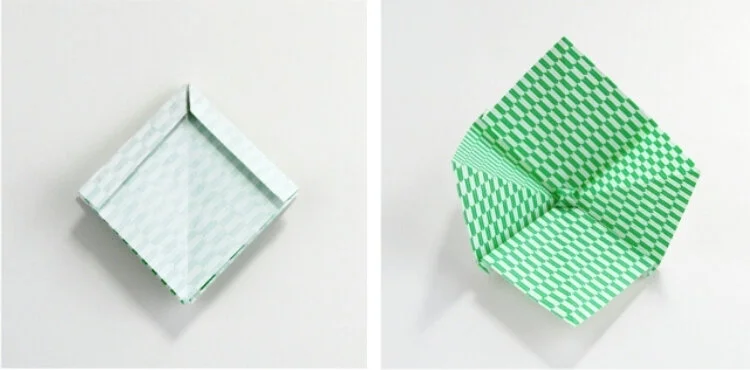
12. Flip your folded paper over and repeat on the other side.
13. Carefully open your paper back up. You should be able to see a square forming in the centre.

14. Press flat making sure all the folds stay in place.
15. Turn your paper over so the patterned side is down.
16. To begin making the bow shape you need to make 4 cuts along the folds (highlighted above) to make two flaps.

17. Fold the first flap down to reveal the top of the bow.
18. Fold down the top to form two triangles.
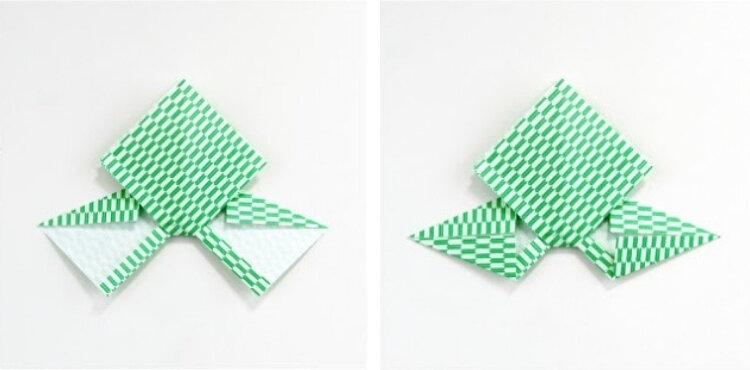
19. Fold both flaps up and repeat to form the bottom of the bow.
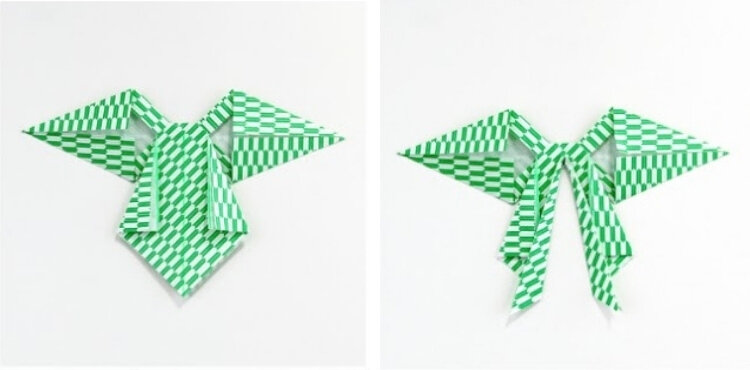
20. Fold both flaps back down to make the tails of the bow.
21. Fold the sides in before cutting up the centre of the tails.
22. Take the sides you've just cut and fold them in.
23. Flip the bow over.
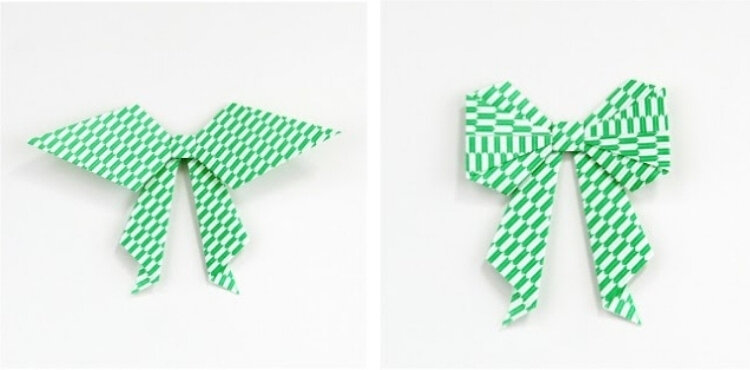
24. To finish the bow fold the tips into the centre and tuck them under the square.
25. Press flat or leave as it is for a 3D bow.
And don’t forget to check out my Origami Bow Ties for more origami bow goodness!