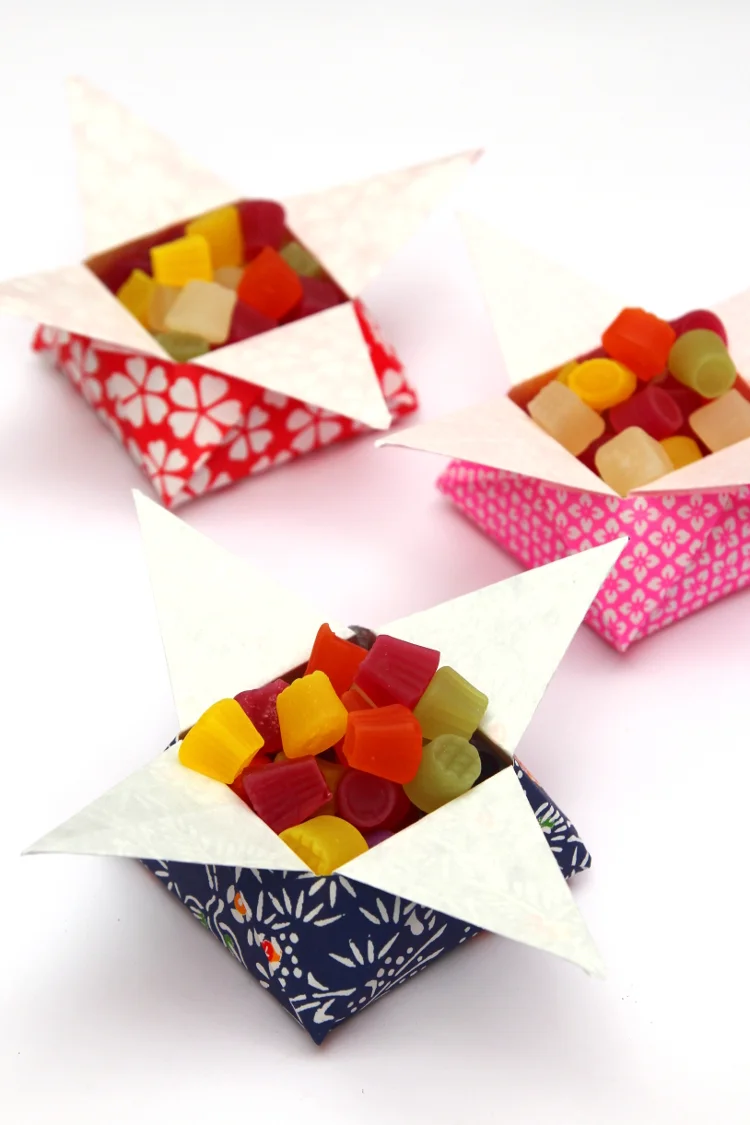
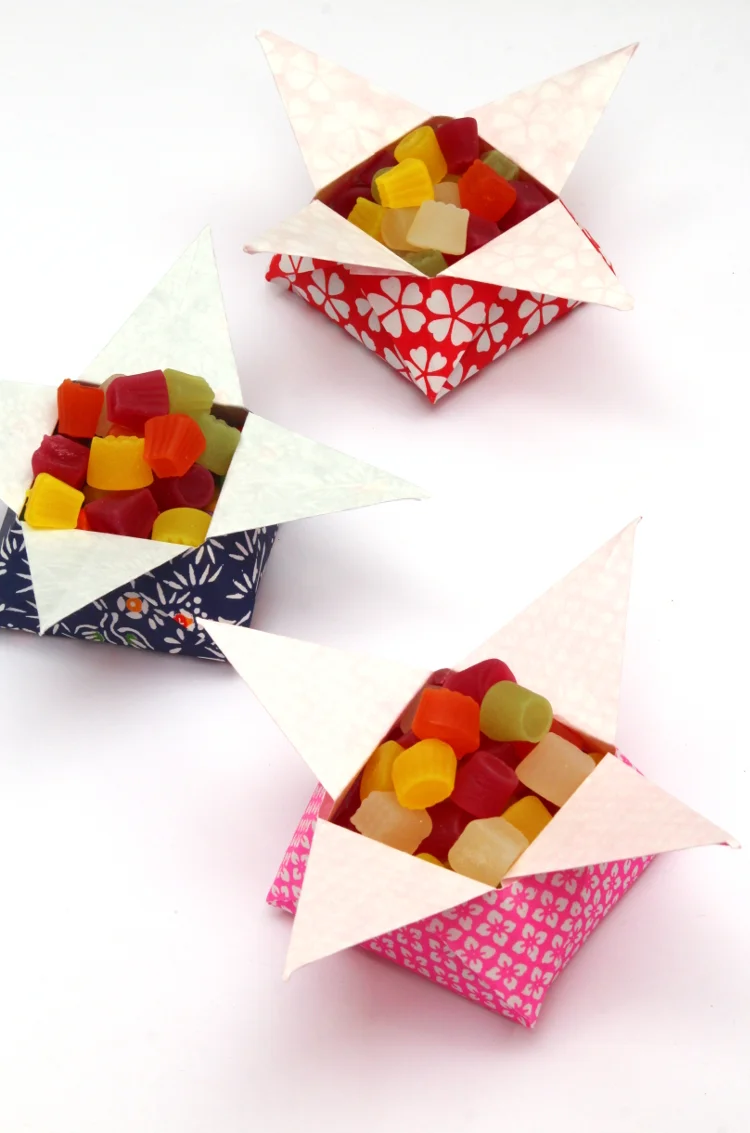
Origami Star Box For Candy Or Snacks
/Learn how to make these cute origami star-shaped boxes perfect for storing your favourite candies or snacks. They're easy to make, and oh-so-fun!
Fill them with homemade goodies or personalised treats, and watch your loved ones' faces light up with delight. Handmade with love, these boxes are sure to make any occasion extra special.

This page contains affiliate links. This means that if you make a purchase after clicking a link I earn a small commission but it doesn’t cost you a penny extra!
DIY Origami Candy Box.
Today I've got a super sweet and exciting project for you: origami star candy or snack boxes! These adorable little boxes are not only perfect for storing your favourite treats, but they also make fantastic gifts or party favours.
Now, I have to admit, I'm a huge fan of origami. There's just something magical about transforming a flat piece of paper into a three-dimensional masterpiece.
And when you combine that with the deliciousness of candy or snacks, well, it's a winning combination in my book!

Origami Star Box.
These origami star boxes are perfect for serving candy at parties, entertaining friends or even just a few snacks in front of the tv after a long day.
They're a fun little project that you can also be used to store paperclips, buttons, drawing pins or any other little bits and pieces you have lying around.
Plus, they're so easy to make, you'll be able to whip up a bunch of them in no time.

Supplies:
Origami Paper (I like this one for the colours and this one for the traditional origami paper patterns).
Your Hands,
And a little patience.
If you’re new to origami make sure to check out these 3 Basic Origami Folds For Beginners.

1. Take your paper and lay in pattern side down. Fold in half and open out to make a mountain fold. Rotate 90 degrees and fold in half again. Open out and lay flat.

2. Fold your paper in half along both diagonals this time with the pattern side up to create a valley fold.

3. With one of the corners pointing towards you collapse your paper down into a diamond shape. The paper should naturally fold into shape.
4. Fold the right side in to meet the center crease.

5. Take the right flap and open it out and press flat to form a triangle. This is called a squash fold.
6. Repeat on the left side.

7. Flip your paper over and repeat to make two more squash folds. Your paper should now look the same on both sides.

8. Now bring the right flap over to the left and open out your folded paper. Fold both sides in to meet at the center crease.

9. Flip back to the center and then open your origami this time to the right. Repeat and fold both sides into the center.
10. Now fold the bottom point up. Repeat on the other 3 sides.

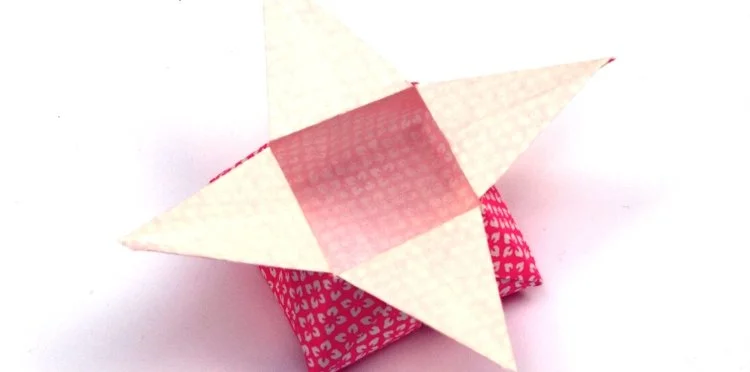
11. Make sure all 4 points are pointing down and use your fingers to gently open your origami box out. Once open press the bottom of your origami base flat.
Adjust the sides and corners as needed to achieve a star-like appearance.
12. Fill with your chosen snacks or sweets.
If you're throwing a party and don’t have any little bowls to match your theme I hope you're inspired to have a go at making your own. They really are so easy to make and a good one if you're a beginner to origami.